Brows are one of our most impactful features, they pull everything together, completing any makeup look and creating a frame for the rest of the face. Over the years, eyebrow styles have ranged from pencil-thin to bushy and bold, but as of late, it's the fuller, natural-looking brows that are still winning out. Here at bareMinerals, we're all about embracing the natural brow shape and texture while creating a polished, yet natural, look. Read on for a full eyebrow tutorial, with all my best tips and tricks for creating (and maintaining) your best brows ever.
Pluck & Shape
First of all, it's important to remember that nobody's brows are exactly symmetrical, so don't stress about 'perfect eyebrows' when comparing your two brows. Overall, when I consider how to shape eyebrows, I just use the brow bone as a guide; where it is raised should be the highest part of your brow and where the natural shape of the arch should lay. I prefer angled tweezers over pointed because they lay flat on your skin, making them easier to capture the hairs. To help avoid over-plucking, start by only cleaning up those extra hairs that grow below the brow. You can pluck above your eyebrow, but be careful and do so sparsely, as you may want to trim some of these hairs instead of plucking. To do this, brush brows up and outward to see the full shape, then trim minimally at first, using a pair of beauty scissors. Avoid cutting brow hairs too much, the idea is to leave hairs long enough to comb and brush, not to cut your brows into the shape you want.
Prep Your Brows
Filling your brows can help make them look fuller, denser and more shapely. But before filling your brows at all, comb through them to make sure there's no skincare or makeup residue. You can do this with a clean spoolie mascara wand with a little micellar water or makeup remover on it. Make sure the spoolie is damp and not soaked, then comb through and let the hairs dry before applying any brow products.
Find Your Brow Shade
When it comes to finding the right shade to fill your brows, aim for one that's close to your natural brow color, but if you're between shades, I recommend going a little lighter to avoid a harsh look. More often than not, your brow color will match your natural hair color, but if you color your hair (or even if it's natural) your hair color is typically more than one tone, so it's best to match your brows to your roots. As an example, if you have highlights, you can choose a brow pencil that is close to your natural hair color, then use a lighter color brow gel overtop to bring out your natural highlight.
Pick a Brow-Filling Format
Pencil
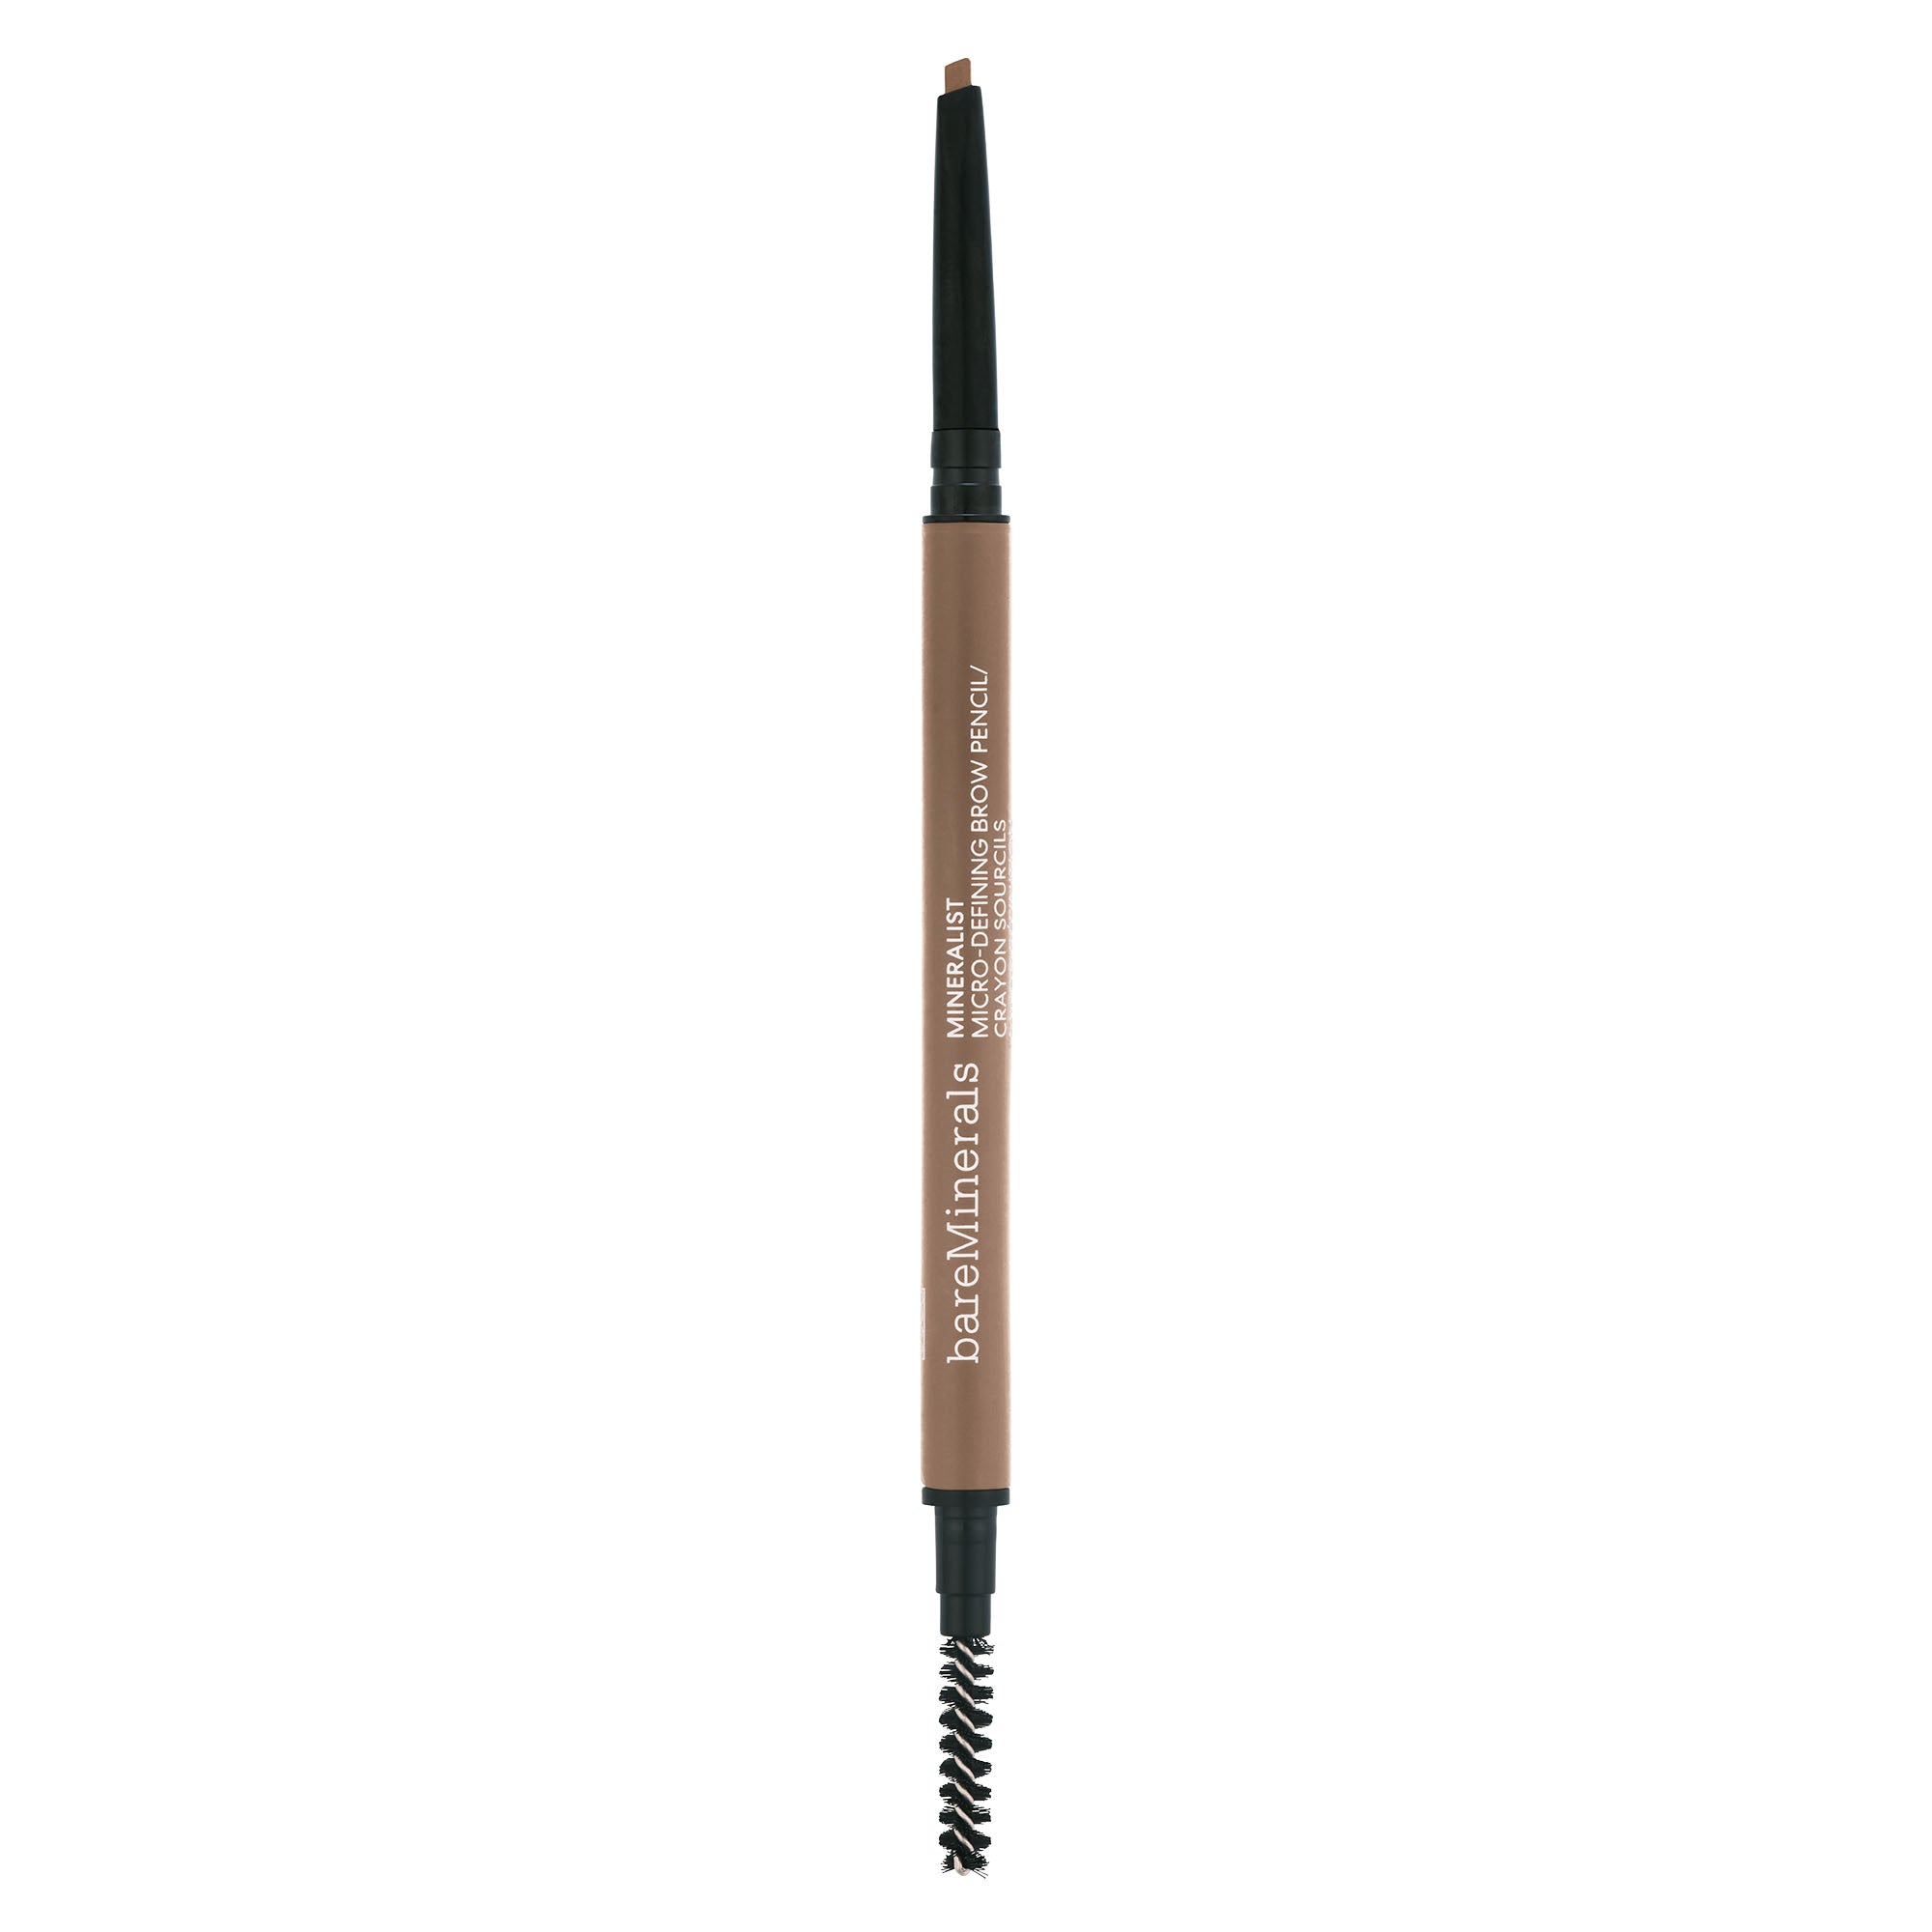
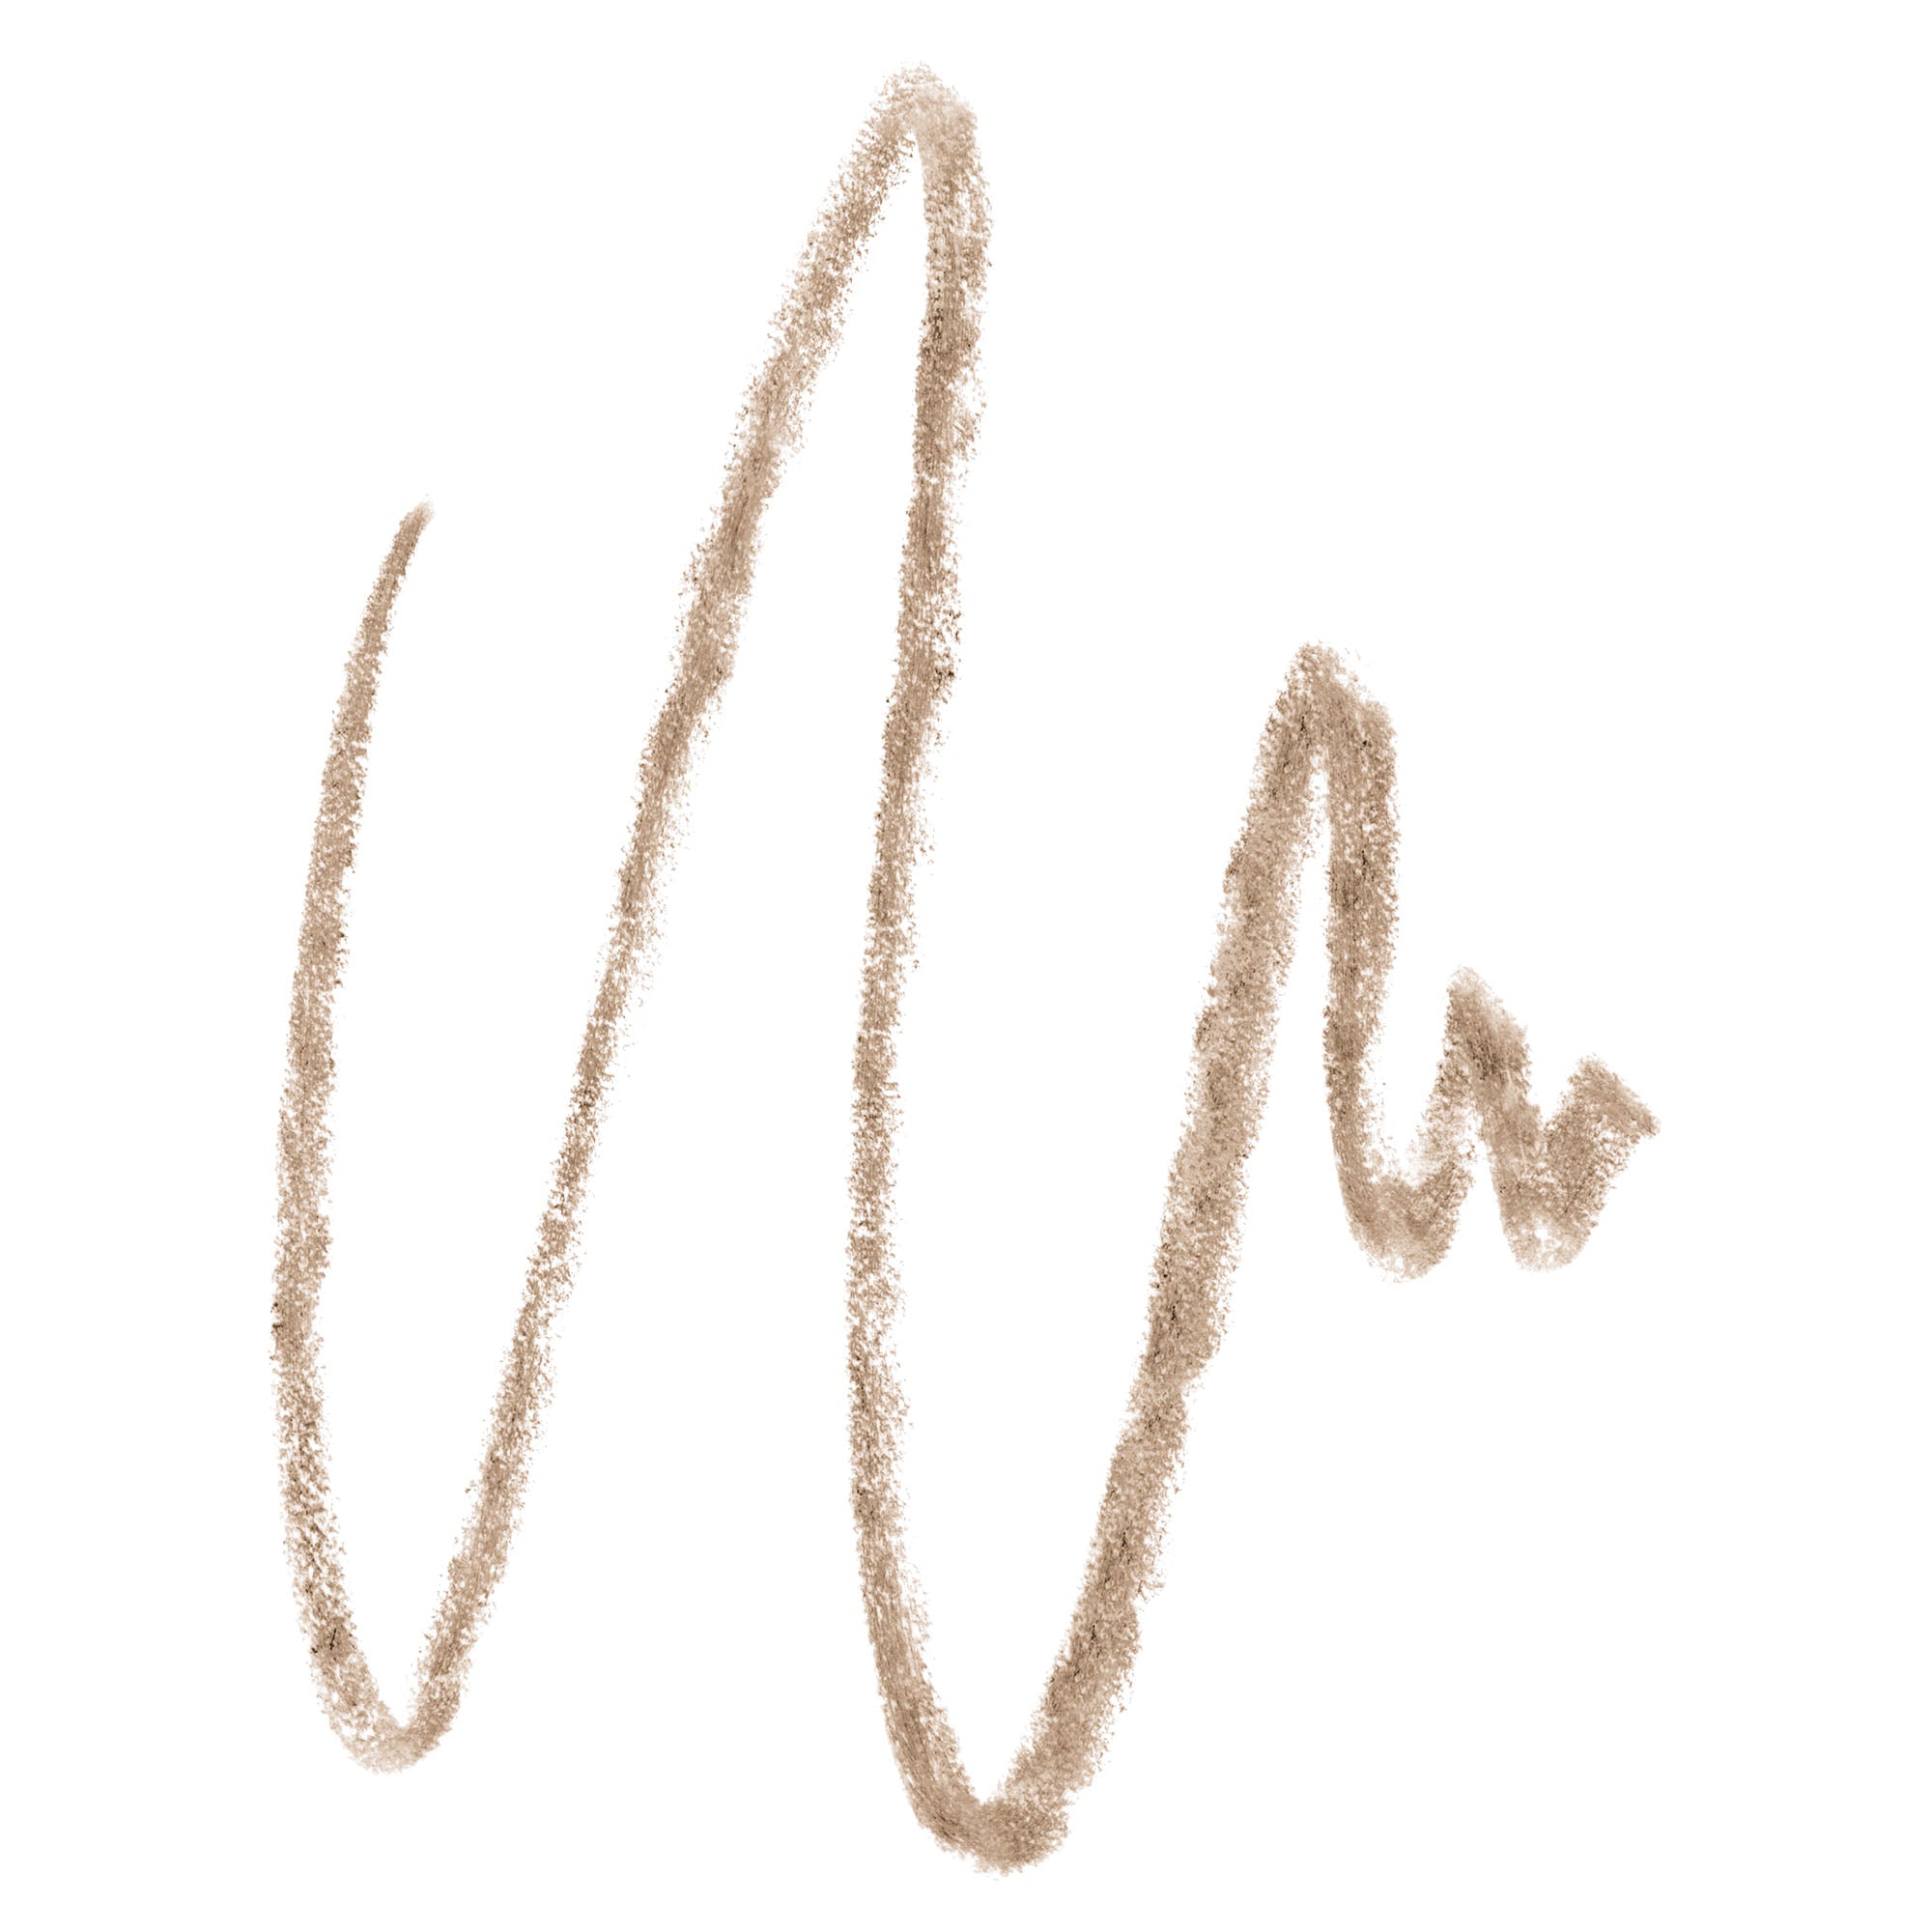
If you have sparse brows, I recommend using a pencil to help define your shape. I love the MINERALIST Micro-Defining Eyebrow Pencil because it gives you a natural fill, but you can easily build up to a full brow. It also goes on smooth, unlike some brow pencils which can require quite a bit of effort to deposit pigment. The micro-tip of this pencil allows you to control how thick or thin your strokes are. Plus, the spoolie at the end helps you distribute product; you can use the brush to carry the pigment through the brow if you've overly deposited in one place.
{"id":6938023100501,"title":"MINERALIST® Micro-Defining Eyebrow Pencil","handle":"mineralist-micro-defining-eyebrow-pencil","description":"\u003ch4 data-mce-fragment=\"1\"\u003eFree of:\u003c\/h4\u003e\n\u003cp data-mce-fragment=\"1\"\u003eCruelty Free, Vegan, Paraben Free, Gluten Free, Talc Free, Synthetic Fragrance Free, PEG Free, Tree Nut Free, SLS Free\u003c\/p\u003e\n\u003ch4 data-mce-fragment=\"1\"\u003eWhat it is:\u003c\/h4\u003e\n\u003cp data-mce-fragment=\"1\"\u003eA retractable micro-tip brow pencil that creates ultra-precise hair strokes to fill in gaps and nourish brow hairs.\u003c\/p\u003e\n\u003ch4 class=\"ewa-rteLine\" data-mce-fragment=\"1\"\u003eWhat it does:\u003c\/h4\u003e\n\u003cul data-mce-fragment=\"1\"\u003e\n\u003cli data-mce-fragment=\"1\"\u003eUnique micro-teardrop shape easily creates hairlike strokes with a smooth, precise application\u003c\/li\u003e\n\u003cli data-mce-fragment=\"1\"\u003eConditions and nourishes brow hairs, for naturally fuller brows over time\u003c\/li\u003e\n\u003cli data-mce-fragment=\"1\"\u003eArgan Oil and Panthenol condition and nourish brows \u003cbr\u003e\n\u003c\/li\u003e\n\u003c\/ul\u003e\n\u003ch4 data-mce-fragment=\"1\"\u003eConsumer tested:\u003c\/h4\u003e\n\u003cul data-mce-fragment=\"1\"\u003e\n\u003cli data-mce-fragment=\"1\"\u003e12-hour waterproof, smudge-proof, fuller brows*\u003cbr\u003e*Based on a consumer study of 30 people. \u003c\/li\u003e\n\u003c\/ul\u003e\n\u003ch4 data-mce-fragment=\"1\"\u003eWhy you'll love it:\u003c\/h4\u003e\n\u003cul data-mce-fragment=\"1\"\u003e\n\u003cli data-mce-fragment=\"1\"\u003eEffortlessly achieve naturally full and defined brows\u003c\/li\u003e\n\u003cli data-mce-fragment=\"1\"\u003eUnique micro-teardrop shape creates precise, hairlike strokes and a spoolie to blend and de-tangle brow hairs\u003c\/li\u003e\n\u003cli data-mce-fragment=\"1\"\u003eConditions and nourishes brow hairs, for naturally fuller brows over time\u003c\/li\u003e\n\u003cli data-mce-fragment=\"1\"\u003e12-hour smudge-proof, fade-proof, sweat-proof wear\u003c\/li\u003e\n\u003cli data-mce-fragment=\"1\"\u003eDermatologist-tested\u003c\/li\u003e\n\u003cli data-mce-fragment=\"1\"\u003eCruelty-free\u003c\/li\u003e\n\u003cli data-mce-fragment=\"1\"\u003eVegan\u003c\/li\u003e\n\u003cli data-mce-fragment=\"1\"\u003eClean — talc-free + free of gluten, synthetic fragrance, PEGs and more\u003c\/li\u003e\n\u003cli data-mce-fragment=\"1\"\u003eAt bareMinerals, we have restricted over 2,500 ingredients, including the 1,400+ banned in the E.U.\u003c\/li\u003e\n\u003c\/ul\u003e","published_at":"2023-10-04T10:26:40-04:00","created_at":"2023-06-28T13:58:51-04:00","vendor":"Bare Minerals","type":"Eyebrow","tags":["All Makeup","Amazon","Brow","Duel","Eye","Full Size Makeup GSK","Full Size Product","Makeup","Not Holiday","Ordergroove","Subscription","Valentine's Day"],"price":2300,"price_min":2300,"price_max":2300,"available":true,"price_varies":false,"compare_at_price":null,"compare_at_price_min":0,"compare_at_price_max":0,"compare_at_price_varies":false,"variants":[{"id":40644075192405,"title":"Taupe","option1":"Taupe","option2":null,"option3":null,"sku":"41704248101","requires_shipping":true,"taxable":true,"featured_image":{"id":30570291953749,"product_id":6938023100501,"position":9,"created_at":"2023-07-05T10:13:18-04:00","updated_at":"2024-12-26T07:14:25-05:00","alt":"Taupe","width":2000,"height":2000,"src":"\/\/www.bareminerals.com\/cdn\/shop\/files\/BM_SU23_MMBP_Taupe_OPEN_2000x2000_R300.jpg?v=1735215265","variant_ids":[40644075192405]},"available":true,"name":"MINERALIST® Micro-Defining Eyebrow Pencil - Taupe","public_title":"Taupe","options":["Taupe"],"price":2300,"weight":0,"compare_at_price":null,"inventory_management":"shopify","barcode":"194248059644","featured_media":{"alt":"Taupe","id":22897115267157,"position":9,"preview_image":{"aspect_ratio":1.0,"height":2000,"width":2000,"src":"\/\/www.bareminerals.com\/cdn\/shop\/files\/BM_SU23_MMBP_Taupe_OPEN_2000x2000_R300.jpg?v=1735215265"}},"requires_selling_plan":false,"selling_plan_allocations":[{"price_adjustments":[{"position":1,"price":2070}],"price":2070,"compare_at_price":2300,"per_delivery_price":2070,"selling_plan_id":5036572757,"selling_plan_group_id":"bc6478a662ffae32b3be35b3fe566fa707984433"},{"price_adjustments":[{"position":1,"price":2070}],"price":2070,"compare_at_price":2300,"per_delivery_price":2070,"selling_plan_id":5042864213,"selling_plan_group_id":"bc6478a662ffae32b3be35b3fe566fa707984433"},{"price_adjustments":[{"position":1,"price":2070}],"price":2070,"compare_at_price":2300,"per_delivery_price":2070,"selling_plan_id":5042896981,"selling_plan_group_id":"bc6478a662ffae32b3be35b3fe566fa707984433"},{"price_adjustments":[{"position":1,"price":2070}],"price":2070,"compare_at_price":2300,"per_delivery_price":2070,"selling_plan_id":5042929749,"selling_plan_group_id":"bc6478a662ffae32b3be35b3fe566fa707984433"},{"price_adjustments":[{"position":1,"price":2070}],"price":2070,"compare_at_price":2300,"per_delivery_price":2070,"selling_plan_id":5042962517,"selling_plan_group_id":"bc6478a662ffae32b3be35b3fe566fa707984433"},{"price_adjustments":[{"position":1,"price":2070}],"price":2070,"compare_at_price":2300,"per_delivery_price":2070,"selling_plan_id":5042995285,"selling_plan_group_id":"bc6478a662ffae32b3be35b3fe566fa707984433"}],"quantity_rule":{"min":1,"max":null,"increment":1}},{"id":40644075225173,"title":"Light Brunette","option1":"Light Brunette","option2":null,"option3":null,"sku":"41704250101","requires_shipping":true,"taxable":true,"featured_image":{"id":30570291822677,"product_id":6938023100501,"position":18,"created_at":"2023-07-05T10:13:18-04:00","updated_at":"2024-12-26T07:14:26-05:00","alt":"Light Brunette","width":2000,"height":2000,"src":"\/\/www.bareminerals.com\/cdn\/shop\/files\/BM_SU23_MMBP_LightBrunette_CLOSED_2000x2000_R300.jpg?v=1735215266","variant_ids":[40644075225173]},"available":true,"name":"MINERALIST® Micro-Defining Eyebrow Pencil - Light Brunette","public_title":"Light Brunette","options":["Light Brunette"],"price":2300,"weight":0,"compare_at_price":null,"inventory_management":"shopify","barcode":"194248059668","featured_media":{"alt":"Light Brunette","id":22897115037781,"position":18,"preview_image":{"aspect_ratio":1.0,"height":2000,"width":2000,"src":"\/\/www.bareminerals.com\/cdn\/shop\/files\/BM_SU23_MMBP_LightBrunette_CLOSED_2000x2000_R300.jpg?v=1735215266"}},"requires_selling_plan":false,"selling_plan_allocations":[{"price_adjustments":[{"position":1,"price":2070}],"price":2070,"compare_at_price":2300,"per_delivery_price":2070,"selling_plan_id":5036572757,"selling_plan_group_id":"bc6478a662ffae32b3be35b3fe566fa707984433"},{"price_adjustments":[{"position":1,"price":2070}],"price":2070,"compare_at_price":2300,"per_delivery_price":2070,"selling_plan_id":5042864213,"selling_plan_group_id":"bc6478a662ffae32b3be35b3fe566fa707984433"},{"price_adjustments":[{"position":1,"price":2070}],"price":2070,"compare_at_price":2300,"per_delivery_price":2070,"selling_plan_id":5042896981,"selling_plan_group_id":"bc6478a662ffae32b3be35b3fe566fa707984433"},{"price_adjustments":[{"position":1,"price":2070}],"price":2070,"compare_at_price":2300,"per_delivery_price":2070,"selling_plan_id":5042929749,"selling_plan_group_id":"bc6478a662ffae32b3be35b3fe566fa707984433"},{"price_adjustments":[{"position":1,"price":2070}],"price":2070,"compare_at_price":2300,"per_delivery_price":2070,"selling_plan_id":5042962517,"selling_plan_group_id":"bc6478a662ffae32b3be35b3fe566fa707984433"},{"price_adjustments":[{"position":1,"price":2070}],"price":2070,"compare_at_price":2300,"per_delivery_price":2070,"selling_plan_id":5042995285,"selling_plan_group_id":"bc6478a662ffae32b3be35b3fe566fa707984433"}],"quantity_rule":{"min":1,"max":null,"increment":1}},{"id":40644075257941,"title":"Chestnut","option1":"Chestnut","option2":null,"option3":null,"sku":"41704252101","requires_shipping":true,"taxable":true,"featured_image":{"id":30570291429461,"product_id":6938023100501,"position":17,"created_at":"2023-07-05T10:13:18-04:00","updated_at":"2024-12-26T07:14:26-05:00","alt":"Chestnut","width":2000,"height":2000,"src":"\/\/www.bareminerals.com\/cdn\/shop\/files\/BM_SU23_MMBP_Chestnut_CLOSED_2000x2000_R300.jpg?v=1735215266","variant_ids":[40644075257941]},"available":true,"name":"MINERALIST® Micro-Defining Eyebrow Pencil - Chestnut","public_title":"Chestnut","options":["Chestnut"],"price":2300,"weight":0,"compare_at_price":null,"inventory_management":"shopify","barcode":"194248059682","featured_media":{"alt":"Chestnut","id":22897114841173,"position":17,"preview_image":{"aspect_ratio":1.0,"height":2000,"width":2000,"src":"\/\/www.bareminerals.com\/cdn\/shop\/files\/BM_SU23_MMBP_Chestnut_CLOSED_2000x2000_R300.jpg?v=1735215266"}},"requires_selling_plan":false,"selling_plan_allocations":[{"price_adjustments":[{"position":1,"price":2070}],"price":2070,"compare_at_price":2300,"per_delivery_price":2070,"selling_plan_id":5036572757,"selling_plan_group_id":"bc6478a662ffae32b3be35b3fe566fa707984433"},{"price_adjustments":[{"position":1,"price":2070}],"price":2070,"compare_at_price":2300,"per_delivery_price":2070,"selling_plan_id":5042864213,"selling_plan_group_id":"bc6478a662ffae32b3be35b3fe566fa707984433"},{"price_adjustments":[{"position":1,"price":2070}],"price":2070,"compare_at_price":2300,"per_delivery_price":2070,"selling_plan_id":5042896981,"selling_plan_group_id":"bc6478a662ffae32b3be35b3fe566fa707984433"},{"price_adjustments":[{"position":1,"price":2070}],"price":2070,"compare_at_price":2300,"per_delivery_price":2070,"selling_plan_id":5042929749,"selling_plan_group_id":"bc6478a662ffae32b3be35b3fe566fa707984433"},{"price_adjustments":[{"position":1,"price":2070}],"price":2070,"compare_at_price":2300,"per_delivery_price":2070,"selling_plan_id":5042962517,"selling_plan_group_id":"bc6478a662ffae32b3be35b3fe566fa707984433"},{"price_adjustments":[{"position":1,"price":2070}],"price":2070,"compare_at_price":2300,"per_delivery_price":2070,"selling_plan_id":5042995285,"selling_plan_group_id":"bc6478a662ffae32b3be35b3fe566fa707984433"}],"quantity_rule":{"min":1,"max":null,"increment":1}},{"id":40644075290709,"title":"Coffee","option1":"Coffee","option2":null,"option3":null,"sku":"41704254101","requires_shipping":true,"taxable":true,"featured_image":{"id":30570291462229,"product_id":6938023100501,"position":16,"created_at":"2023-07-05T10:13:18-04:00","updated_at":"2024-12-26T07:14:26-05:00","alt":"Coffee","width":2000,"height":2000,"src":"\/\/www.bareminerals.com\/cdn\/shop\/files\/BM_SU23_MMBP_Coffee_CLOSED_2000x2000_R300.jpg?v=1735215266","variant_ids":[40644075290709]},"available":true,"name":"MINERALIST® Micro-Defining Eyebrow Pencil - Coffee","public_title":"Coffee","options":["Coffee"],"price":2300,"weight":0,"compare_at_price":null,"inventory_management":"shopify","barcode":"194248059705","featured_media":{"alt":"Coffee","id":22897114939477,"position":16,"preview_image":{"aspect_ratio":1.0,"height":2000,"width":2000,"src":"\/\/www.bareminerals.com\/cdn\/shop\/files\/BM_SU23_MMBP_Coffee_CLOSED_2000x2000_R300.jpg?v=1735215266"}},"requires_selling_plan":false,"selling_plan_allocations":[{"price_adjustments":[{"position":1,"price":2070}],"price":2070,"compare_at_price":2300,"per_delivery_price":2070,"selling_plan_id":5036572757,"selling_plan_group_id":"bc6478a662ffae32b3be35b3fe566fa707984433"},{"price_adjustments":[{"position":1,"price":2070}],"price":2070,"compare_at_price":2300,"per_delivery_price":2070,"selling_plan_id":5042864213,"selling_plan_group_id":"bc6478a662ffae32b3be35b3fe566fa707984433"},{"price_adjustments":[{"position":1,"price":2070}],"price":2070,"compare_at_price":2300,"per_delivery_price":2070,"selling_plan_id":5042896981,"selling_plan_group_id":"bc6478a662ffae32b3be35b3fe566fa707984433"},{"price_adjustments":[{"position":1,"price":2070}],"price":2070,"compare_at_price":2300,"per_delivery_price":2070,"selling_plan_id":5042929749,"selling_plan_group_id":"bc6478a662ffae32b3be35b3fe566fa707984433"},{"price_adjustments":[{"position":1,"price":2070}],"price":2070,"compare_at_price":2300,"per_delivery_price":2070,"selling_plan_id":5042962517,"selling_plan_group_id":"bc6478a662ffae32b3be35b3fe566fa707984433"},{"price_adjustments":[{"position":1,"price":2070}],"price":2070,"compare_at_price":2300,"per_delivery_price":2070,"selling_plan_id":5042995285,"selling_plan_group_id":"bc6478a662ffae32b3be35b3fe566fa707984433"}],"quantity_rule":{"min":1,"max":null,"increment":1}},{"id":40644075323477,"title":"Rich Black","option1":"Rich Black","option2":null,"option3":null,"sku":"41704256101","requires_shipping":true,"taxable":true,"featured_image":{"id":30570291331157,"product_id":6938023100501,"position":7,"created_at":"2023-07-05T10:13:18-04:00","updated_at":"2024-12-26T07:14:25-05:00","alt":"Rich Black","width":2000,"height":2000,"src":"\/\/www.bareminerals.com\/cdn\/shop\/files\/BM_SU23_MMBP_RichBlack_OPEN_2000x2000_R300.jpg?v=1735215265","variant_ids":[40644075323477]},"available":true,"name":"MINERALIST® Micro-Defining Eyebrow Pencil - Rich Black","public_title":"Rich Black","options":["Rich Black"],"price":2300,"weight":0,"compare_at_price":null,"inventory_management":"shopify","barcode":"194248059729","featured_media":{"alt":"Rich Black","id":22897115168853,"position":7,"preview_image":{"aspect_ratio":1.0,"height":2000,"width":2000,"src":"\/\/www.bareminerals.com\/cdn\/shop\/files\/BM_SU23_MMBP_RichBlack_OPEN_2000x2000_R300.jpg?v=1735215265"}},"requires_selling_plan":false,"selling_plan_allocations":[{"price_adjustments":[{"position":1,"price":2070}],"price":2070,"compare_at_price":2300,"per_delivery_price":2070,"selling_plan_id":5036572757,"selling_plan_group_id":"bc6478a662ffae32b3be35b3fe566fa707984433"},{"price_adjustments":[{"position":1,"price":2070}],"price":2070,"compare_at_price":2300,"per_delivery_price":2070,"selling_plan_id":5042864213,"selling_plan_group_id":"bc6478a662ffae32b3be35b3fe566fa707984433"},{"price_adjustments":[{"position":1,"price":2070}],"price":2070,"compare_at_price":2300,"per_delivery_price":2070,"selling_plan_id":5042896981,"selling_plan_group_id":"bc6478a662ffae32b3be35b3fe566fa707984433"},{"price_adjustments":[{"position":1,"price":2070}],"price":2070,"compare_at_price":2300,"per_delivery_price":2070,"selling_plan_id":5042929749,"selling_plan_group_id":"bc6478a662ffae32b3be35b3fe566fa707984433"},{"price_adjustments":[{"position":1,"price":2070}],"price":2070,"compare_at_price":2300,"per_delivery_price":2070,"selling_plan_id":5042962517,"selling_plan_group_id":"bc6478a662ffae32b3be35b3fe566fa707984433"},{"price_adjustments":[{"position":1,"price":2070}],"price":2070,"compare_at_price":2300,"per_delivery_price":2070,"selling_plan_id":5042995285,"selling_plan_group_id":"bc6478a662ffae32b3be35b3fe566fa707984433"}],"quantity_rule":{"min":1,"max":null,"increment":1}}],"images":["\/\/www.bareminerals.com\/cdn\/shop\/files\/BM_SU23_MMBP_Chestnut_OPEN_2000x2000_R300.jpg?v=1735215264","\/\/www.bareminerals.com\/cdn\/shop\/files\/BM_SU23_MMBP_Chestnut_TX_2000x2000_R300.jpg?v=1735215265","\/\/www.bareminerals.com\/cdn\/shop\/files\/BM_SU23_MMBP_Coffee_OPEN_2000x2000_R300.jpg?v=1735215265","\/\/www.bareminerals.com\/cdn\/shop\/files\/BM_SU23_MMBP_Coffee_TX_2000x2000_R300.jpg?v=1735215265","\/\/www.bareminerals.com\/cdn\/shop\/files\/BM_SU23_MMBP_LightBrunette_OPEN_2000x2000_R300.jpg?v=1735215265","\/\/www.bareminerals.com\/cdn\/shop\/files\/BM_SU23_MMBP_LightBrunette_TX_2000x2000_R300.jpg?v=1735215265","\/\/www.bareminerals.com\/cdn\/shop\/files\/BM_SU23_MMBP_RichBlack_OPEN_2000x2000_R300.jpg?v=1735215265","\/\/www.bareminerals.com\/cdn\/shop\/files\/BM_SU23_MMBP_RichBlack_TX_2000x2000_R300.jpg?v=1735215265","\/\/www.bareminerals.com\/cdn\/shop\/files\/BM_SU23_MMBP_Taupe_OPEN_2000x2000_R300.jpg?v=1735215265","\/\/www.bareminerals.com\/cdn\/shop\/files\/BM_SU23_MMBP_Taupe_TX_2000x2000_R300.jpg?v=1735215265","\/\/www.bareminerals.com\/cdn\/shop\/files\/BM_SP23_Mineralist_Brow_Pencil_ArmSwatch_ShadeNames_2000X2000_d920eace-52c7-4233-ae4e-c326d9354a36.jpg?v=1735215265","\/\/www.bareminerals.com\/cdn\/shop\/files\/BM_SP23_MineralistBrow_Model_2000x2000_R300_44fa093b-1be8-4de0-8837-8a6bf000a842.jpg?v=1735215265","\/\/www.bareminerals.com\/cdn\/shop\/files\/BM_SU23_MINERALIST_MICRO_BROW_PDP_Ingredient_Infographics_3000X3000_319eb3c6-1e3c-4136-909e-93df091c4ccf.png?v=1735215266","\/\/www.bareminerals.com\/cdn\/shop\/files\/BM_SU23_MINERALIST_MICRO_BROW_PDP_Infographics_3000X3000_96bf97b2-6734-434d-b2e5-7b95f386ebbc.png?v=1735215266","\/\/www.bareminerals.com\/cdn\/shop\/files\/BM_SU23_MMBP_Taupe_CLOSED_2000x2000_R300.jpg?v=1735215266","\/\/www.bareminerals.com\/cdn\/shop\/files\/BM_SU23_MMBP_Coffee_CLOSED_2000x2000_R300.jpg?v=1735215266","\/\/www.bareminerals.com\/cdn\/shop\/files\/BM_SU23_MMBP_Chestnut_CLOSED_2000x2000_R300.jpg?v=1735215266","\/\/www.bareminerals.com\/cdn\/shop\/files\/BM_SU23_MMBP_LightBrunette_CLOSED_2000x2000_R300.jpg?v=1735215266","\/\/www.bareminerals.com\/cdn\/shop\/files\/BM_SU23_MMBP_RichBlack_CLOSED_2000x2000_R300.jpg?v=1735215266"],"featured_image":"\/\/www.bareminerals.com\/cdn\/shop\/files\/BM_SU23_MMBP_Chestnut_OPEN_2000x2000_R300.jpg?v=1735215264","options":["Color"],"media":[{"alt":"Chestnut","id":22897114873941,"position":1,"preview_image":{"aspect_ratio":1.0,"height":2000,"width":2000,"src":"\/\/www.bareminerals.com\/cdn\/shop\/files\/BM_SU23_MMBP_Chestnut_OPEN_2000x2000_R300.jpg?v=1735215264"},"aspect_ratio":1.0,"height":2000,"media_type":"image","src":"\/\/www.bareminerals.com\/cdn\/shop\/files\/BM_SU23_MMBP_Chestnut_OPEN_2000x2000_R300.jpg?v=1735215264","width":2000},{"alt":"Chestnut","id":22897114906709,"position":2,"preview_image":{"aspect_ratio":1.0,"height":2000,"width":2000,"src":"\/\/www.bareminerals.com\/cdn\/shop\/files\/BM_SU23_MMBP_Chestnut_TX_2000x2000_R300.jpg?v=1735215265"},"aspect_ratio":1.0,"height":2000,"media_type":"image","src":"\/\/www.bareminerals.com\/cdn\/shop\/files\/BM_SU23_MMBP_Chestnut_TX_2000x2000_R300.jpg?v=1735215265","width":2000},{"alt":"Coffee","id":22897114972245,"position":3,"preview_image":{"aspect_ratio":1.0,"height":2000,"width":2000,"src":"\/\/www.bareminerals.com\/cdn\/shop\/files\/BM_SU23_MMBP_Coffee_OPEN_2000x2000_R300.jpg?v=1735215265"},"aspect_ratio":1.0,"height":2000,"media_type":"image","src":"\/\/www.bareminerals.com\/cdn\/shop\/files\/BM_SU23_MMBP_Coffee_OPEN_2000x2000_R300.jpg?v=1735215265","width":2000},{"alt":"Coffee","id":22897115005013,"position":4,"preview_image":{"aspect_ratio":1.0,"height":2000,"width":2000,"src":"\/\/www.bareminerals.com\/cdn\/shop\/files\/BM_SU23_MMBP_Coffee_TX_2000x2000_R300.jpg?v=1735215265"},"aspect_ratio":1.0,"height":2000,"media_type":"image","src":"\/\/www.bareminerals.com\/cdn\/shop\/files\/BM_SU23_MMBP_Coffee_TX_2000x2000_R300.jpg?v=1735215265","width":2000},{"alt":"Light Brunette","id":22897115070549,"position":5,"preview_image":{"aspect_ratio":1.0,"height":2000,"width":2000,"src":"\/\/www.bareminerals.com\/cdn\/shop\/files\/BM_SU23_MMBP_LightBrunette_OPEN_2000x2000_R300.jpg?v=1735215265"},"aspect_ratio":1.0,"height":2000,"media_type":"image","src":"\/\/www.bareminerals.com\/cdn\/shop\/files\/BM_SU23_MMBP_LightBrunette_OPEN_2000x2000_R300.jpg?v=1735215265","width":2000},{"alt":"Light Brunette","id":22897115103317,"position":6,"preview_image":{"aspect_ratio":1.0,"height":2000,"width":2000,"src":"\/\/www.bareminerals.com\/cdn\/shop\/files\/BM_SU23_MMBP_LightBrunette_TX_2000x2000_R300.jpg?v=1735215265"},"aspect_ratio":1.0,"height":2000,"media_type":"image","src":"\/\/www.bareminerals.com\/cdn\/shop\/files\/BM_SU23_MMBP_LightBrunette_TX_2000x2000_R300.jpg?v=1735215265","width":2000},{"alt":"Rich Black","id":22897115168853,"position":7,"preview_image":{"aspect_ratio":1.0,"height":2000,"width":2000,"src":"\/\/www.bareminerals.com\/cdn\/shop\/files\/BM_SU23_MMBP_RichBlack_OPEN_2000x2000_R300.jpg?v=1735215265"},"aspect_ratio":1.0,"height":2000,"media_type":"image","src":"\/\/www.bareminerals.com\/cdn\/shop\/files\/BM_SU23_MMBP_RichBlack_OPEN_2000x2000_R300.jpg?v=1735215265","width":2000},{"alt":"Rich Black","id":22897115201621,"position":8,"preview_image":{"aspect_ratio":1.0,"height":2000,"width":2000,"src":"\/\/www.bareminerals.com\/cdn\/shop\/files\/BM_SU23_MMBP_RichBlack_TX_2000x2000_R300.jpg?v=1735215265"},"aspect_ratio":1.0,"height":2000,"media_type":"image","src":"\/\/www.bareminerals.com\/cdn\/shop\/files\/BM_SU23_MMBP_RichBlack_TX_2000x2000_R300.jpg?v=1735215265","width":2000},{"alt":"Taupe","id":22897115267157,"position":9,"preview_image":{"aspect_ratio":1.0,"height":2000,"width":2000,"src":"\/\/www.bareminerals.com\/cdn\/shop\/files\/BM_SU23_MMBP_Taupe_OPEN_2000x2000_R300.jpg?v=1735215265"},"aspect_ratio":1.0,"height":2000,"media_type":"image","src":"\/\/www.bareminerals.com\/cdn\/shop\/files\/BM_SU23_MMBP_Taupe_OPEN_2000x2000_R300.jpg?v=1735215265","width":2000},{"alt":"Taupe","id":22897114808405,"position":10,"preview_image":{"aspect_ratio":1.0,"height":2000,"width":2000,"src":"\/\/www.bareminerals.com\/cdn\/shop\/files\/BM_SU23_MMBP_Taupe_TX_2000x2000_R300.jpg?v=1735215265"},"aspect_ratio":1.0,"height":2000,"media_type":"image","src":"\/\/www.bareminerals.com\/cdn\/shop\/files\/BM_SU23_MMBP_Taupe_TX_2000x2000_R300.jpg?v=1735215265","width":2000},{"alt":"All","id":22897115660373,"position":11,"preview_image":{"aspect_ratio":1.0,"height":2000,"width":2000,"src":"\/\/www.bareminerals.com\/cdn\/shop\/files\/BM_SP23_Mineralist_Brow_Pencil_ArmSwatch_ShadeNames_2000X2000_d920eace-52c7-4233-ae4e-c326d9354a36.jpg?v=1735215265"},"aspect_ratio":1.0,"height":2000,"media_type":"image","src":"\/\/www.bareminerals.com\/cdn\/shop\/files\/BM_SP23_Mineralist_Brow_Pencil_ArmSwatch_ShadeNames_2000X2000_d920eace-52c7-4233-ae4e-c326d9354a36.jpg?v=1735215265","width":2000},{"alt":"All","id":22897115693141,"position":12,"preview_image":{"aspect_ratio":1.0,"height":2000,"width":2000,"src":"\/\/www.bareminerals.com\/cdn\/shop\/files\/BM_SP23_MineralistBrow_Model_2000x2000_R300_44fa093b-1be8-4de0-8837-8a6bf000a842.jpg?v=1735215265"},"aspect_ratio":1.0,"height":2000,"media_type":"image","src":"\/\/www.bareminerals.com\/cdn\/shop\/files\/BM_SP23_MineralistBrow_Model_2000x2000_R300_44fa093b-1be8-4de0-8837-8a6bf000a842.jpg?v=1735215265","width":2000},{"alt":null,"id":23118294384725,"position":13,"preview_image":{"aspect_ratio":1.0,"height":3000,"width":3000,"src":"\/\/www.bareminerals.com\/cdn\/shop\/files\/BM_SU23_MINERALIST_MICRO_BROW_PDP_Ingredient_Infographics_3000X3000_319eb3c6-1e3c-4136-909e-93df091c4ccf.png?v=1735215266"},"aspect_ratio":1.0,"height":3000,"media_type":"image","src":"\/\/www.bareminerals.com\/cdn\/shop\/files\/BM_SU23_MINERALIST_MICRO_BROW_PDP_Ingredient_Infographics_3000X3000_319eb3c6-1e3c-4136-909e-93df091c4ccf.png?v=1735215266","width":3000},{"alt":null,"id":23118294417493,"position":14,"preview_image":{"aspect_ratio":1.0,"height":3000,"width":3000,"src":"\/\/www.bareminerals.com\/cdn\/shop\/files\/BM_SU23_MINERALIST_MICRO_BROW_PDP_Infographics_3000X3000_96bf97b2-6734-434d-b2e5-7b95f386ebbc.png?v=1735215266"},"aspect_ratio":1.0,"height":3000,"media_type":"image","src":"\/\/www.bareminerals.com\/cdn\/shop\/files\/BM_SU23_MINERALIST_MICRO_BROW_PDP_Infographics_3000X3000_96bf97b2-6734-434d-b2e5-7b95f386ebbc.png?v=1735215266","width":3000},{"alt":"Taupe","id":22897115234389,"position":15,"preview_image":{"aspect_ratio":1.0,"height":2000,"width":2000,"src":"\/\/www.bareminerals.com\/cdn\/shop\/files\/BM_SU23_MMBP_Taupe_CLOSED_2000x2000_R300.jpg?v=1735215266"},"aspect_ratio":1.0,"height":2000,"media_type":"image","src":"\/\/www.bareminerals.com\/cdn\/shop\/files\/BM_SU23_MMBP_Taupe_CLOSED_2000x2000_R300.jpg?v=1735215266","width":2000},{"alt":"Coffee","id":22897114939477,"position":16,"preview_image":{"aspect_ratio":1.0,"height":2000,"width":2000,"src":"\/\/www.bareminerals.com\/cdn\/shop\/files\/BM_SU23_MMBP_Coffee_CLOSED_2000x2000_R300.jpg?v=1735215266"},"aspect_ratio":1.0,"height":2000,"media_type":"image","src":"\/\/www.bareminerals.com\/cdn\/shop\/files\/BM_SU23_MMBP_Coffee_CLOSED_2000x2000_R300.jpg?v=1735215266","width":2000},{"alt":"Chestnut","id":22897114841173,"position":17,"preview_image":{"aspect_ratio":1.0,"height":2000,"width":2000,"src":"\/\/www.bareminerals.com\/cdn\/shop\/files\/BM_SU23_MMBP_Chestnut_CLOSED_2000x2000_R300.jpg?v=1735215266"},"aspect_ratio":1.0,"height":2000,"media_type":"image","src":"\/\/www.bareminerals.com\/cdn\/shop\/files\/BM_SU23_MMBP_Chestnut_CLOSED_2000x2000_R300.jpg?v=1735215266","width":2000},{"alt":"Light Brunette","id":22897115037781,"position":18,"preview_image":{"aspect_ratio":1.0,"height":2000,"width":2000,"src":"\/\/www.bareminerals.com\/cdn\/shop\/files\/BM_SU23_MMBP_LightBrunette_CLOSED_2000x2000_R300.jpg?v=1735215266"},"aspect_ratio":1.0,"height":2000,"media_type":"image","src":"\/\/www.bareminerals.com\/cdn\/shop\/files\/BM_SU23_MMBP_LightBrunette_CLOSED_2000x2000_R300.jpg?v=1735215266","width":2000},{"alt":"Rich Black","id":22897115136085,"position":19,"preview_image":{"aspect_ratio":1.0,"height":2000,"width":2000,"src":"\/\/www.bareminerals.com\/cdn\/shop\/files\/BM_SU23_MMBP_RichBlack_CLOSED_2000x2000_R300.jpg?v=1735215266"},"aspect_ratio":1.0,"height":2000,"media_type":"image","src":"\/\/www.bareminerals.com\/cdn\/shop\/files\/BM_SU23_MMBP_RichBlack_CLOSED_2000x2000_R300.jpg?v=1735215266","width":2000},{"alt":"Mineralist Micro-Defining Eyebrow Pencil","id":23611289665621,"position":20,"preview_image":{"aspect_ratio":1.333,"height":360,"width":480,"src":"\/\/www.bareminerals.com\/cdn\/shop\/files\/preview_images\/hqdefault_6de81764-81fe-4035-a0a7-aad9cc6501a8.jpg?v=1710256089"},"aspect_ratio":1.77,"external_id":"qvTnjLUk9SY","host":"youtube","media_type":"external_video"}],"requires_selling_plan":false,"selling_plan_groups":[{"id":"bc6478a662ffae32b3be35b3fe566fa707984433","name":"Subscribe and Save","options":[{"name":"Delivery every","position":1,"values":["month","2 months","3 months","4 months","5 months","6 months"]}],"selling_plans":[{"id":5036572757,"name":"Delivered every month. Get 10% off today and all future orders.","description":null,"options":[{"name":"Delivery every","position":1,"value":"month"}],"recurring_deliveries":true,"price_adjustments":[{"order_count":null,"position":1,"value_type":"percentage","value":10}],"checkout_charge":{"value_type":"percentage","value":100}},{"id":5042864213,"name":"Delivered every 2 months. Get 10% off today and all future orders.","description":null,"options":[{"name":"Delivery every","position":1,"value":"2 months"}],"recurring_deliveries":true,"price_adjustments":[{"order_count":null,"position":1,"value_type":"percentage","value":10}],"checkout_charge":{"value_type":"percentage","value":100}},{"id":5042896981,"name":"Delivered every 3 months. Get 10% off today and all future orders.","description":null,"options":[{"name":"Delivery every","position":1,"value":"3 months"}],"recurring_deliveries":true,"price_adjustments":[{"order_count":null,"position":1,"value_type":"percentage","value":10}],"checkout_charge":{"value_type":"percentage","value":100}},{"id":5042929749,"name":"Delivered every 4 months. Get 10% off today and all future orders.","description":null,"options":[{"name":"Delivery every","position":1,"value":"4 months"}],"recurring_deliveries":true,"price_adjustments":[{"order_count":null,"position":1,"value_type":"percentage","value":10}],"checkout_charge":{"value_type":"percentage","value":100}},{"id":5042962517,"name":"Delivered every 5 months. Get 10% off today and all future orders.","description":null,"options":[{"name":"Delivery every","position":1,"value":"5 months"}],"recurring_deliveries":true,"price_adjustments":[{"order_count":null,"position":1,"value_type":"percentage","value":10}],"checkout_charge":{"value_type":"percentage","value":100}},{"id":5042995285,"name":"Delivered every 6 months. Get 10% off today and all future orders.","description":null,"options":[{"name":"Delivery every","position":1,"value":"6 months"}],"recurring_deliveries":true,"price_adjustments":[{"order_count":null,"position":1,"value_type":"percentage","value":10}],"checkout_charge":{"value_type":"percentage","value":100}}],"app_id":"ordergroove-subscribe-and-save"}],"content":"\u003ch4 data-mce-fragment=\"1\"\u003eFree of:\u003c\/h4\u003e\n\u003cp data-mce-fragment=\"1\"\u003eCruelty Free, Vegan, Paraben Free, Gluten Free, Talc Free, Synthetic Fragrance Free, PEG Free, Tree Nut Free, SLS Free\u003c\/p\u003e\n\u003ch4 data-mce-fragment=\"1\"\u003eWhat it is:\u003c\/h4\u003e\n\u003cp data-mce-fragment=\"1\"\u003eA retractable micro-tip brow pencil that creates ultra-precise hair strokes to fill in gaps and nourish brow hairs.\u003c\/p\u003e\n\u003ch4 class=\"ewa-rteLine\" data-mce-fragment=\"1\"\u003eWhat it does:\u003c\/h4\u003e\n\u003cul data-mce-fragment=\"1\"\u003e\n\u003cli data-mce-fragment=\"1\"\u003eUnique micro-teardrop shape easily creates hairlike strokes with a smooth, precise application\u003c\/li\u003e\n\u003cli data-mce-fragment=\"1\"\u003eConditions and nourishes brow hairs, for naturally fuller brows over time\u003c\/li\u003e\n\u003cli data-mce-fragment=\"1\"\u003eArgan Oil and Panthenol condition and nourish brows \u003cbr\u003e\n\u003c\/li\u003e\n\u003c\/ul\u003e\n\u003ch4 data-mce-fragment=\"1\"\u003eConsumer tested:\u003c\/h4\u003e\n\u003cul data-mce-fragment=\"1\"\u003e\n\u003cli data-mce-fragment=\"1\"\u003e12-hour waterproof, smudge-proof, fuller brows*\u003cbr\u003e*Based on a consumer study of 30 people. \u003c\/li\u003e\n\u003c\/ul\u003e\n\u003ch4 data-mce-fragment=\"1\"\u003eWhy you'll love it:\u003c\/h4\u003e\n\u003cul data-mce-fragment=\"1\"\u003e\n\u003cli data-mce-fragment=\"1\"\u003eEffortlessly achieve naturally full and defined brows\u003c\/li\u003e\n\u003cli data-mce-fragment=\"1\"\u003eUnique micro-teardrop shape creates precise, hairlike strokes and a spoolie to blend and de-tangle brow hairs\u003c\/li\u003e\n\u003cli data-mce-fragment=\"1\"\u003eConditions and nourishes brow hairs, for naturally fuller brows over time\u003c\/li\u003e\n\u003cli data-mce-fragment=\"1\"\u003e12-hour smudge-proof, fade-proof, sweat-proof wear\u003c\/li\u003e\n\u003cli data-mce-fragment=\"1\"\u003eDermatologist-tested\u003c\/li\u003e\n\u003cli data-mce-fragment=\"1\"\u003eCruelty-free\u003c\/li\u003e\n\u003cli data-mce-fragment=\"1\"\u003eVegan\u003c\/li\u003e\n\u003cli data-mce-fragment=\"1\"\u003eClean — talc-free + free of gluten, synthetic fragrance, PEGs and more\u003c\/li\u003e\n\u003cli data-mce-fragment=\"1\"\u003eAt bareMinerals, we have restricted over 2,500 ingredients, including the 1,400+ banned in the E.U.\u003c\/li\u003e\n\u003c\/ul\u003e"}{"id":6938023100501,"title":"MINERALIST® Micro-Defining Eyebrow Pencil","handle":"mineralist-micro-defining-eyebrow-pencil","description":"\u003ch4 data-mce-fragment=\"1\"\u003eFree of:\u003c\/h4\u003e\n\u003cp data-mce-fragment=\"1\"\u003eCruelty Free, Vegan, Paraben Free, Gluten Free, Talc Free, Synthetic Fragrance Free, PEG Free, Tree Nut Free, SLS Free\u003c\/p\u003e\n\u003ch4 data-mce-fragment=\"1\"\u003eWhat it is:\u003c\/h4\u003e\n\u003cp data-mce-fragment=\"1\"\u003eA retractable micro-tip brow pencil that creates ultra-precise hair strokes to fill in gaps and nourish brow hairs.\u003c\/p\u003e\n\u003ch4 class=\"ewa-rteLine\" data-mce-fragment=\"1\"\u003eWhat it does:\u003c\/h4\u003e\n\u003cul data-mce-fragment=\"1\"\u003e\n\u003cli data-mce-fragment=\"1\"\u003eUnique micro-teardrop shape easily creates hairlike strokes with a smooth, precise application\u003c\/li\u003e\n\u003cli data-mce-fragment=\"1\"\u003eConditions and nourishes brow hairs, for naturally fuller brows over time\u003c\/li\u003e\n\u003cli data-mce-fragment=\"1\"\u003eArgan Oil and Panthenol condition and nourish brows \u003cbr\u003e\n\u003c\/li\u003e\n\u003c\/ul\u003e\n\u003ch4 data-mce-fragment=\"1\"\u003eConsumer tested:\u003c\/h4\u003e\n\u003cul data-mce-fragment=\"1\"\u003e\n\u003cli data-mce-fragment=\"1\"\u003e12-hour waterproof, smudge-proof, fuller brows*\u003cbr\u003e*Based on a consumer study of 30 people. \u003c\/li\u003e\n\u003c\/ul\u003e\n\u003ch4 data-mce-fragment=\"1\"\u003eWhy you'll love it:\u003c\/h4\u003e\n\u003cul data-mce-fragment=\"1\"\u003e\n\u003cli data-mce-fragment=\"1\"\u003eEffortlessly achieve naturally full and defined brows\u003c\/li\u003e\n\u003cli data-mce-fragment=\"1\"\u003eUnique micro-teardrop shape creates precise, hairlike strokes and a spoolie to blend and de-tangle brow hairs\u003c\/li\u003e\n\u003cli data-mce-fragment=\"1\"\u003eConditions and nourishes brow hairs, for naturally fuller brows over time\u003c\/li\u003e\n\u003cli data-mce-fragment=\"1\"\u003e12-hour smudge-proof, fade-proof, sweat-proof wear\u003c\/li\u003e\n\u003cli data-mce-fragment=\"1\"\u003eDermatologist-tested\u003c\/li\u003e\n\u003cli data-mce-fragment=\"1\"\u003eCruelty-free\u003c\/li\u003e\n\u003cli data-mce-fragment=\"1\"\u003eVegan\u003c\/li\u003e\n\u003cli data-mce-fragment=\"1\"\u003eClean — talc-free + free of gluten, synthetic fragrance, PEGs and more\u003c\/li\u003e\n\u003cli data-mce-fragment=\"1\"\u003eAt bareMinerals, we have restricted over 2,500 ingredients, including the 1,400+ banned in the E.U.\u003c\/li\u003e\n\u003c\/ul\u003e","published_at":"2023-10-04T10:26:40-04:00","created_at":"2023-06-28T13:58:51-04:00","vendor":"Bare Minerals","type":"Eyebrow","tags":["All Makeup","Amazon","Brow","Duel","Eye","Full Size Makeup GSK","Full Size Product","Makeup","Not Holiday","Ordergroove","Subscription","Valentine's Day"],"price":2300,"price_min":2300,"price_max":2300,"available":true,"price_varies":false,"compare_at_price":null,"compare_at_price_min":0,"compare_at_price_max":0,"compare_at_price_varies":false,"variants":[{"id":40644075192405,"title":"Taupe","option1":"Taupe","option2":null,"option3":null,"sku":"41704248101","requires_shipping":true,"taxable":true,"featured_image":{"id":30570291953749,"product_id":6938023100501,"position":9,"created_at":"2023-07-05T10:13:18-04:00","updated_at":"2024-12-26T07:14:25-05:00","alt":"Taupe","width":2000,"height":2000,"src":"\/\/www.bareminerals.com\/cdn\/shop\/files\/BM_SU23_MMBP_Taupe_OPEN_2000x2000_R300.jpg?v=1735215265","variant_ids":[40644075192405]},"available":true,"name":"MINERALIST® Micro-Defining Eyebrow Pencil - Taupe","public_title":"Taupe","options":["Taupe"],"price":2300,"weight":0,"compare_at_price":null,"inventory_management":"shopify","barcode":"194248059644","featured_media":{"alt":"Taupe","id":22897115267157,"position":9,"preview_image":{"aspect_ratio":1.0,"height":2000,"width":2000,"src":"\/\/www.bareminerals.com\/cdn\/shop\/files\/BM_SU23_MMBP_Taupe_OPEN_2000x2000_R300.jpg?v=1735215265"}},"requires_selling_plan":false,"selling_plan_allocations":[{"price_adjustments":[{"position":1,"price":2070}],"price":2070,"compare_at_price":2300,"per_delivery_price":2070,"selling_plan_id":5036572757,"selling_plan_group_id":"bc6478a662ffae32b3be35b3fe566fa707984433"},{"price_adjustments":[{"position":1,"price":2070}],"price":2070,"compare_at_price":2300,"per_delivery_price":2070,"selling_plan_id":5042864213,"selling_plan_group_id":"bc6478a662ffae32b3be35b3fe566fa707984433"},{"price_adjustments":[{"position":1,"price":2070}],"price":2070,"compare_at_price":2300,"per_delivery_price":2070,"selling_plan_id":5042896981,"selling_plan_group_id":"bc6478a662ffae32b3be35b3fe566fa707984433"},{"price_adjustments":[{"position":1,"price":2070}],"price":2070,"compare_at_price":2300,"per_delivery_price":2070,"selling_plan_id":5042929749,"selling_plan_group_id":"bc6478a662ffae32b3be35b3fe566fa707984433"},{"price_adjustments":[{"position":1,"price":2070}],"price":2070,"compare_at_price":2300,"per_delivery_price":2070,"selling_plan_id":5042962517,"selling_plan_group_id":"bc6478a662ffae32b3be35b3fe566fa707984433"},{"price_adjustments":[{"position":1,"price":2070}],"price":2070,"compare_at_price":2300,"per_delivery_price":2070,"selling_plan_id":5042995285,"selling_plan_group_id":"bc6478a662ffae32b3be35b3fe566fa707984433"}],"quantity_rule":{"min":1,"max":null,"increment":1}},{"id":40644075225173,"title":"Light Brunette","option1":"Light Brunette","option2":null,"option3":null,"sku":"41704250101","requires_shipping":true,"taxable":true,"featured_image":{"id":30570291822677,"product_id":6938023100501,"position":18,"created_at":"2023-07-05T10:13:18-04:00","updated_at":"2024-12-26T07:14:26-05:00","alt":"Light Brunette","width":2000,"height":2000,"src":"\/\/www.bareminerals.com\/cdn\/shop\/files\/BM_SU23_MMBP_LightBrunette_CLOSED_2000x2000_R300.jpg?v=1735215266","variant_ids":[40644075225173]},"available":true,"name":"MINERALIST® Micro-Defining Eyebrow Pencil - Light Brunette","public_title":"Light Brunette","options":["Light Brunette"],"price":2300,"weight":0,"compare_at_price":null,"inventory_management":"shopify","barcode":"194248059668","featured_media":{"alt":"Light Brunette","id":22897115037781,"position":18,"preview_image":{"aspect_ratio":1.0,"height":2000,"width":2000,"src":"\/\/www.bareminerals.com\/cdn\/shop\/files\/BM_SU23_MMBP_LightBrunette_CLOSED_2000x2000_R300.jpg?v=1735215266"}},"requires_selling_plan":false,"selling_plan_allocations":[{"price_adjustments":[{"position":1,"price":2070}],"price":2070,"compare_at_price":2300,"per_delivery_price":2070,"selling_plan_id":5036572757,"selling_plan_group_id":"bc6478a662ffae32b3be35b3fe566fa707984433"},{"price_adjustments":[{"position":1,"price":2070}],"price":2070,"compare_at_price":2300,"per_delivery_price":2070,"selling_plan_id":5042864213,"selling_plan_group_id":"bc6478a662ffae32b3be35b3fe566fa707984433"},{"price_adjustments":[{"position":1,"price":2070}],"price":2070,"compare_at_price":2300,"per_delivery_price":2070,"selling_plan_id":5042896981,"selling_plan_group_id":"bc6478a662ffae32b3be35b3fe566fa707984433"},{"price_adjustments":[{"position":1,"price":2070}],"price":2070,"compare_at_price":2300,"per_delivery_price":2070,"selling_plan_id":5042929749,"selling_plan_group_id":"bc6478a662ffae32b3be35b3fe566fa707984433"},{"price_adjustments":[{"position":1,"price":2070}],"price":2070,"compare_at_price":2300,"per_delivery_price":2070,"selling_plan_id":5042962517,"selling_plan_group_id":"bc6478a662ffae32b3be35b3fe566fa707984433"},{"price_adjustments":[{"position":1,"price":2070}],"price":2070,"compare_at_price":2300,"per_delivery_price":2070,"selling_plan_id":5042995285,"selling_plan_group_id":"bc6478a662ffae32b3be35b3fe566fa707984433"}],"quantity_rule":{"min":1,"max":null,"increment":1}},{"id":40644075257941,"title":"Chestnut","option1":"Chestnut","option2":null,"option3":null,"sku":"41704252101","requires_shipping":true,"taxable":true,"featured_image":{"id":30570291429461,"product_id":6938023100501,"position":17,"created_at":"2023-07-05T10:13:18-04:00","updated_at":"2024-12-26T07:14:26-05:00","alt":"Chestnut","width":2000,"height":2000,"src":"\/\/www.bareminerals.com\/cdn\/shop\/files\/BM_SU23_MMBP_Chestnut_CLOSED_2000x2000_R300.jpg?v=1735215266","variant_ids":[40644075257941]},"available":true,"name":"MINERALIST® Micro-Defining Eyebrow Pencil - Chestnut","public_title":"Chestnut","options":["Chestnut"],"price":2300,"weight":0,"compare_at_price":null,"inventory_management":"shopify","barcode":"194248059682","featured_media":{"alt":"Chestnut","id":22897114841173,"position":17,"preview_image":{"aspect_ratio":1.0,"height":2000,"width":2000,"src":"\/\/www.bareminerals.com\/cdn\/shop\/files\/BM_SU23_MMBP_Chestnut_CLOSED_2000x2000_R300.jpg?v=1735215266"}},"requires_selling_plan":false,"selling_plan_allocations":[{"price_adjustments":[{"position":1,"price":2070}],"price":2070,"compare_at_price":2300,"per_delivery_price":2070,"selling_plan_id":5036572757,"selling_plan_group_id":"bc6478a662ffae32b3be35b3fe566fa707984433"},{"price_adjustments":[{"position":1,"price":2070}],"price":2070,"compare_at_price":2300,"per_delivery_price":2070,"selling_plan_id":5042864213,"selling_plan_group_id":"bc6478a662ffae32b3be35b3fe566fa707984433"},{"price_adjustments":[{"position":1,"price":2070}],"price":2070,"compare_at_price":2300,"per_delivery_price":2070,"selling_plan_id":5042896981,"selling_plan_group_id":"bc6478a662ffae32b3be35b3fe566fa707984433"},{"price_adjustments":[{"position":1,"price":2070}],"price":2070,"compare_at_price":2300,"per_delivery_price":2070,"selling_plan_id":5042929749,"selling_plan_group_id":"bc6478a662ffae32b3be35b3fe566fa707984433"},{"price_adjustments":[{"position":1,"price":2070}],"price":2070,"compare_at_price":2300,"per_delivery_price":2070,"selling_plan_id":5042962517,"selling_plan_group_id":"bc6478a662ffae32b3be35b3fe566fa707984433"},{"price_adjustments":[{"position":1,"price":2070}],"price":2070,"compare_at_price":2300,"per_delivery_price":2070,"selling_plan_id":5042995285,"selling_plan_group_id":"bc6478a662ffae32b3be35b3fe566fa707984433"}],"quantity_rule":{"min":1,"max":null,"increment":1}},{"id":40644075290709,"title":"Coffee","option1":"Coffee","option2":null,"option3":null,"sku":"41704254101","requires_shipping":true,"taxable":true,"featured_image":{"id":30570291462229,"product_id":6938023100501,"position":16,"created_at":"2023-07-05T10:13:18-04:00","updated_at":"2024-12-26T07:14:26-05:00","alt":"Coffee","width":2000,"height":2000,"src":"\/\/www.bareminerals.com\/cdn\/shop\/files\/BM_SU23_MMBP_Coffee_CLOSED_2000x2000_R300.jpg?v=1735215266","variant_ids":[40644075290709]},"available":true,"name":"MINERALIST® Micro-Defining Eyebrow Pencil - Coffee","public_title":"Coffee","options":["Coffee"],"price":2300,"weight":0,"compare_at_price":null,"inventory_management":"shopify","barcode":"194248059705","featured_media":{"alt":"Coffee","id":22897114939477,"position":16,"preview_image":{"aspect_ratio":1.0,"height":2000,"width":2000,"src":"\/\/www.bareminerals.com\/cdn\/shop\/files\/BM_SU23_MMBP_Coffee_CLOSED_2000x2000_R300.jpg?v=1735215266"}},"requires_selling_plan":false,"selling_plan_allocations":[{"price_adjustments":[{"position":1,"price":2070}],"price":2070,"compare_at_price":2300,"per_delivery_price":2070,"selling_plan_id":5036572757,"selling_plan_group_id":"bc6478a662ffae32b3be35b3fe566fa707984433"},{"price_adjustments":[{"position":1,"price":2070}],"price":2070,"compare_at_price":2300,"per_delivery_price":2070,"selling_plan_id":5042864213,"selling_plan_group_id":"bc6478a662ffae32b3be35b3fe566fa707984433"},{"price_adjustments":[{"position":1,"price":2070}],"price":2070,"compare_at_price":2300,"per_delivery_price":2070,"selling_plan_id":5042896981,"selling_plan_group_id":"bc6478a662ffae32b3be35b3fe566fa707984433"},{"price_adjustments":[{"position":1,"price":2070}],"price":2070,"compare_at_price":2300,"per_delivery_price":2070,"selling_plan_id":5042929749,"selling_plan_group_id":"bc6478a662ffae32b3be35b3fe566fa707984433"},{"price_adjustments":[{"position":1,"price":2070}],"price":2070,"compare_at_price":2300,"per_delivery_price":2070,"selling_plan_id":5042962517,"selling_plan_group_id":"bc6478a662ffae32b3be35b3fe566fa707984433"},{"price_adjustments":[{"position":1,"price":2070}],"price":2070,"compare_at_price":2300,"per_delivery_price":2070,"selling_plan_id":5042995285,"selling_plan_group_id":"bc6478a662ffae32b3be35b3fe566fa707984433"}],"quantity_rule":{"min":1,"max":null,"increment":1}},{"id":40644075323477,"title":"Rich Black","option1":"Rich Black","option2":null,"option3":null,"sku":"41704256101","requires_shipping":true,"taxable":true,"featured_image":{"id":30570291331157,"product_id":6938023100501,"position":7,"created_at":"2023-07-05T10:13:18-04:00","updated_at":"2024-12-26T07:14:25-05:00","alt":"Rich Black","width":2000,"height":2000,"src":"\/\/www.bareminerals.com\/cdn\/shop\/files\/BM_SU23_MMBP_RichBlack_OPEN_2000x2000_R300.jpg?v=1735215265","variant_ids":[40644075323477]},"available":true,"name":"MINERALIST® Micro-Defining Eyebrow Pencil - Rich Black","public_title":"Rich Black","options":["Rich Black"],"price":2300,"weight":0,"compare_at_price":null,"inventory_management":"shopify","barcode":"194248059729","featured_media":{"alt":"Rich Black","id":22897115168853,"position":7,"preview_image":{"aspect_ratio":1.0,"height":2000,"width":2000,"src":"\/\/www.bareminerals.com\/cdn\/shop\/files\/BM_SU23_MMBP_RichBlack_OPEN_2000x2000_R300.jpg?v=1735215265"}},"requires_selling_plan":false,"selling_plan_allocations":[{"price_adjustments":[{"position":1,"price":2070}],"price":2070,"compare_at_price":2300,"per_delivery_price":2070,"selling_plan_id":5036572757,"selling_plan_group_id":"bc6478a662ffae32b3be35b3fe566fa707984433"},{"price_adjustments":[{"position":1,"price":2070}],"price":2070,"compare_at_price":2300,"per_delivery_price":2070,"selling_plan_id":5042864213,"selling_plan_group_id":"bc6478a662ffae32b3be35b3fe566fa707984433"},{"price_adjustments":[{"position":1,"price":2070}],"price":2070,"compare_at_price":2300,"per_delivery_price":2070,"selling_plan_id":5042896981,"selling_plan_group_id":"bc6478a662ffae32b3be35b3fe566fa707984433"},{"price_adjustments":[{"position":1,"price":2070}],"price":2070,"compare_at_price":2300,"per_delivery_price":2070,"selling_plan_id":5042929749,"selling_plan_group_id":"bc6478a662ffae32b3be35b3fe566fa707984433"},{"price_adjustments":[{"position":1,"price":2070}],"price":2070,"compare_at_price":2300,"per_delivery_price":2070,"selling_plan_id":5042962517,"selling_plan_group_id":"bc6478a662ffae32b3be35b3fe566fa707984433"},{"price_adjustments":[{"position":1,"price":2070}],"price":2070,"compare_at_price":2300,"per_delivery_price":2070,"selling_plan_id":5042995285,"selling_plan_group_id":"bc6478a662ffae32b3be35b3fe566fa707984433"}],"quantity_rule":{"min":1,"max":null,"increment":1}}],"images":["\/\/www.bareminerals.com\/cdn\/shop\/files\/BM_SU23_MMBP_Chestnut_OPEN_2000x2000_R300.jpg?v=1735215264","\/\/www.bareminerals.com\/cdn\/shop\/files\/BM_SU23_MMBP_Chestnut_TX_2000x2000_R300.jpg?v=1735215265","\/\/www.bareminerals.com\/cdn\/shop\/files\/BM_SU23_MMBP_Coffee_OPEN_2000x2000_R300.jpg?v=1735215265","\/\/www.bareminerals.com\/cdn\/shop\/files\/BM_SU23_MMBP_Coffee_TX_2000x2000_R300.jpg?v=1735215265","\/\/www.bareminerals.com\/cdn\/shop\/files\/BM_SU23_MMBP_LightBrunette_OPEN_2000x2000_R300.jpg?v=1735215265","\/\/www.bareminerals.com\/cdn\/shop\/files\/BM_SU23_MMBP_LightBrunette_TX_2000x2000_R300.jpg?v=1735215265","\/\/www.bareminerals.com\/cdn\/shop\/files\/BM_SU23_MMBP_RichBlack_OPEN_2000x2000_R300.jpg?v=1735215265","\/\/www.bareminerals.com\/cdn\/shop\/files\/BM_SU23_MMBP_RichBlack_TX_2000x2000_R300.jpg?v=1735215265","\/\/www.bareminerals.com\/cdn\/shop\/files\/BM_SU23_MMBP_Taupe_OPEN_2000x2000_R300.jpg?v=1735215265","\/\/www.bareminerals.com\/cdn\/shop\/files\/BM_SU23_MMBP_Taupe_TX_2000x2000_R300.jpg?v=1735215265","\/\/www.bareminerals.com\/cdn\/shop\/files\/BM_SP23_Mineralist_Brow_Pencil_ArmSwatch_ShadeNames_2000X2000_d920eace-52c7-4233-ae4e-c326d9354a36.jpg?v=1735215265","\/\/www.bareminerals.com\/cdn\/shop\/files\/BM_SP23_MineralistBrow_Model_2000x2000_R300_44fa093b-1be8-4de0-8837-8a6bf000a842.jpg?v=1735215265","\/\/www.bareminerals.com\/cdn\/shop\/files\/BM_SU23_MINERALIST_MICRO_BROW_PDP_Ingredient_Infographics_3000X3000_319eb3c6-1e3c-4136-909e-93df091c4ccf.png?v=1735215266","\/\/www.bareminerals.com\/cdn\/shop\/files\/BM_SU23_MINERALIST_MICRO_BROW_PDP_Infographics_3000X3000_96bf97b2-6734-434d-b2e5-7b95f386ebbc.png?v=1735215266","\/\/www.bareminerals.com\/cdn\/shop\/files\/BM_SU23_MMBP_Taupe_CLOSED_2000x2000_R300.jpg?v=1735215266","\/\/www.bareminerals.com\/cdn\/shop\/files\/BM_SU23_MMBP_Coffee_CLOSED_2000x2000_R300.jpg?v=1735215266","\/\/www.bareminerals.com\/cdn\/shop\/files\/BM_SU23_MMBP_Chestnut_CLOSED_2000x2000_R300.jpg?v=1735215266","\/\/www.bareminerals.com\/cdn\/shop\/files\/BM_SU23_MMBP_LightBrunette_CLOSED_2000x2000_R300.jpg?v=1735215266","\/\/www.bareminerals.com\/cdn\/shop\/files\/BM_SU23_MMBP_RichBlack_CLOSED_2000x2000_R300.jpg?v=1735215266"],"featured_image":"\/\/www.bareminerals.com\/cdn\/shop\/files\/BM_SU23_MMBP_Chestnut_OPEN_2000x2000_R300.jpg?v=1735215264","options":["Color"],"media":[{"alt":"Chestnut","id":22897114873941,"position":1,"preview_image":{"aspect_ratio":1.0,"height":2000,"width":2000,"src":"\/\/www.bareminerals.com\/cdn\/shop\/files\/BM_SU23_MMBP_Chestnut_OPEN_2000x2000_R300.jpg?v=1735215264"},"aspect_ratio":1.0,"height":2000,"media_type":"image","src":"\/\/www.bareminerals.com\/cdn\/shop\/files\/BM_SU23_MMBP_Chestnut_OPEN_2000x2000_R300.jpg?v=1735215264","width":2000},{"alt":"Chestnut","id":22897114906709,"position":2,"preview_image":{"aspect_ratio":1.0,"height":2000,"width":2000,"src":"\/\/www.bareminerals.com\/cdn\/shop\/files\/BM_SU23_MMBP_Chestnut_TX_2000x2000_R300.jpg?v=1735215265"},"aspect_ratio":1.0,"height":2000,"media_type":"image","src":"\/\/www.bareminerals.com\/cdn\/shop\/files\/BM_SU23_MMBP_Chestnut_TX_2000x2000_R300.jpg?v=1735215265","width":2000},{"alt":"Coffee","id":22897114972245,"position":3,"preview_image":{"aspect_ratio":1.0,"height":2000,"width":2000,"src":"\/\/www.bareminerals.com\/cdn\/shop\/files\/BM_SU23_MMBP_Coffee_OPEN_2000x2000_R300.jpg?v=1735215265"},"aspect_ratio":1.0,"height":2000,"media_type":"image","src":"\/\/www.bareminerals.com\/cdn\/shop\/files\/BM_SU23_MMBP_Coffee_OPEN_2000x2000_R300.jpg?v=1735215265","width":2000},{"alt":"Coffee","id":22897115005013,"position":4,"preview_image":{"aspect_ratio":1.0,"height":2000,"width":2000,"src":"\/\/www.bareminerals.com\/cdn\/shop\/files\/BM_SU23_MMBP_Coffee_TX_2000x2000_R300.jpg?v=1735215265"},"aspect_ratio":1.0,"height":2000,"media_type":"image","src":"\/\/www.bareminerals.com\/cdn\/shop\/files\/BM_SU23_MMBP_Coffee_TX_2000x2000_R300.jpg?v=1735215265","width":2000},{"alt":"Light Brunette","id":22897115070549,"position":5,"preview_image":{"aspect_ratio":1.0,"height":2000,"width":2000,"src":"\/\/www.bareminerals.com\/cdn\/shop\/files\/BM_SU23_MMBP_LightBrunette_OPEN_2000x2000_R300.jpg?v=1735215265"},"aspect_ratio":1.0,"height":2000,"media_type":"image","src":"\/\/www.bareminerals.com\/cdn\/shop\/files\/BM_SU23_MMBP_LightBrunette_OPEN_2000x2000_R300.jpg?v=1735215265","width":2000},{"alt":"Light Brunette","id":22897115103317,"position":6,"preview_image":{"aspect_ratio":1.0,"height":2000,"width":2000,"src":"\/\/www.bareminerals.com\/cdn\/shop\/files\/BM_SU23_MMBP_LightBrunette_TX_2000x2000_R300.jpg?v=1735215265"},"aspect_ratio":1.0,"height":2000,"media_type":"image","src":"\/\/www.bareminerals.com\/cdn\/shop\/files\/BM_SU23_MMBP_LightBrunette_TX_2000x2000_R300.jpg?v=1735215265","width":2000},{"alt":"Rich Black","id":22897115168853,"position":7,"preview_image":{"aspect_ratio":1.0,"height":2000,"width":2000,"src":"\/\/www.bareminerals.com\/cdn\/shop\/files\/BM_SU23_MMBP_RichBlack_OPEN_2000x2000_R300.jpg?v=1735215265"},"aspect_ratio":1.0,"height":2000,"media_type":"image","src":"\/\/www.bareminerals.com\/cdn\/shop\/files\/BM_SU23_MMBP_RichBlack_OPEN_2000x2000_R300.jpg?v=1735215265","width":2000},{"alt":"Rich Black","id":22897115201621,"position":8,"preview_image":{"aspect_ratio":1.0,"height":2000,"width":2000,"src":"\/\/www.bareminerals.com\/cdn\/shop\/files\/BM_SU23_MMBP_RichBlack_TX_2000x2000_R300.jpg?v=1735215265"},"aspect_ratio":1.0,"height":2000,"media_type":"image","src":"\/\/www.bareminerals.com\/cdn\/shop\/files\/BM_SU23_MMBP_RichBlack_TX_2000x2000_R300.jpg?v=1735215265","width":2000},{"alt":"Taupe","id":22897115267157,"position":9,"preview_image":{"aspect_ratio":1.0,"height":2000,"width":2000,"src":"\/\/www.bareminerals.com\/cdn\/shop\/files\/BM_SU23_MMBP_Taupe_OPEN_2000x2000_R300.jpg?v=1735215265"},"aspect_ratio":1.0,"height":2000,"media_type":"image","src":"\/\/www.bareminerals.com\/cdn\/shop\/files\/BM_SU23_MMBP_Taupe_OPEN_2000x2000_R300.jpg?v=1735215265","width":2000},{"alt":"Taupe","id":22897114808405,"position":10,"preview_image":{"aspect_ratio":1.0,"height":2000,"width":2000,"src":"\/\/www.bareminerals.com\/cdn\/shop\/files\/BM_SU23_MMBP_Taupe_TX_2000x2000_R300.jpg?v=1735215265"},"aspect_ratio":1.0,"height":2000,"media_type":"image","src":"\/\/www.bareminerals.com\/cdn\/shop\/files\/BM_SU23_MMBP_Taupe_TX_2000x2000_R300.jpg?v=1735215265","width":2000},{"alt":"All","id":22897115660373,"position":11,"preview_image":{"aspect_ratio":1.0,"height":2000,"width":2000,"src":"\/\/www.bareminerals.com\/cdn\/shop\/files\/BM_SP23_Mineralist_Brow_Pencil_ArmSwatch_ShadeNames_2000X2000_d920eace-52c7-4233-ae4e-c326d9354a36.jpg?v=1735215265"},"aspect_ratio":1.0,"height":2000,"media_type":"image","src":"\/\/www.bareminerals.com\/cdn\/shop\/files\/BM_SP23_Mineralist_Brow_Pencil_ArmSwatch_ShadeNames_2000X2000_d920eace-52c7-4233-ae4e-c326d9354a36.jpg?v=1735215265","width":2000},{"alt":"All","id":22897115693141,"position":12,"preview_image":{"aspect_ratio":1.0,"height":2000,"width":2000,"src":"\/\/www.bareminerals.com\/cdn\/shop\/files\/BM_SP23_MineralistBrow_Model_2000x2000_R300_44fa093b-1be8-4de0-8837-8a6bf000a842.jpg?v=1735215265"},"aspect_ratio":1.0,"height":2000,"media_type":"image","src":"\/\/www.bareminerals.com\/cdn\/shop\/files\/BM_SP23_MineralistBrow_Model_2000x2000_R300_44fa093b-1be8-4de0-8837-8a6bf000a842.jpg?v=1735215265","width":2000},{"alt":null,"id":23118294384725,"position":13,"preview_image":{"aspect_ratio":1.0,"height":3000,"width":3000,"src":"\/\/www.bareminerals.com\/cdn\/shop\/files\/BM_SU23_MINERALIST_MICRO_BROW_PDP_Ingredient_Infographics_3000X3000_319eb3c6-1e3c-4136-909e-93df091c4ccf.png?v=1735215266"},"aspect_ratio":1.0,"height":3000,"media_type":"image","src":"\/\/www.bareminerals.com\/cdn\/shop\/files\/BM_SU23_MINERALIST_MICRO_BROW_PDP_Ingredient_Infographics_3000X3000_319eb3c6-1e3c-4136-909e-93df091c4ccf.png?v=1735215266","width":3000},{"alt":null,"id":23118294417493,"position":14,"preview_image":{"aspect_ratio":1.0,"height":3000,"width":3000,"src":"\/\/www.bareminerals.com\/cdn\/shop\/files\/BM_SU23_MINERALIST_MICRO_BROW_PDP_Infographics_3000X3000_96bf97b2-6734-434d-b2e5-7b95f386ebbc.png?v=1735215266"},"aspect_ratio":1.0,"height":3000,"media_type":"image","src":"\/\/www.bareminerals.com\/cdn\/shop\/files\/BM_SU23_MINERALIST_MICRO_BROW_PDP_Infographics_3000X3000_96bf97b2-6734-434d-b2e5-7b95f386ebbc.png?v=1735215266","width":3000},{"alt":"Taupe","id":22897115234389,"position":15,"preview_image":{"aspect_ratio":1.0,"height":2000,"width":2000,"src":"\/\/www.bareminerals.com\/cdn\/shop\/files\/BM_SU23_MMBP_Taupe_CLOSED_2000x2000_R300.jpg?v=1735215266"},"aspect_ratio":1.0,"height":2000,"media_type":"image","src":"\/\/www.bareminerals.com\/cdn\/shop\/files\/BM_SU23_MMBP_Taupe_CLOSED_2000x2000_R300.jpg?v=1735215266","width":2000},{"alt":"Coffee","id":22897114939477,"position":16,"preview_image":{"aspect_ratio":1.0,"height":2000,"width":2000,"src":"\/\/www.bareminerals.com\/cdn\/shop\/files\/BM_SU23_MMBP_Coffee_CLOSED_2000x2000_R300.jpg?v=1735215266"},"aspect_ratio":1.0,"height":2000,"media_type":"image","src":"\/\/www.bareminerals.com\/cdn\/shop\/files\/BM_SU23_MMBP_Coffee_CLOSED_2000x2000_R300.jpg?v=1735215266","width":2000},{"alt":"Chestnut","id":22897114841173,"position":17,"preview_image":{"aspect_ratio":1.0,"height":2000,"width":2000,"src":"\/\/www.bareminerals.com\/cdn\/shop\/files\/BM_SU23_MMBP_Chestnut_CLOSED_2000x2000_R300.jpg?v=1735215266"},"aspect_ratio":1.0,"height":2000,"media_type":"image","src":"\/\/www.bareminerals.com\/cdn\/shop\/files\/BM_SU23_MMBP_Chestnut_CLOSED_2000x2000_R300.jpg?v=1735215266","width":2000},{"alt":"Light Brunette","id":22897115037781,"position":18,"preview_image":{"aspect_ratio":1.0,"height":2000,"width":2000,"src":"\/\/www.bareminerals.com\/cdn\/shop\/files\/BM_SU23_MMBP_LightBrunette_CLOSED_2000x2000_R300.jpg?v=1735215266"},"aspect_ratio":1.0,"height":2000,"media_type":"image","src":"\/\/www.bareminerals.com\/cdn\/shop\/files\/BM_SU23_MMBP_LightBrunette_CLOSED_2000x2000_R300.jpg?v=1735215266","width":2000},{"alt":"Rich Black","id":22897115136085,"position":19,"preview_image":{"aspect_ratio":1.0,"height":2000,"width":2000,"src":"\/\/www.bareminerals.com\/cdn\/shop\/files\/BM_SU23_MMBP_RichBlack_CLOSED_2000x2000_R300.jpg?v=1735215266"},"aspect_ratio":1.0,"height":2000,"media_type":"image","src":"\/\/www.bareminerals.com\/cdn\/shop\/files\/BM_SU23_MMBP_RichBlack_CLOSED_2000x2000_R300.jpg?v=1735215266","width":2000},{"alt":"Mineralist Micro-Defining Eyebrow Pencil","id":23611289665621,"position":20,"preview_image":{"aspect_ratio":1.333,"height":360,"width":480,"src":"\/\/www.bareminerals.com\/cdn\/shop\/files\/preview_images\/hqdefault_6de81764-81fe-4035-a0a7-aad9cc6501a8.jpg?v=1710256089"},"aspect_ratio":1.77,"external_id":"qvTnjLUk9SY","host":"youtube","media_type":"external_video"}],"requires_selling_plan":false,"selling_plan_groups":[{"id":"bc6478a662ffae32b3be35b3fe566fa707984433","name":"Subscribe and Save","options":[{"name":"Delivery every","position":1,"values":["month","2 months","3 months","4 months","5 months","6 months"]}],"selling_plans":[{"id":5036572757,"name":"Delivered every month. Get 10% off today and all future orders.","description":null,"options":[{"name":"Delivery every","position":1,"value":"month"}],"recurring_deliveries":true,"price_adjustments":[{"order_count":null,"position":1,"value_type":"percentage","value":10}],"checkout_charge":{"value_type":"percentage","value":100}},{"id":5042864213,"name":"Delivered every 2 months. Get 10% off today and all future orders.","description":null,"options":[{"name":"Delivery every","position":1,"value":"2 months"}],"recurring_deliveries":true,"price_adjustments":[{"order_count":null,"position":1,"value_type":"percentage","value":10}],"checkout_charge":{"value_type":"percentage","value":100}},{"id":5042896981,"name":"Delivered every 3 months. Get 10% off today and all future orders.","description":null,"options":[{"name":"Delivery every","position":1,"value":"3 months"}],"recurring_deliveries":true,"price_adjustments":[{"order_count":null,"position":1,"value_type":"percentage","value":10}],"checkout_charge":{"value_type":"percentage","value":100}},{"id":5042929749,"name":"Delivered every 4 months. Get 10% off today and all future orders.","description":null,"options":[{"name":"Delivery every","position":1,"value":"4 months"}],"recurring_deliveries":true,"price_adjustments":[{"order_count":null,"position":1,"value_type":"percentage","value":10}],"checkout_charge":{"value_type":"percentage","value":100}},{"id":5042962517,"name":"Delivered every 5 months. Get 10% off today and all future orders.","description":null,"options":[{"name":"Delivery every","position":1,"value":"5 months"}],"recurring_deliveries":true,"price_adjustments":[{"order_count":null,"position":1,"value_type":"percentage","value":10}],"checkout_charge":{"value_type":"percentage","value":100}},{"id":5042995285,"name":"Delivered every 6 months. Get 10% off today and all future orders.","description":null,"options":[{"name":"Delivery every","position":1,"value":"6 months"}],"recurring_deliveries":true,"price_adjustments":[{"order_count":null,"position":1,"value_type":"percentage","value":10}],"checkout_charge":{"value_type":"percentage","value":100}}],"app_id":"ordergroove-subscribe-and-save"}],"content":"\u003ch4 data-mce-fragment=\"1\"\u003eFree of:\u003c\/h4\u003e\n\u003cp data-mce-fragment=\"1\"\u003eCruelty Free, Vegan, Paraben Free, Gluten Free, Talc Free, Synthetic Fragrance Free, PEG Free, Tree Nut Free, SLS Free\u003c\/p\u003e\n\u003ch4 data-mce-fragment=\"1\"\u003eWhat it is:\u003c\/h4\u003e\n\u003cp data-mce-fragment=\"1\"\u003eA retractable micro-tip brow pencil that creates ultra-precise hair strokes to fill in gaps and nourish brow hairs.\u003c\/p\u003e\n\u003ch4 class=\"ewa-rteLine\" data-mce-fragment=\"1\"\u003eWhat it does:\u003c\/h4\u003e\n\u003cul data-mce-fragment=\"1\"\u003e\n\u003cli data-mce-fragment=\"1\"\u003eUnique micro-teardrop shape easily creates hairlike strokes with a smooth, precise application\u003c\/li\u003e\n\u003cli data-mce-fragment=\"1\"\u003eConditions and nourishes brow hairs, for naturally fuller brows over time\u003c\/li\u003e\n\u003cli data-mce-fragment=\"1\"\u003eArgan Oil and Panthenol condition and nourish brows \u003cbr\u003e\n\u003c\/li\u003e\n\u003c\/ul\u003e\n\u003ch4 data-mce-fragment=\"1\"\u003eConsumer tested:\u003c\/h4\u003e\n\u003cul data-mce-fragment=\"1\"\u003e\n\u003cli data-mce-fragment=\"1\"\u003e12-hour waterproof, smudge-proof, fuller brows*\u003cbr\u003e*Based on a consumer study of 30 people. \u003c\/li\u003e\n\u003c\/ul\u003e\n\u003ch4 data-mce-fragment=\"1\"\u003eWhy you'll love it:\u003c\/h4\u003e\n\u003cul data-mce-fragment=\"1\"\u003e\n\u003cli data-mce-fragment=\"1\"\u003eEffortlessly achieve naturally full and defined brows\u003c\/li\u003e\n\u003cli data-mce-fragment=\"1\"\u003eUnique micro-teardrop shape creates precise, hairlike strokes and a spoolie to blend and de-tangle brow hairs\u003c\/li\u003e\n\u003cli data-mce-fragment=\"1\"\u003eConditions and nourishes brow hairs, for naturally fuller brows over time\u003c\/li\u003e\n\u003cli data-mce-fragment=\"1\"\u003e12-hour smudge-proof, fade-proof, sweat-proof wear\u003c\/li\u003e\n\u003cli data-mce-fragment=\"1\"\u003eDermatologist-tested\u003c\/li\u003e\n\u003cli data-mce-fragment=\"1\"\u003eCruelty-free\u003c\/li\u003e\n\u003cli data-mce-fragment=\"1\"\u003eVegan\u003c\/li\u003e\n\u003cli data-mce-fragment=\"1\"\u003eClean — talc-free + free of gluten, synthetic fragrance, PEGs and more\u003c\/li\u003e\n\u003cli data-mce-fragment=\"1\"\u003eAt bareMinerals, we have restricted over 2,500 ingredients, including the 1,400+ banned in the E.U.\u003c\/li\u003e\n\u003c\/ul\u003e"}
Micro-tip brow pencil that creates ultra-precise hair strokes.
Regular price
$23.00
Unit price
/ per
Powder
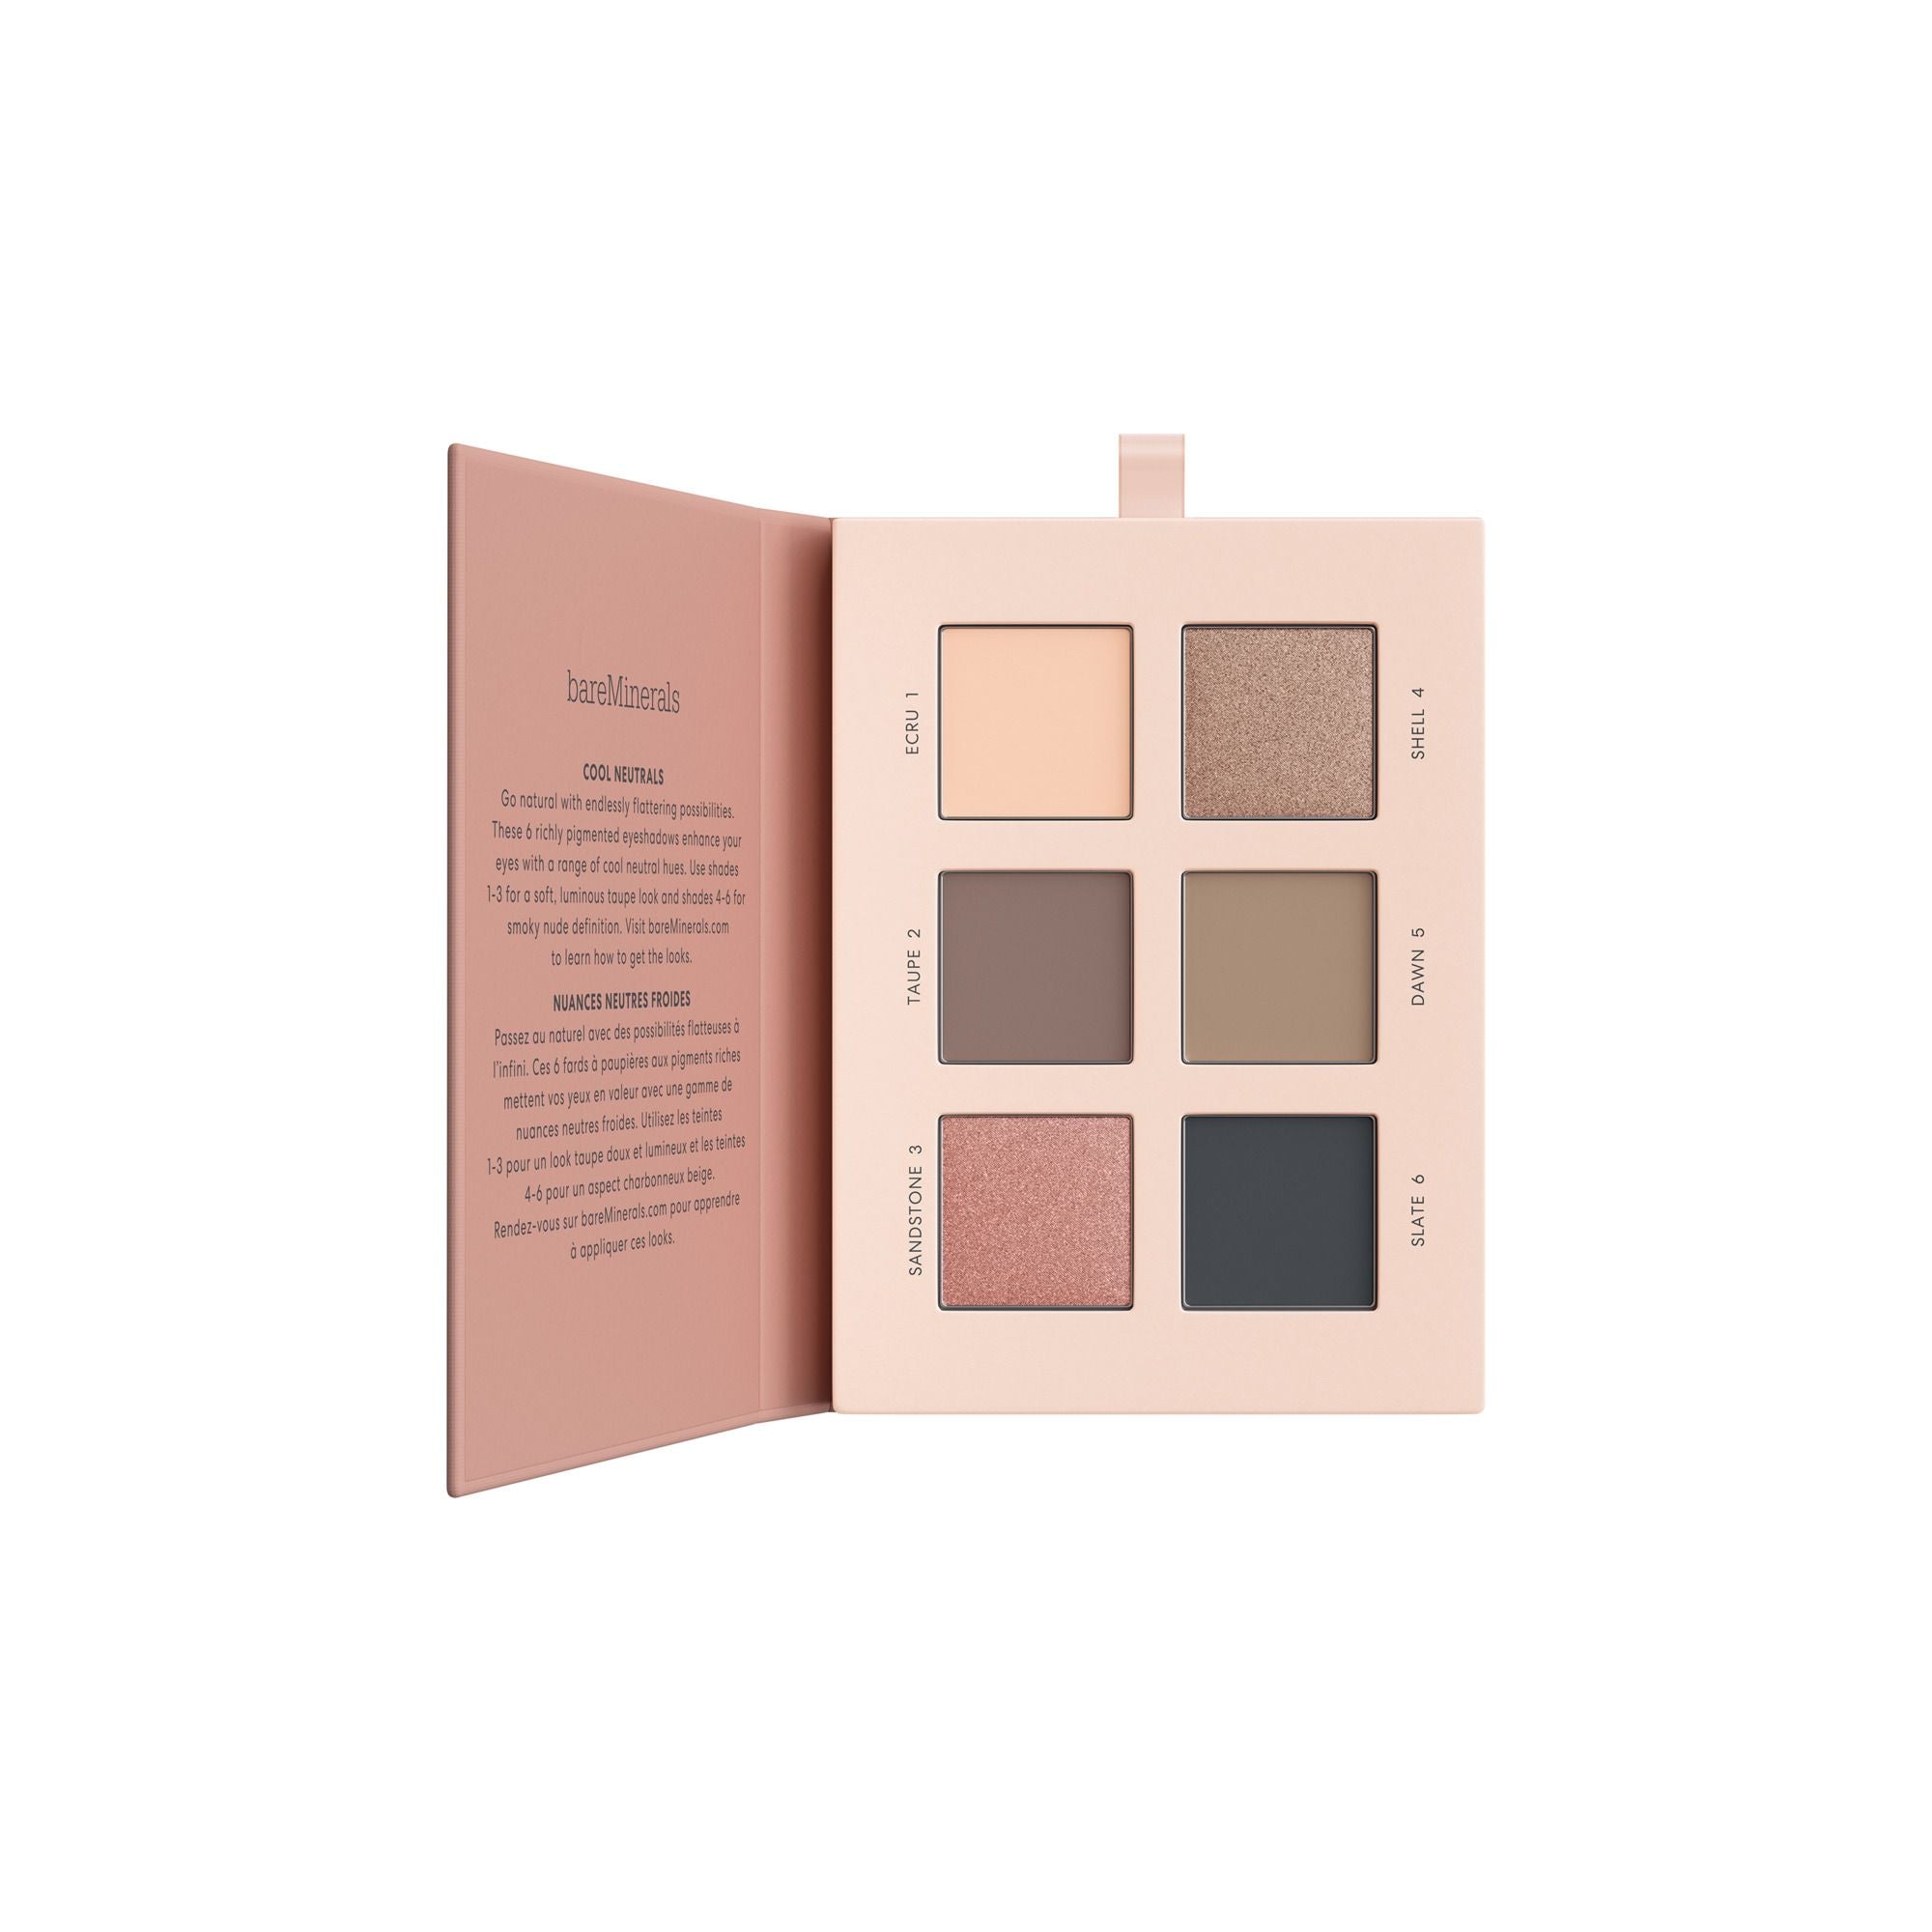
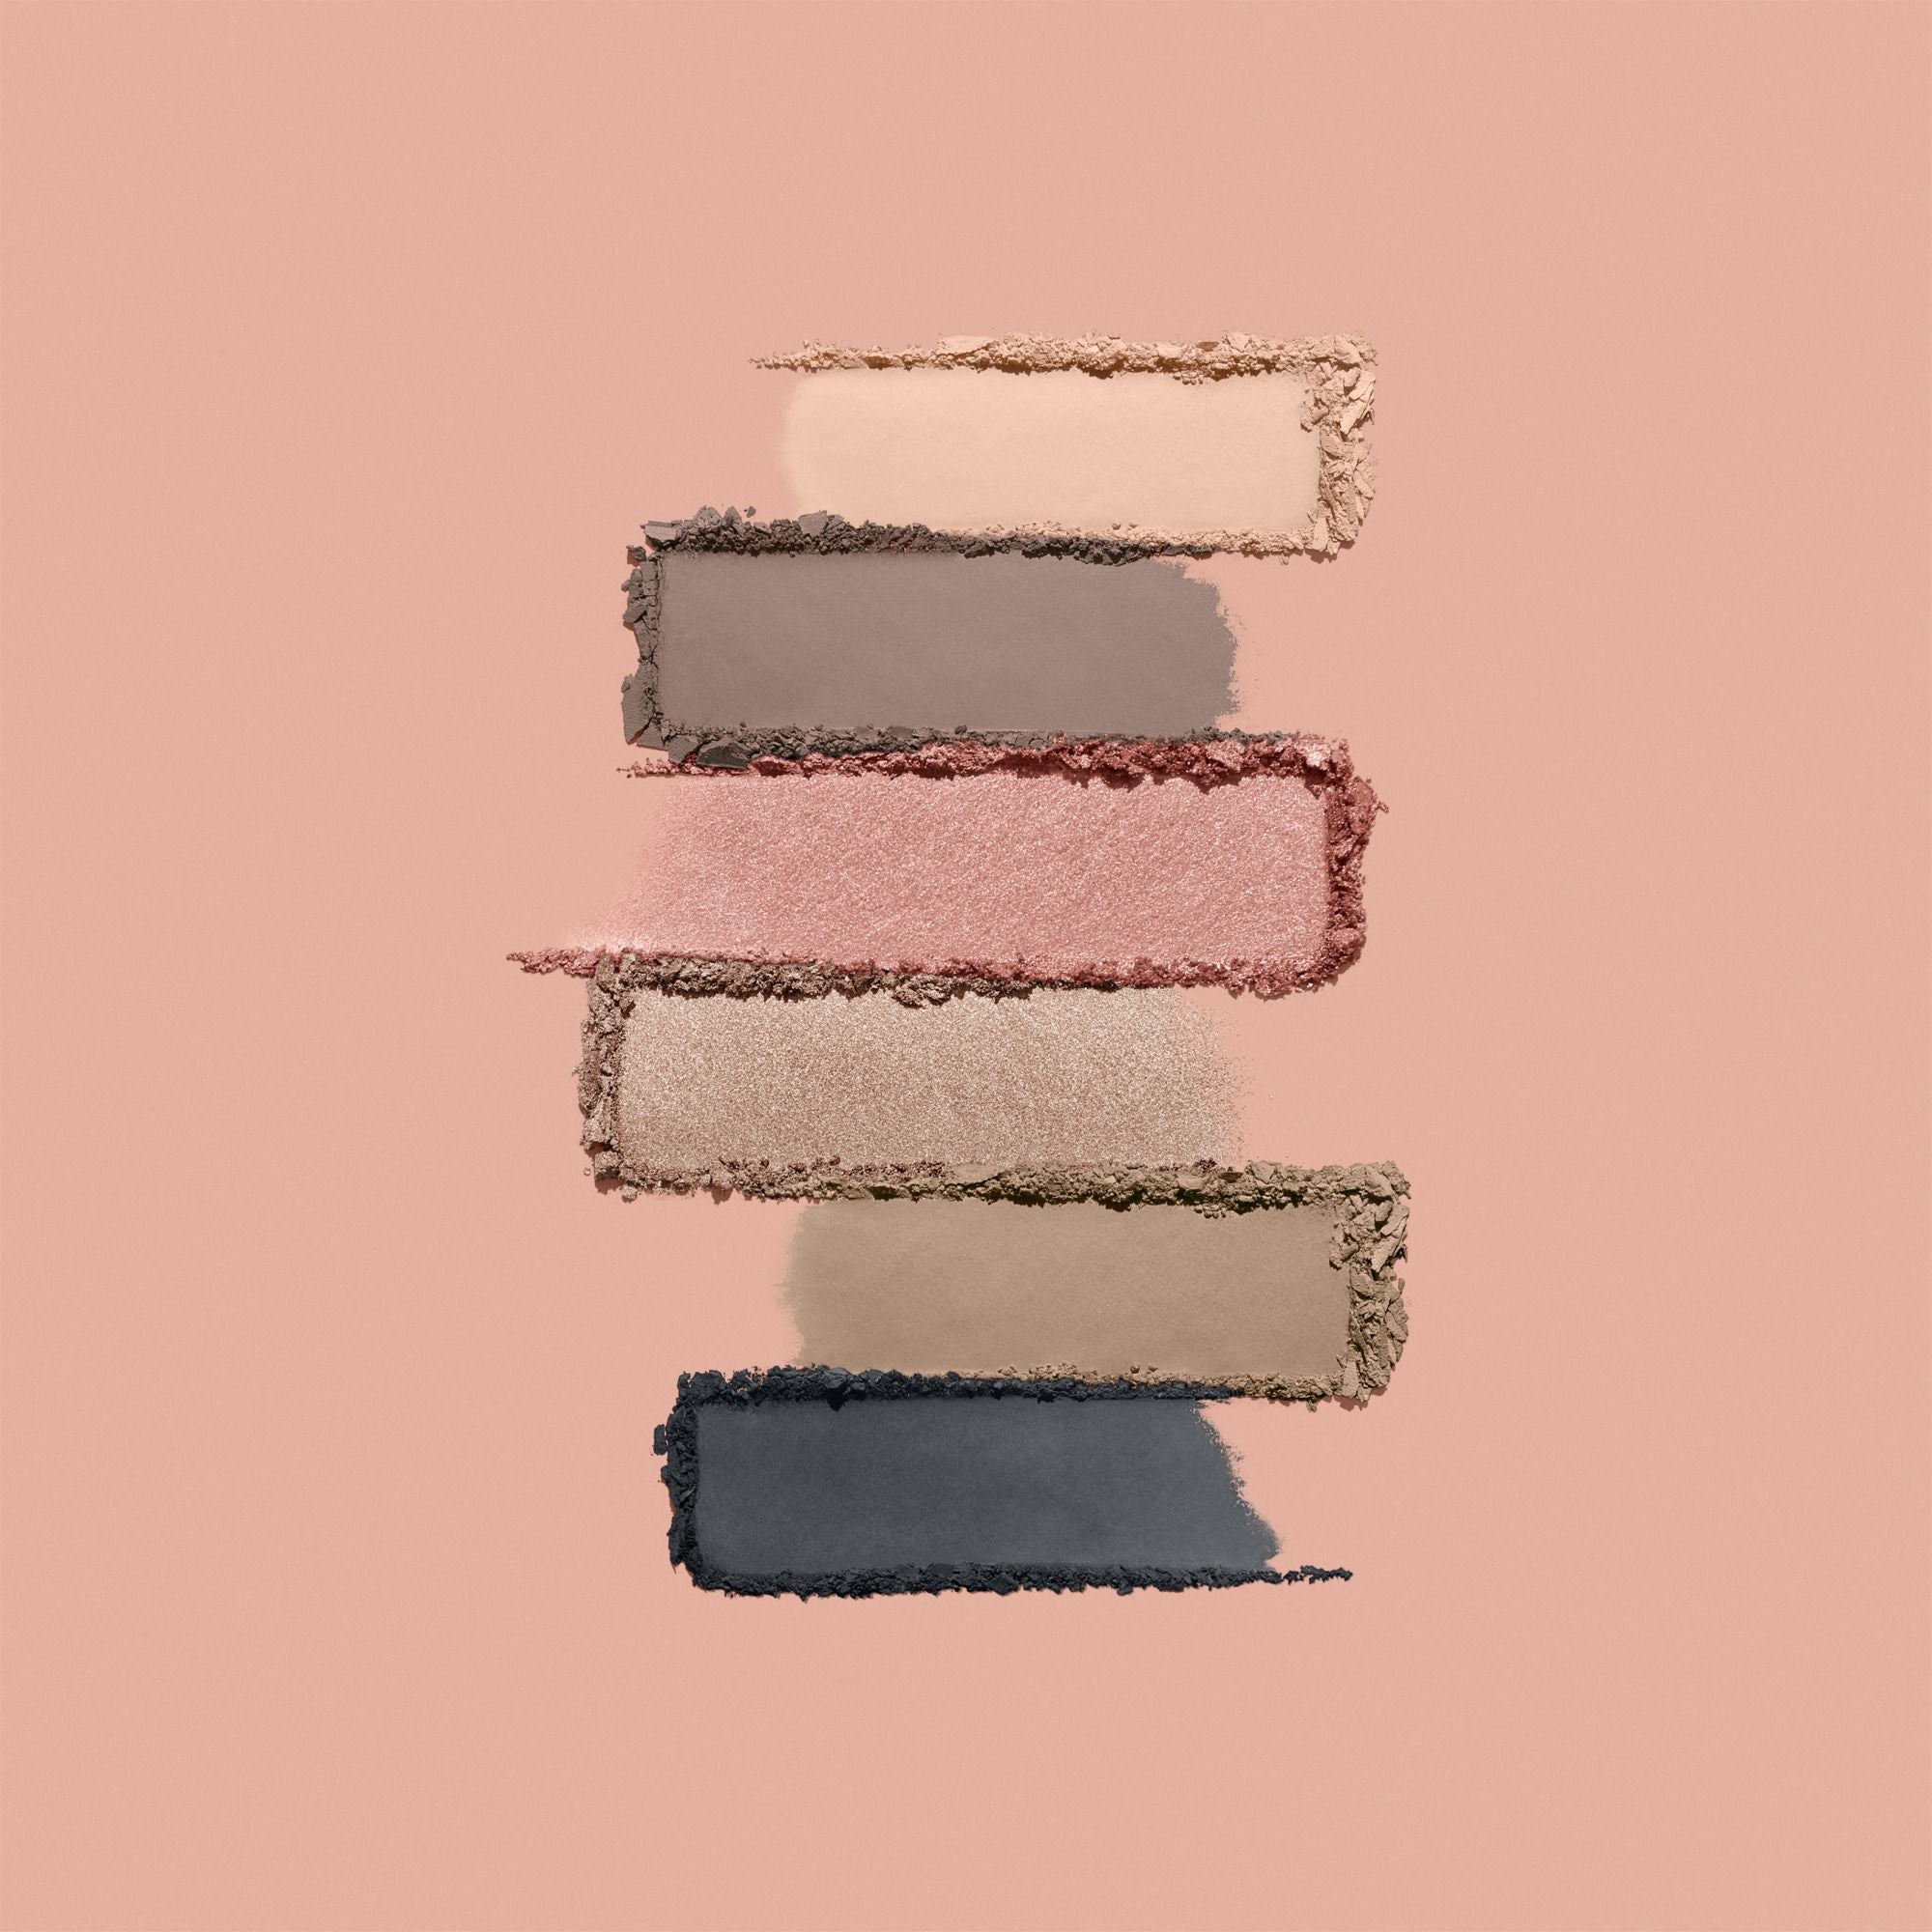
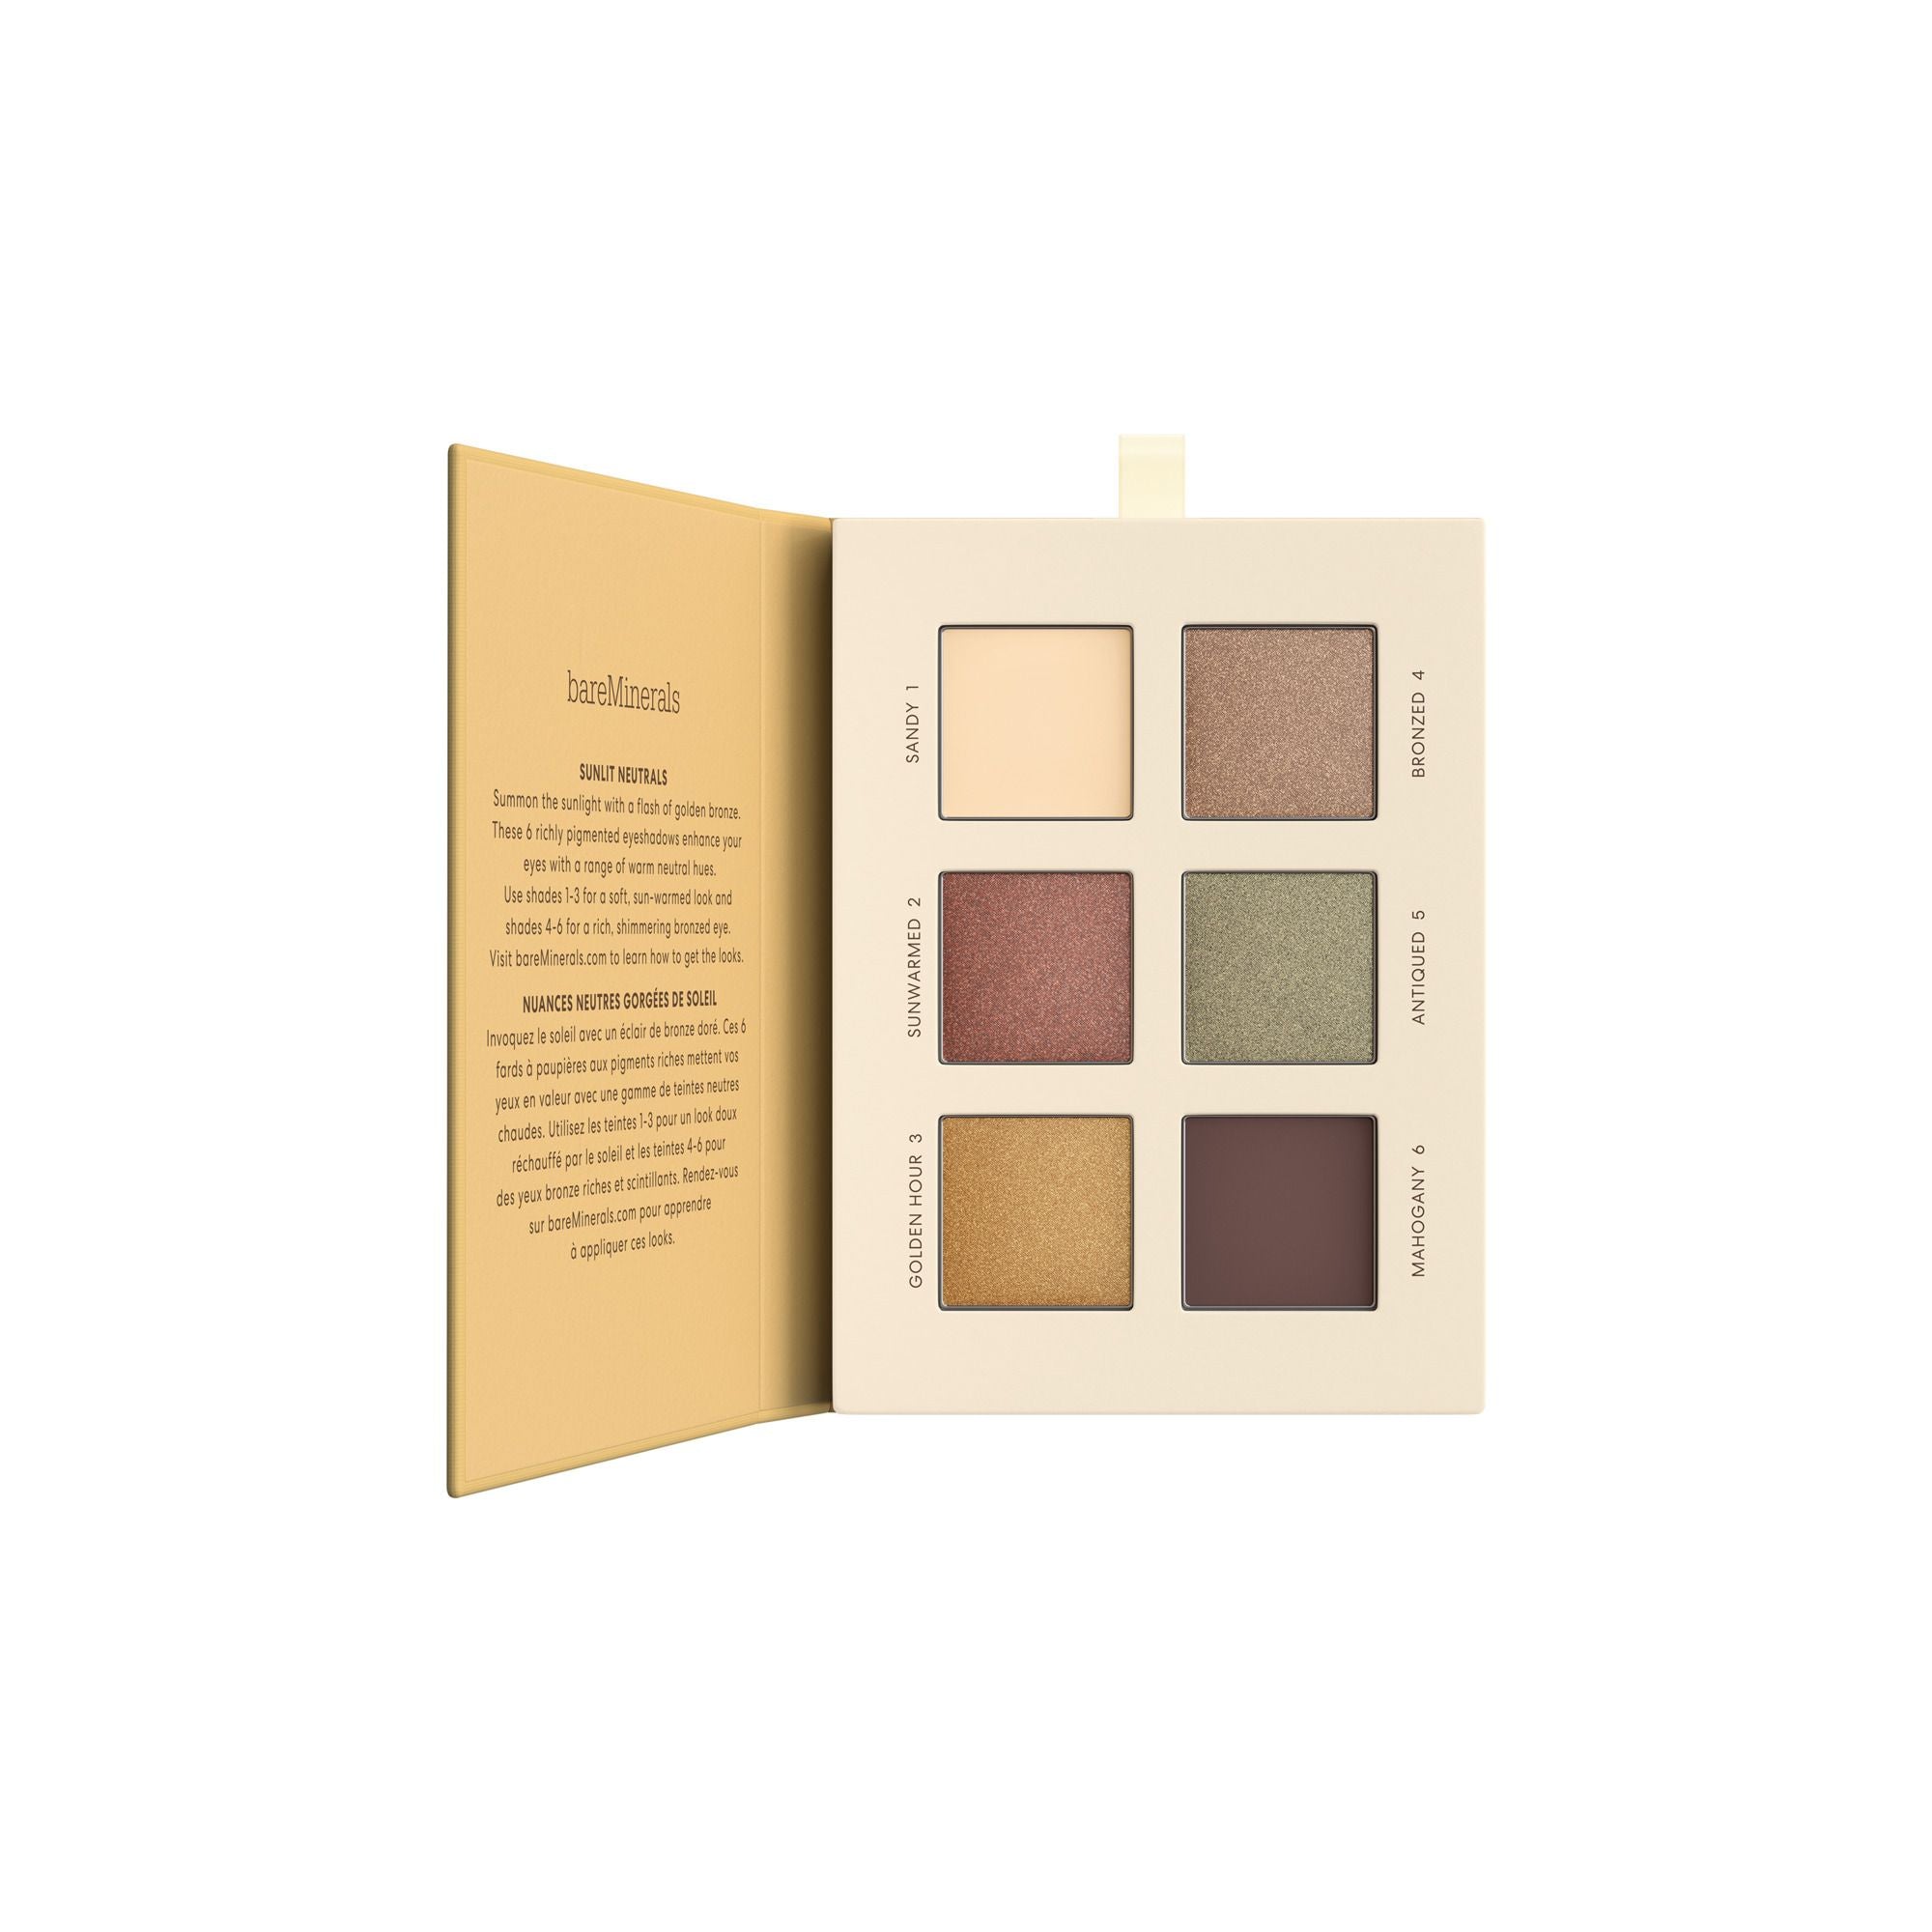
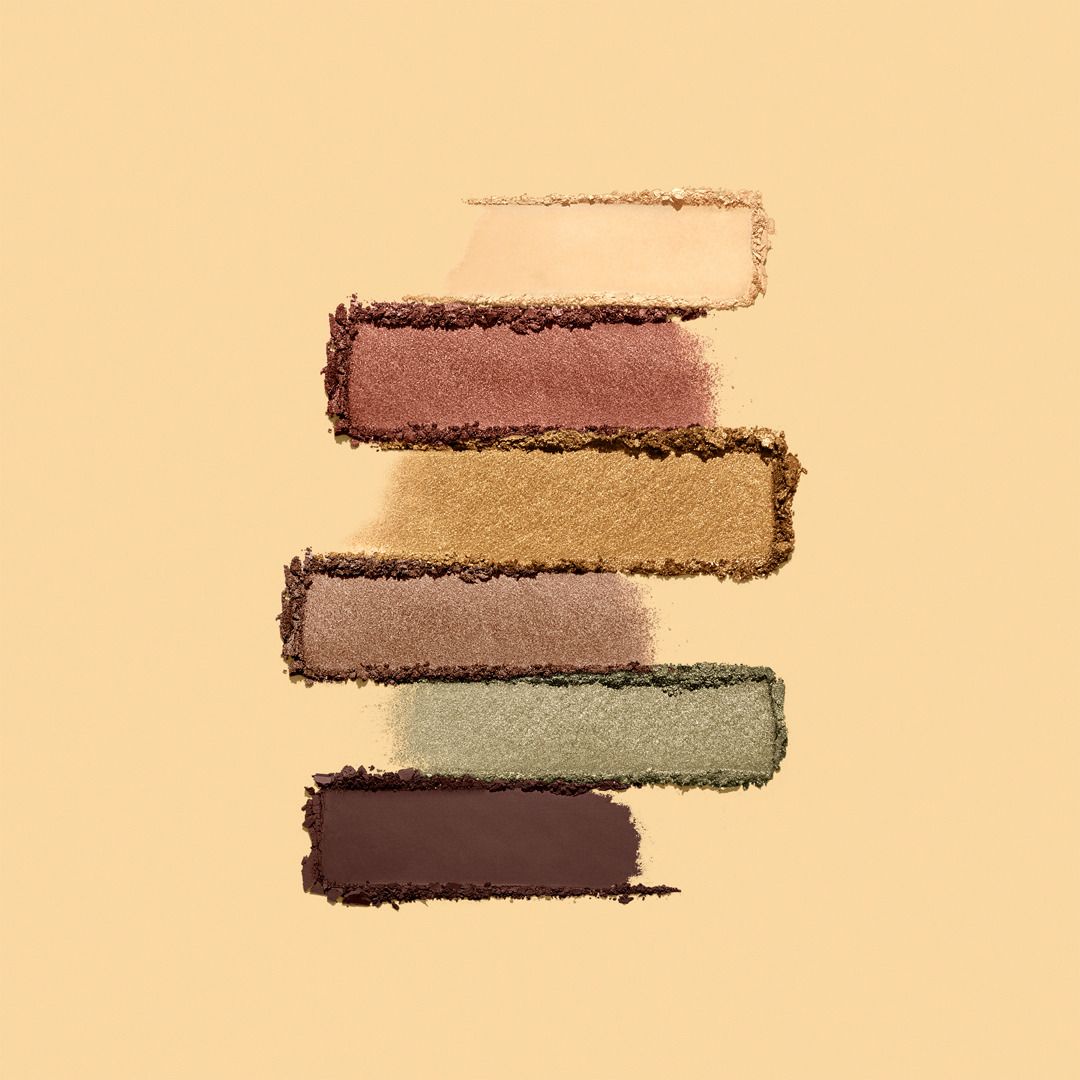
Did you know you can use a matte eyeshadow to help fill in your brows? This is a great way to go if you already have naturally fuller brows, which gives the pigments something to grip to. I like using a flat angled brush, to dip into the product and apply. I love our Mineralist Palettes for filling in brows - try using the shade Taupe from the MINERALIST Ultranatural Eyeshadow Palette or shade Mahogany from the MINERALIST Sunlit Eyeshadow Palette.
{"id":6892122505301,"title":"MINERALIST® Ultranatural Eyeshadow Palette","handle":"mineralist-ultranatural-eyeshadow-palette","description":"\u003ch4\u003eWhat it is:\u003c\/h4\u003e\n\u003cp\u003eGo au naturale with this talc-free, vegan eyeshadow palette featuring 6 richly pigmented, ultra-blendable rosy taupe and cool brown shades in a range of finishes.\u003c\/p\u003e\n\u003ch4\u003eWhat it does:\u003c\/h4\u003e\n\u003cul\u003e\n\u003cli\u003e6 cool rose, taupe and brown shades create endless looks\u003c\/li\u003e\n\u003cli\u003e4 velvety mattes and 2 luminous satins\u003c\/li\u003e\n\u003cli\u003eDelivers all-day, crease-proof wear\u003c\/li\u003e\n\u003cli\u003eCreamy textures easily build, blend and layer\u003c\/li\u003e\n\u003cli\u003eCold-pressed botanicals help to nourish and visibly smooth skin\u003c\/li\u003e\n\u003c\/ul\u003e\n\u003ch4\u003eConsumer tested:\u003c\/h4\u003e\n\u003cul\u003e\n\u003cli\u003e94% saw smoother eyelids*\u003c\/li\u003e\n\u003c\/ul\u003e\n\u003ch4\u003eWhy you'll love it:\u003c\/h4\u003e\n\u003cul\u003e\n\u003cli\u003e95% naturally derived ingredients**\u003c\/li\u003e\n\u003cli\u003eEco-friendly, sustainable packaging: fully recyclable, plastic-free — no mirror or magnets\u003c\/li\u003e\n\u003cli\u003eDermatologist-tested\u003c\/li\u003e\n\u003cli\u003eOphthalmologist-tested\u003c\/li\u003e\n\u003cli\u003eAllergy-tested\u003c\/li\u003e\n\u003cli\u003eSuitable for sensitive eyes and contact lens wearers\u003c\/li\u003e\n\u003cli\u003eCruelty-free\u003c\/li\u003e\n\u003cli\u003eVegan\u003c\/li\u003e\n\u003cli\u003eClean — Talc-free + formulated without parabens, formaldehyde, synthetic fragrance, gluten and more\u003c\/li\u003e\n\u003cli\u003eAt bareMinerals, we have restricted over 2,500 ingredients, including the 1,400+ banned in the E.U.\u003c\/li\u003e\n\u003c\/ul\u003e\n\u003ch4\u003eAwards:\u003c\/h4\u003e\n\u003cul\u003e\n\u003cli\u003eGood Housekeeping Beauty Awards - Outstanding Cosmetics (2022)\u003c\/li\u003e\n\u003c\/ul\u003e\n\u003cbr\u003e\n\u003cp\u003e*Based on a consumer study of 33 people. \u003cbr\u003e**Averaged across all MINERALIST Eyeshadows.\u003c\/p\u003e","published_at":"2023-01-26T11:03:40-05:00","created_at":"2023-01-26T11:03:40-05:00","vendor":"Bare Minerals","type":"Eyeshadow","tags":["All Makeup","Amazon","Duel","Eye","Eyeshadow","Full Size Makeup GSK","Full Size Product","HO23Gifts50","Holiday Gifts 50","Makeup","Not Holiday","Valentine's Day","VTO"],"price":3300,"price_min":3300,"price_max":3300,"available":true,"price_varies":false,"compare_at_price":null,"compare_at_price_min":0,"compare_at_price_max":0,"compare_at_price_varies":false,"variants":[{"id":40494126891093,"title":"Default Title","option1":"Default Title","option2":null,"option3":null,"sku":"41701077101","requires_shipping":true,"taxable":true,"featured_image":null,"available":true,"name":"MINERALIST® Ultranatural Eyeshadow Palette","public_title":null,"options":["Default Title"],"price":3300,"weight":0,"compare_at_price":null,"inventory_management":"shopify","barcode":"194248015121","requires_selling_plan":false,"selling_plan_allocations":[],"quantity_rule":{"min":1,"max":null,"increment":1}}],"images":["\/\/www.bareminerals.com\/cdn\/shop\/products\/41701077101_BM_Mineralist_206-Pan_20Eyeshadow_20Palette_20-_20Ultranatural_Open_x4_JG_sRGB_LORES.jpg?v=1735215469","\/\/www.bareminerals.com\/cdn\/shop\/products\/BAR185_Mineralist_Eye_Product_Stylized_Smears_Ultranatural_HIRES300_sRGB_LORES_112a3fb3-a05c-46b8-a3b9-979ddf394f64.jpg?v=1735215469","\/\/www.bareminerals.com\/cdn\/shop\/products\/41701077101_ULTRANATURAL_PALETTE_ARMSWATCH_SUPERS_HIRES300_COLORPROFIL_CMYK_LORES_9a563d06-7633-4e94-b252-455713cafcd7.jpg?v=1736366350","\/\/www.bareminerals.com\/cdn\/shop\/products\/MineralistEyeshadowPalette_HowTo_ULTRANATURAL_HIRES300_COLORPROFILE_sRGB_LORES_220b4563-901f-4dab-aa6f-ef86514017c1.jpg?v=1735215470","\/\/www.bareminerals.com\/cdn\/shop\/products\/MineralistEyeshadowPalette_CloseUp_ULTRANATURAL_HIRES300_COLORPROFILE_sRGB_LORES_de0c86bf-5e18-4c42-9ee3-3659ae5069b1.jpg?v=1735215470","\/\/www.bareminerals.com\/cdn\/shop\/products\/SHOT_13_BAR185_Mineralist_Eye_Product_Stylized_Palette_with_smears_Ultranatural_04_LORES_1dfd6cd1-9712-44c8-9335-32ce0f218308.jpg?v=1735215470"],"featured_image":"\/\/www.bareminerals.com\/cdn\/shop\/products\/41701077101_BM_Mineralist_206-Pan_20Eyeshadow_20Palette_20-_20Ultranatural_Open_x4_JG_sRGB_LORES.jpg?v=1735215469","options":["Title"],"media":[{"alt":null,"id":22534435373141,"position":1,"preview_image":{"aspect_ratio":1.0,"height":2000,"width":2000,"src":"\/\/www.bareminerals.com\/cdn\/shop\/products\/41701077101_BM_Mineralist_206-Pan_20Eyeshadow_20Palette_20-_20Ultranatural_Open_x4_JG_sRGB_LORES.jpg?v=1735215469"},"aspect_ratio":1.0,"height":2000,"media_type":"image","src":"\/\/www.bareminerals.com\/cdn\/shop\/products\/41701077101_BM_Mineralist_206-Pan_20Eyeshadow_20Palette_20-_20Ultranatural_Open_x4_JG_sRGB_LORES.jpg?v=1735215469","width":2000},{"alt":null,"id":22534435602517,"position":2,"preview_image":{"aspect_ratio":1.0,"height":2000,"width":2000,"src":"\/\/www.bareminerals.com\/cdn\/shop\/products\/BAR185_Mineralist_Eye_Product_Stylized_Smears_Ultranatural_HIRES300_sRGB_LORES_112a3fb3-a05c-46b8-a3b9-979ddf394f64.jpg?v=1735215469"},"aspect_ratio":1.0,"height":2000,"media_type":"image","src":"\/\/www.bareminerals.com\/cdn\/shop\/products\/BAR185_Mineralist_Eye_Product_Stylized_Smears_Ultranatural_HIRES300_sRGB_LORES_112a3fb3-a05c-46b8-a3b9-979ddf394f64.jpg?v=1735215469","width":2000},{"alt":null,"id":22534435471445,"position":3,"preview_image":{"aspect_ratio":1.0,"height":2000,"width":2000,"src":"\/\/www.bareminerals.com\/cdn\/shop\/products\/41701077101_ULTRANATURAL_PALETTE_ARMSWATCH_SUPERS_HIRES300_COLORPROFIL_CMYK_LORES_9a563d06-7633-4e94-b252-455713cafcd7.jpg?v=1736366350"},"aspect_ratio":1.0,"height":2000,"media_type":"image","src":"\/\/www.bareminerals.com\/cdn\/shop\/products\/41701077101_ULTRANATURAL_PALETTE_ARMSWATCH_SUPERS_HIRES300_COLORPROFIL_CMYK_LORES_9a563d06-7633-4e94-b252-455713cafcd7.jpg?v=1736366350","width":2000},{"alt":null,"id":22534435700821,"position":4,"preview_image":{"aspect_ratio":1.0,"height":2000,"width":2000,"src":"\/\/www.bareminerals.com\/cdn\/shop\/products\/MineralistEyeshadowPalette_HowTo_ULTRANATURAL_HIRES300_COLORPROFILE_sRGB_LORES_220b4563-901f-4dab-aa6f-ef86514017c1.jpg?v=1735215470"},"aspect_ratio":1.0,"height":2000,"media_type":"image","src":"\/\/www.bareminerals.com\/cdn\/shop\/products\/MineralistEyeshadowPalette_HowTo_ULTRANATURAL_HIRES300_COLORPROFILE_sRGB_LORES_220b4563-901f-4dab-aa6f-ef86514017c1.jpg?v=1735215470","width":2000},{"alt":null,"id":22534435569749,"position":5,"preview_image":{"aspect_ratio":1.0,"height":2000,"width":2000,"src":"\/\/www.bareminerals.com\/cdn\/shop\/products\/MineralistEyeshadowPalette_CloseUp_ULTRANATURAL_HIRES300_COLORPROFILE_sRGB_LORES_de0c86bf-5e18-4c42-9ee3-3659ae5069b1.jpg?v=1735215470"},"aspect_ratio":1.0,"height":2000,"media_type":"image","src":"\/\/www.bareminerals.com\/cdn\/shop\/products\/MineralistEyeshadowPalette_CloseUp_ULTRANATURAL_HIRES300_COLORPROFILE_sRGB_LORES_de0c86bf-5e18-4c42-9ee3-3659ae5069b1.jpg?v=1735215470","width":2000},{"alt":null,"id":22534435766357,"position":6,"preview_image":{"aspect_ratio":1.0,"height":2000,"width":2000,"src":"\/\/www.bareminerals.com\/cdn\/shop\/products\/SHOT_13_BAR185_Mineralist_Eye_Product_Stylized_Palette_with_smears_Ultranatural_04_LORES_1dfd6cd1-9712-44c8-9335-32ce0f218308.jpg?v=1735215470"},"aspect_ratio":1.0,"height":2000,"media_type":"image","src":"\/\/www.bareminerals.com\/cdn\/shop\/products\/SHOT_13_BAR185_Mineralist_Eye_Product_Stylized_Palette_with_smears_Ultranatural_04_LORES_1dfd6cd1-9712-44c8-9335-32ce0f218308.jpg?v=1735215470","width":2000},{"alt":null,"id":23062225387605,"position":7,"preview_image":{"aspect_ratio":1.333,"height":360,"width":480,"src":"\/\/www.bareminerals.com\/cdn\/shop\/files\/preview_images\/hqdefault_ac0378e3-bae1-450d-b141-ac9c6f1e3518.jpg?v=1694020037"},"aspect_ratio":1.77,"external_id":"5w8diDGnrfE","host":"youtube","media_type":"external_video"}],"requires_selling_plan":false,"selling_plan_groups":[],"content":"\u003ch4\u003eWhat it is:\u003c\/h4\u003e\n\u003cp\u003eGo au naturale with this talc-free, vegan eyeshadow palette featuring 6 richly pigmented, ultra-blendable rosy taupe and cool brown shades in a range of finishes.\u003c\/p\u003e\n\u003ch4\u003eWhat it does:\u003c\/h4\u003e\n\u003cul\u003e\n\u003cli\u003e6 cool rose, taupe and brown shades create endless looks\u003c\/li\u003e\n\u003cli\u003e4 velvety mattes and 2 luminous satins\u003c\/li\u003e\n\u003cli\u003eDelivers all-day, crease-proof wear\u003c\/li\u003e\n\u003cli\u003eCreamy textures easily build, blend and layer\u003c\/li\u003e\n\u003cli\u003eCold-pressed botanicals help to nourish and visibly smooth skin\u003c\/li\u003e\n\u003c\/ul\u003e\n\u003ch4\u003eConsumer tested:\u003c\/h4\u003e\n\u003cul\u003e\n\u003cli\u003e94% saw smoother eyelids*\u003c\/li\u003e\n\u003c\/ul\u003e\n\u003ch4\u003eWhy you'll love it:\u003c\/h4\u003e\n\u003cul\u003e\n\u003cli\u003e95% naturally derived ingredients**\u003c\/li\u003e\n\u003cli\u003eEco-friendly, sustainable packaging: fully recyclable, plastic-free — no mirror or magnets\u003c\/li\u003e\n\u003cli\u003eDermatologist-tested\u003c\/li\u003e\n\u003cli\u003eOphthalmologist-tested\u003c\/li\u003e\n\u003cli\u003eAllergy-tested\u003c\/li\u003e\n\u003cli\u003eSuitable for sensitive eyes and contact lens wearers\u003c\/li\u003e\n\u003cli\u003eCruelty-free\u003c\/li\u003e\n\u003cli\u003eVegan\u003c\/li\u003e\n\u003cli\u003eClean — Talc-free + formulated without parabens, formaldehyde, synthetic fragrance, gluten and more\u003c\/li\u003e\n\u003cli\u003eAt bareMinerals, we have restricted over 2,500 ingredients, including the 1,400+ banned in the E.U.\u003c\/li\u003e\n\u003c\/ul\u003e\n\u003ch4\u003eAwards:\u003c\/h4\u003e\n\u003cul\u003e\n\u003cli\u003eGood Housekeeping Beauty Awards - Outstanding Cosmetics (2022)\u003c\/li\u003e\n\u003c\/ul\u003e\n\u003cbr\u003e\n\u003cp\u003e*Based on a consumer study of 33 people. \u003cbr\u003e**Averaged across all MINERALIST Eyeshadows.\u003c\/p\u003e"}{"id":6892122505301,"title":"MINERALIST® Ultranatural Eyeshadow Palette","handle":"mineralist-ultranatural-eyeshadow-palette","description":"\u003ch4\u003eWhat it is:\u003c\/h4\u003e\n\u003cp\u003eGo au naturale with this talc-free, vegan eyeshadow palette featuring 6 richly pigmented, ultra-blendable rosy taupe and cool brown shades in a range of finishes.\u003c\/p\u003e\n\u003ch4\u003eWhat it does:\u003c\/h4\u003e\n\u003cul\u003e\n\u003cli\u003e6 cool rose, taupe and brown shades create endless looks\u003c\/li\u003e\n\u003cli\u003e4 velvety mattes and 2 luminous satins\u003c\/li\u003e\n\u003cli\u003eDelivers all-day, crease-proof wear\u003c\/li\u003e\n\u003cli\u003eCreamy textures easily build, blend and layer\u003c\/li\u003e\n\u003cli\u003eCold-pressed botanicals help to nourish and visibly smooth skin\u003c\/li\u003e\n\u003c\/ul\u003e\n\u003ch4\u003eConsumer tested:\u003c\/h4\u003e\n\u003cul\u003e\n\u003cli\u003e94% saw smoother eyelids*\u003c\/li\u003e\n\u003c\/ul\u003e\n\u003ch4\u003eWhy you'll love it:\u003c\/h4\u003e\n\u003cul\u003e\n\u003cli\u003e95% naturally derived ingredients**\u003c\/li\u003e\n\u003cli\u003eEco-friendly, sustainable packaging: fully recyclable, plastic-free — no mirror or magnets\u003c\/li\u003e\n\u003cli\u003eDermatologist-tested\u003c\/li\u003e\n\u003cli\u003eOphthalmologist-tested\u003c\/li\u003e\n\u003cli\u003eAllergy-tested\u003c\/li\u003e\n\u003cli\u003eSuitable for sensitive eyes and contact lens wearers\u003c\/li\u003e\n\u003cli\u003eCruelty-free\u003c\/li\u003e\n\u003cli\u003eVegan\u003c\/li\u003e\n\u003cli\u003eClean — Talc-free + formulated without parabens, formaldehyde, synthetic fragrance, gluten and more\u003c\/li\u003e\n\u003cli\u003eAt bareMinerals, we have restricted over 2,500 ingredients, including the 1,400+ banned in the E.U.\u003c\/li\u003e\n\u003c\/ul\u003e\n\u003ch4\u003eAwards:\u003c\/h4\u003e\n\u003cul\u003e\n\u003cli\u003eGood Housekeeping Beauty Awards - Outstanding Cosmetics (2022)\u003c\/li\u003e\n\u003c\/ul\u003e\n\u003cbr\u003e\n\u003cp\u003e*Based on a consumer study of 33 people. \u003cbr\u003e**Averaged across all MINERALIST Eyeshadows.\u003c\/p\u003e","published_at":"2023-01-26T11:03:40-05:00","created_at":"2023-01-26T11:03:40-05:00","vendor":"Bare Minerals","type":"Eyeshadow","tags":["All Makeup","Amazon","Duel","Eye","Eyeshadow","Full Size Makeup GSK","Full Size Product","HO23Gifts50","Holiday Gifts 50","Makeup","Not Holiday","Valentine's Day","VTO"],"price":3300,"price_min":3300,"price_max":3300,"available":true,"price_varies":false,"compare_at_price":null,"compare_at_price_min":0,"compare_at_price_max":0,"compare_at_price_varies":false,"variants":[{"id":40494126891093,"title":"Default Title","option1":"Default Title","option2":null,"option3":null,"sku":"41701077101","requires_shipping":true,"taxable":true,"featured_image":null,"available":true,"name":"MINERALIST® Ultranatural Eyeshadow Palette","public_title":null,"options":["Default Title"],"price":3300,"weight":0,"compare_at_price":null,"inventory_management":"shopify","barcode":"194248015121","requires_selling_plan":false,"selling_plan_allocations":[],"quantity_rule":{"min":1,"max":null,"increment":1}}],"images":["\/\/www.bareminerals.com\/cdn\/shop\/products\/41701077101_BM_Mineralist_206-Pan_20Eyeshadow_20Palette_20-_20Ultranatural_Open_x4_JG_sRGB_LORES.jpg?v=1735215469","\/\/www.bareminerals.com\/cdn\/shop\/products\/BAR185_Mineralist_Eye_Product_Stylized_Smears_Ultranatural_HIRES300_sRGB_LORES_112a3fb3-a05c-46b8-a3b9-979ddf394f64.jpg?v=1735215469","\/\/www.bareminerals.com\/cdn\/shop\/products\/41701077101_ULTRANATURAL_PALETTE_ARMSWATCH_SUPERS_HIRES300_COLORPROFIL_CMYK_LORES_9a563d06-7633-4e94-b252-455713cafcd7.jpg?v=1736366350","\/\/www.bareminerals.com\/cdn\/shop\/products\/MineralistEyeshadowPalette_HowTo_ULTRANATURAL_HIRES300_COLORPROFILE_sRGB_LORES_220b4563-901f-4dab-aa6f-ef86514017c1.jpg?v=1735215470","\/\/www.bareminerals.com\/cdn\/shop\/products\/MineralistEyeshadowPalette_CloseUp_ULTRANATURAL_HIRES300_COLORPROFILE_sRGB_LORES_de0c86bf-5e18-4c42-9ee3-3659ae5069b1.jpg?v=1735215470","\/\/www.bareminerals.com\/cdn\/shop\/products\/SHOT_13_BAR185_Mineralist_Eye_Product_Stylized_Palette_with_smears_Ultranatural_04_LORES_1dfd6cd1-9712-44c8-9335-32ce0f218308.jpg?v=1735215470"],"featured_image":"\/\/www.bareminerals.com\/cdn\/shop\/products\/41701077101_BM_Mineralist_206-Pan_20Eyeshadow_20Palette_20-_20Ultranatural_Open_x4_JG_sRGB_LORES.jpg?v=1735215469","options":["Title"],"media":[{"alt":null,"id":22534435373141,"position":1,"preview_image":{"aspect_ratio":1.0,"height":2000,"width":2000,"src":"\/\/www.bareminerals.com\/cdn\/shop\/products\/41701077101_BM_Mineralist_206-Pan_20Eyeshadow_20Palette_20-_20Ultranatural_Open_x4_JG_sRGB_LORES.jpg?v=1735215469"},"aspect_ratio":1.0,"height":2000,"media_type":"image","src":"\/\/www.bareminerals.com\/cdn\/shop\/products\/41701077101_BM_Mineralist_206-Pan_20Eyeshadow_20Palette_20-_20Ultranatural_Open_x4_JG_sRGB_LORES.jpg?v=1735215469","width":2000},{"alt":null,"id":22534435602517,"position":2,"preview_image":{"aspect_ratio":1.0,"height":2000,"width":2000,"src":"\/\/www.bareminerals.com\/cdn\/shop\/products\/BAR185_Mineralist_Eye_Product_Stylized_Smears_Ultranatural_HIRES300_sRGB_LORES_112a3fb3-a05c-46b8-a3b9-979ddf394f64.jpg?v=1735215469"},"aspect_ratio":1.0,"height":2000,"media_type":"image","src":"\/\/www.bareminerals.com\/cdn\/shop\/products\/BAR185_Mineralist_Eye_Product_Stylized_Smears_Ultranatural_HIRES300_sRGB_LORES_112a3fb3-a05c-46b8-a3b9-979ddf394f64.jpg?v=1735215469","width":2000},{"alt":null,"id":22534435471445,"position":3,"preview_image":{"aspect_ratio":1.0,"height":2000,"width":2000,"src":"\/\/www.bareminerals.com\/cdn\/shop\/products\/41701077101_ULTRANATURAL_PALETTE_ARMSWATCH_SUPERS_HIRES300_COLORPROFIL_CMYK_LORES_9a563d06-7633-4e94-b252-455713cafcd7.jpg?v=1736366350"},"aspect_ratio":1.0,"height":2000,"media_type":"image","src":"\/\/www.bareminerals.com\/cdn\/shop\/products\/41701077101_ULTRANATURAL_PALETTE_ARMSWATCH_SUPERS_HIRES300_COLORPROFIL_CMYK_LORES_9a563d06-7633-4e94-b252-455713cafcd7.jpg?v=1736366350","width":2000},{"alt":null,"id":22534435700821,"position":4,"preview_image":{"aspect_ratio":1.0,"height":2000,"width":2000,"src":"\/\/www.bareminerals.com\/cdn\/shop\/products\/MineralistEyeshadowPalette_HowTo_ULTRANATURAL_HIRES300_COLORPROFILE_sRGB_LORES_220b4563-901f-4dab-aa6f-ef86514017c1.jpg?v=1735215470"},"aspect_ratio":1.0,"height":2000,"media_type":"image","src":"\/\/www.bareminerals.com\/cdn\/shop\/products\/MineralistEyeshadowPalette_HowTo_ULTRANATURAL_HIRES300_COLORPROFILE_sRGB_LORES_220b4563-901f-4dab-aa6f-ef86514017c1.jpg?v=1735215470","width":2000},{"alt":null,"id":22534435569749,"position":5,"preview_image":{"aspect_ratio":1.0,"height":2000,"width":2000,"src":"\/\/www.bareminerals.com\/cdn\/shop\/products\/MineralistEyeshadowPalette_CloseUp_ULTRANATURAL_HIRES300_COLORPROFILE_sRGB_LORES_de0c86bf-5e18-4c42-9ee3-3659ae5069b1.jpg?v=1735215470"},"aspect_ratio":1.0,"height":2000,"media_type":"image","src":"\/\/www.bareminerals.com\/cdn\/shop\/products\/MineralistEyeshadowPalette_CloseUp_ULTRANATURAL_HIRES300_COLORPROFILE_sRGB_LORES_de0c86bf-5e18-4c42-9ee3-3659ae5069b1.jpg?v=1735215470","width":2000},{"alt":null,"id":22534435766357,"position":6,"preview_image":{"aspect_ratio":1.0,"height":2000,"width":2000,"src":"\/\/www.bareminerals.com\/cdn\/shop\/products\/SHOT_13_BAR185_Mineralist_Eye_Product_Stylized_Palette_with_smears_Ultranatural_04_LORES_1dfd6cd1-9712-44c8-9335-32ce0f218308.jpg?v=1735215470"},"aspect_ratio":1.0,"height":2000,"media_type":"image","src":"\/\/www.bareminerals.com\/cdn\/shop\/products\/SHOT_13_BAR185_Mineralist_Eye_Product_Stylized_Palette_with_smears_Ultranatural_04_LORES_1dfd6cd1-9712-44c8-9335-32ce0f218308.jpg?v=1735215470","width":2000},{"alt":null,"id":23062225387605,"position":7,"preview_image":{"aspect_ratio":1.333,"height":360,"width":480,"src":"\/\/www.bareminerals.com\/cdn\/shop\/files\/preview_images\/hqdefault_ac0378e3-bae1-450d-b141-ac9c6f1e3518.jpg?v=1694020037"},"aspect_ratio":1.77,"external_id":"5w8diDGnrfE","host":"youtube","media_type":"external_video"}],"requires_selling_plan":false,"selling_plan_groups":[],"content":"\u003ch4\u003eWhat it is:\u003c\/h4\u003e\n\u003cp\u003eGo au naturale with this talc-free, vegan eyeshadow palette featuring 6 richly pigmented, ultra-blendable rosy taupe and cool brown shades in a range of finishes.\u003c\/p\u003e\n\u003ch4\u003eWhat it does:\u003c\/h4\u003e\n\u003cul\u003e\n\u003cli\u003e6 cool rose, taupe and brown shades create endless looks\u003c\/li\u003e\n\u003cli\u003e4 velvety mattes and 2 luminous satins\u003c\/li\u003e\n\u003cli\u003eDelivers all-day, crease-proof wear\u003c\/li\u003e\n\u003cli\u003eCreamy textures easily build, blend and layer\u003c\/li\u003e\n\u003cli\u003eCold-pressed botanicals help to nourish and visibly smooth skin\u003c\/li\u003e\n\u003c\/ul\u003e\n\u003ch4\u003eConsumer tested:\u003c\/h4\u003e\n\u003cul\u003e\n\u003cli\u003e94% saw smoother eyelids*\u003c\/li\u003e\n\u003c\/ul\u003e\n\u003ch4\u003eWhy you'll love it:\u003c\/h4\u003e\n\u003cul\u003e\n\u003cli\u003e95% naturally derived ingredients**\u003c\/li\u003e\n\u003cli\u003eEco-friendly, sustainable packaging: fully recyclable, plastic-free — no mirror or magnets\u003c\/li\u003e\n\u003cli\u003eDermatologist-tested\u003c\/li\u003e\n\u003cli\u003eOphthalmologist-tested\u003c\/li\u003e\n\u003cli\u003eAllergy-tested\u003c\/li\u003e\n\u003cli\u003eSuitable for sensitive eyes and contact lens wearers\u003c\/li\u003e\n\u003cli\u003eCruelty-free\u003c\/li\u003e\n\u003cli\u003eVegan\u003c\/li\u003e\n\u003cli\u003eClean — Talc-free + formulated without parabens, formaldehyde, synthetic fragrance, gluten and more\u003c\/li\u003e\n\u003cli\u003eAt bareMinerals, we have restricted over 2,500 ingredients, including the 1,400+ banned in the E.U.\u003c\/li\u003e\n\u003c\/ul\u003e\n\u003ch4\u003eAwards:\u003c\/h4\u003e\n\u003cul\u003e\n\u003cli\u003eGood Housekeeping Beauty Awards - Outstanding Cosmetics (2022)\u003c\/li\u003e\n\u003c\/ul\u003e\n\u003cbr\u003e\n\u003cp\u003e*Based on a consumer study of 33 people. \u003cbr\u003e**Averaged across all MINERALIST Eyeshadows.\u003c\/p\u003e"}
6 richly pigmented, ultra-blendable rosy taupe and cool brown shades.
Regular price
$33.00
Unit price
/ per
{"id":6892122701909,"title":"MINERALIST® Sunlit Eyeshadow Palette","handle":"mineralist-sunlit-eyeshadow-palette","description":"\u003ch4\u003eWhat it is:\u003c\/h4\u003e\n\u003cp\u003eSummon the sunlight with this talc-free, vegan eyeshadow palette featuring 6 richly pigmented, ultra-blendable sunwarmed bronze and copper shades in a range of finishes.\u003c\/p\u003e\n\u003ch4\u003eWhat it does:\u003c\/h4\u003e\n\u003cul\u003e\n\u003cli\u003e6 warm bronze, copper and golden tones create endless looks\u003c\/li\u003e\n\u003cli\u003e2 velvety mattes and 4 luminous satins\u003c\/li\u003e\n\u003cli\u003eDelivers all-day, crease-proof wear\u003c\/li\u003e\n\u003cli\u003eCreamy textures easily build, blend and layer\u003c\/li\u003e\n\u003cli\u003eCold-pressed botanicals help to nourish and visibly smooth skin\u003c\/li\u003e\n\u003c\/ul\u003e\n\u003ch4\u003eConsumer tested:\u003c\/h4\u003e\n\u003cul\u003e\n\u003cli\u003e94% saw smoother eyelids*\u003c\/li\u003e\n\u003c\/ul\u003e\n\u003ch4\u003eWhy you'll love it:\u003c\/h4\u003e\n\u003cul\u003e\n\u003cli\u003e95% naturally derived ingredients**\u003c\/li\u003e\n\u003cli\u003eEco-friendly, sustainable packaging: fully recyclable, plastic-free — no mirror or magnets\u003c\/li\u003e\n\u003cli\u003eDermatologist-tested\u003c\/li\u003e\n\u003cli\u003eOphthalmologist-tested\u003c\/li\u003e\n\u003cli\u003eAllergy-tested\u003c\/li\u003e\n\u003cli\u003eSuitable for sensitive eyes and contact lens wearers\u003c\/li\u003e\n\u003cli\u003eCruelty-free\u003c\/li\u003e\n\u003cli\u003eVegan\u003c\/li\u003e\n\u003cli\u003eClean — Talc-free + formulated without parabens, formaldehyde, synthetic fragrance, gluten and more\u003c\/li\u003e\n\u003cli\u003eAt bareMinerals, we have restricted over 2,500 ingredients, including the 1,400+ banned in the E.U.\u003c\/li\u003e\n\u003c\/ul\u003e\n\u003ch4\u003eAwards:\u003c\/h4\u003e\n\u003cul\u003e\n\u003cli\u003eGood Housekeeping Beauty Awards - Outstanding Cosmetics (2022)\u003c\/li\u003e\n\u003c\/ul\u003e\n\u003cbr\u003e\n\u003cp\u003e*Based on a consumer study of 33 people. \u003cbr\u003e**Averaged across all MINERALIST Eyeshadows.\u003c\/p\u003e","published_at":"2023-01-26T11:03:40-05:00","created_at":"2023-01-26T11:03:40-05:00","vendor":"Bare Minerals","type":"Eyeshadow","tags":["All Makeup","Amazon","Duel","Eye","Eyeshadow","Full Size Makeup GSK","Full Size Product","HO23Gifts50","Holiday Gifts 50","Makeup","Not Holiday","Valentine's Day","VTO"],"price":3300,"price_min":3300,"price_max":3300,"available":true,"price_varies":false,"compare_at_price":null,"compare_at_price_min":0,"compare_at_price_max":0,"compare_at_price_varies":false,"variants":[{"id":40494127087701,"title":"Default Title","option1":"Default Title","option2":null,"option3":null,"sku":"41701079101","requires_shipping":true,"taxable":true,"featured_image":null,"available":true,"name":"MINERALIST® Sunlit Eyeshadow Palette","public_title":null,"options":["Default Title"],"price":3300,"weight":0,"compare_at_price":null,"inventory_management":"shopify","barcode":"194248015145","requires_selling_plan":false,"selling_plan_allocations":[],"quantity_rule":{"min":1,"max":null,"increment":1}}],"images":["\/\/www.bareminerals.com\/cdn\/shop\/products\/41701079101_BM_Mineralist_206-Pan_20Eyeshadow_20Palette_20-_20Sunlit_Open_x6a_JG_sRGB_LORES_085e565a-e1b4-41e0-8396-491c02eb9005.jpg?v=1735215474","\/\/www.bareminerals.com\/cdn\/shop\/products\/BAR185_Mineralist_Eye_Product_Stylized_Smears_Sunlit_LORES72_sRGB_LORES_7de5b89e-ee4b-489c-b556-63a6b49f4dd1.jpg?v=1735215474","\/\/www.bareminerals.com\/cdn\/shop\/products\/41701079101_SUNLIT_PALETTE_ARMSWATCH_HIRES300_COLORPROFIL_Ulta_sRGB_LORES_60e6e5dd-9a63-49b5-9165-6d1ce40a0331.jpg?v=1736366350","\/\/www.bareminerals.com\/cdn\/shop\/products\/MineralistEyeshadowPalette_HowTo_SUNLIT_HIRES300_COLORPROFILE_sRGB_LORES_3d4b33db-56ec-4dcb-8f4a-ad1f7912f7da.jpg?v=1735215474","\/\/www.bareminerals.com\/cdn\/shop\/products\/MineralistEyeshadowPalette_CloseUp_SUNLIT_HIRES300_COLORPROFILE_sRGB_LORES_8fe443a2-a823-483f-9544-8001a00b98eb.jpg?v=1735215475","\/\/www.bareminerals.com\/cdn\/shop\/products\/SHOT_18_BAR185_Mineralist_Eye_Product_Stylized_Palette_with_smears_Sunlit_04_LORES_f3010228-8039-4b3f-acb3-7c531a8b51d3.jpg?v=1735215475"],"featured_image":"\/\/www.bareminerals.com\/cdn\/shop\/products\/41701079101_BM_Mineralist_206-Pan_20Eyeshadow_20Palette_20-_20Sunlit_Open_x6a_JG_sRGB_LORES_085e565a-e1b4-41e0-8396-491c02eb9005.jpg?v=1735215474","options":["Title"],"media":[{"alt":null,"id":22534275629141,"position":1,"preview_image":{"aspect_ratio":1.0,"height":2000,"width":2000,"src":"\/\/www.bareminerals.com\/cdn\/shop\/products\/41701079101_BM_Mineralist_206-Pan_20Eyeshadow_20Palette_20-_20Sunlit_Open_x6a_JG_sRGB_LORES_085e565a-e1b4-41e0-8396-491c02eb9005.jpg?v=1735215474"},"aspect_ratio":1.0,"height":2000,"media_type":"image","src":"\/\/www.bareminerals.com\/cdn\/shop\/products\/41701079101_BM_Mineralist_206-Pan_20Eyeshadow_20Palette_20-_20Sunlit_Open_x6a_JG_sRGB_LORES_085e565a-e1b4-41e0-8396-491c02eb9005.jpg?v=1735215474","width":2000},{"alt":null,"id":22534275891285,"position":2,"preview_image":{"aspect_ratio":1.0,"height":1080,"width":1080,"src":"\/\/www.bareminerals.com\/cdn\/shop\/products\/BAR185_Mineralist_Eye_Product_Stylized_Smears_Sunlit_LORES72_sRGB_LORES_7de5b89e-ee4b-489c-b556-63a6b49f4dd1.jpg?v=1735215474"},"aspect_ratio":1.0,"height":1080,"media_type":"image","src":"\/\/www.bareminerals.com\/cdn\/shop\/products\/BAR185_Mineralist_Eye_Product_Stylized_Smears_Sunlit_LORES72_sRGB_LORES_7de5b89e-ee4b-489c-b556-63a6b49f4dd1.jpg?v=1735215474","width":1080},{"alt":null,"id":22534275661909,"position":3,"preview_image":{"aspect_ratio":1.0,"height":2000,"width":2000,"src":"\/\/www.bareminerals.com\/cdn\/shop\/products\/41701079101_SUNLIT_PALETTE_ARMSWATCH_HIRES300_COLORPROFIL_Ulta_sRGB_LORES_60e6e5dd-9a63-49b5-9165-6d1ce40a0331.jpg?v=1736366350"},"aspect_ratio":1.0,"height":2000,"media_type":"image","src":"\/\/www.bareminerals.com\/cdn\/shop\/products\/41701079101_SUNLIT_PALETTE_ARMSWATCH_HIRES300_COLORPROFIL_Ulta_sRGB_LORES_60e6e5dd-9a63-49b5-9165-6d1ce40a0331.jpg?v=1736366350","width":2000},{"alt":null,"id":22534275924053,"position":4,"preview_image":{"aspect_ratio":1.0,"height":2000,"width":2000,"src":"\/\/www.bareminerals.com\/cdn\/shop\/products\/MineralistEyeshadowPalette_HowTo_SUNLIT_HIRES300_COLORPROFILE_sRGB_LORES_3d4b33db-56ec-4dcb-8f4a-ad1f7912f7da.jpg?v=1735215474"},"aspect_ratio":1.0,"height":2000,"media_type":"image","src":"\/\/www.bareminerals.com\/cdn\/shop\/products\/MineralistEyeshadowPalette_HowTo_SUNLIT_HIRES300_COLORPROFILE_sRGB_LORES_3d4b33db-56ec-4dcb-8f4a-ad1f7912f7da.jpg?v=1735215474","width":2000},{"alt":null,"id":22534275694677,"position":5,"preview_image":{"aspect_ratio":1.0,"height":2000,"width":2000,"src":"\/\/www.bareminerals.com\/cdn\/shop\/products\/MineralistEyeshadowPalette_CloseUp_SUNLIT_HIRES300_COLORPROFILE_sRGB_LORES_8fe443a2-a823-483f-9544-8001a00b98eb.jpg?v=1735215475"},"aspect_ratio":1.0,"height":2000,"media_type":"image","src":"\/\/www.bareminerals.com\/cdn\/shop\/products\/MineralistEyeshadowPalette_CloseUp_SUNLIT_HIRES300_COLORPROFILE_sRGB_LORES_8fe443a2-a823-483f-9544-8001a00b98eb.jpg?v=1735215475","width":2000},{"alt":null,"id":22534276350037,"position":6,"preview_image":{"aspect_ratio":1.0,"height":2000,"width":2000,"src":"\/\/www.bareminerals.com\/cdn\/shop\/products\/SHOT_18_BAR185_Mineralist_Eye_Product_Stylized_Palette_with_smears_Sunlit_04_LORES_f3010228-8039-4b3f-acb3-7c531a8b51d3.jpg?v=1735215475"},"aspect_ratio":1.0,"height":2000,"media_type":"image","src":"\/\/www.bareminerals.com\/cdn\/shop\/products\/SHOT_18_BAR185_Mineralist_Eye_Product_Stylized_Palette_with_smears_Sunlit_04_LORES_f3010228-8039-4b3f-acb3-7c531a8b51d3.jpg?v=1735215475","width":2000}],"requires_selling_plan":false,"selling_plan_groups":[],"content":"\u003ch4\u003eWhat it is:\u003c\/h4\u003e\n\u003cp\u003eSummon the sunlight with this talc-free, vegan eyeshadow palette featuring 6 richly pigmented, ultra-blendable sunwarmed bronze and copper shades in a range of finishes.\u003c\/p\u003e\n\u003ch4\u003eWhat it does:\u003c\/h4\u003e\n\u003cul\u003e\n\u003cli\u003e6 warm bronze, copper and golden tones create endless looks\u003c\/li\u003e\n\u003cli\u003e2 velvety mattes and 4 luminous satins\u003c\/li\u003e\n\u003cli\u003eDelivers all-day, crease-proof wear\u003c\/li\u003e\n\u003cli\u003eCreamy textures easily build, blend and layer\u003c\/li\u003e\n\u003cli\u003eCold-pressed botanicals help to nourish and visibly smooth skin\u003c\/li\u003e\n\u003c\/ul\u003e\n\u003ch4\u003eConsumer tested:\u003c\/h4\u003e\n\u003cul\u003e\n\u003cli\u003e94% saw smoother eyelids*\u003c\/li\u003e\n\u003c\/ul\u003e\n\u003ch4\u003eWhy you'll love it:\u003c\/h4\u003e\n\u003cul\u003e\n\u003cli\u003e95% naturally derived ingredients**\u003c\/li\u003e\n\u003cli\u003eEco-friendly, sustainable packaging: fully recyclable, plastic-free — no mirror or magnets\u003c\/li\u003e\n\u003cli\u003eDermatologist-tested\u003c\/li\u003e\n\u003cli\u003eOphthalmologist-tested\u003c\/li\u003e\n\u003cli\u003eAllergy-tested\u003c\/li\u003e\n\u003cli\u003eSuitable for sensitive eyes and contact lens wearers\u003c\/li\u003e\n\u003cli\u003eCruelty-free\u003c\/li\u003e\n\u003cli\u003eVegan\u003c\/li\u003e\n\u003cli\u003eClean — Talc-free + formulated without parabens, formaldehyde, synthetic fragrance, gluten and more\u003c\/li\u003e\n\u003cli\u003eAt bareMinerals, we have restricted over 2,500 ingredients, including the 1,400+ banned in the E.U.\u003c\/li\u003e\n\u003c\/ul\u003e\n\u003ch4\u003eAwards:\u003c\/h4\u003e\n\u003cul\u003e\n\u003cli\u003eGood Housekeeping Beauty Awards - Outstanding Cosmetics (2022)\u003c\/li\u003e\n\u003c\/ul\u003e\n\u003cbr\u003e\n\u003cp\u003e*Based on a consumer study of 33 people. \u003cbr\u003e**Averaged across all MINERALIST Eyeshadows.\u003c\/p\u003e"}{"id":6892122701909,"title":"MINERALIST® Sunlit Eyeshadow Palette","handle":"mineralist-sunlit-eyeshadow-palette","description":"\u003ch4\u003eWhat it is:\u003c\/h4\u003e\n\u003cp\u003eSummon the sunlight with this talc-free, vegan eyeshadow palette featuring 6 richly pigmented, ultra-blendable sunwarmed bronze and copper shades in a range of finishes.\u003c\/p\u003e\n\u003ch4\u003eWhat it does:\u003c\/h4\u003e\n\u003cul\u003e\n\u003cli\u003e6 warm bronze, copper and golden tones create endless looks\u003c\/li\u003e\n\u003cli\u003e2 velvety mattes and 4 luminous satins\u003c\/li\u003e\n\u003cli\u003eDelivers all-day, crease-proof wear\u003c\/li\u003e\n\u003cli\u003eCreamy textures easily build, blend and layer\u003c\/li\u003e\n\u003cli\u003eCold-pressed botanicals help to nourish and visibly smooth skin\u003c\/li\u003e\n\u003c\/ul\u003e\n\u003ch4\u003eConsumer tested:\u003c\/h4\u003e\n\u003cul\u003e\n\u003cli\u003e94% saw smoother eyelids*\u003c\/li\u003e\n\u003c\/ul\u003e\n\u003ch4\u003eWhy you'll love it:\u003c\/h4\u003e\n\u003cul\u003e\n\u003cli\u003e95% naturally derived ingredients**\u003c\/li\u003e\n\u003cli\u003eEco-friendly, sustainable packaging: fully recyclable, plastic-free — no mirror or magnets\u003c\/li\u003e\n\u003cli\u003eDermatologist-tested\u003c\/li\u003e\n\u003cli\u003eOphthalmologist-tested\u003c\/li\u003e\n\u003cli\u003eAllergy-tested\u003c\/li\u003e\n\u003cli\u003eSuitable for sensitive eyes and contact lens wearers\u003c\/li\u003e\n\u003cli\u003eCruelty-free\u003c\/li\u003e\n\u003cli\u003eVegan\u003c\/li\u003e\n\u003cli\u003eClean — Talc-free + formulated without parabens, formaldehyde, synthetic fragrance, gluten and more\u003c\/li\u003e\n\u003cli\u003eAt bareMinerals, we have restricted over 2,500 ingredients, including the 1,400+ banned in the E.U.\u003c\/li\u003e\n\u003c\/ul\u003e\n\u003ch4\u003eAwards:\u003c\/h4\u003e\n\u003cul\u003e\n\u003cli\u003eGood Housekeeping Beauty Awards - Outstanding Cosmetics (2022)\u003c\/li\u003e\n\u003c\/ul\u003e\n\u003cbr\u003e\n\u003cp\u003e*Based on a consumer study of 33 people. \u003cbr\u003e**Averaged across all MINERALIST Eyeshadows.\u003c\/p\u003e","published_at":"2023-01-26T11:03:40-05:00","created_at":"2023-01-26T11:03:40-05:00","vendor":"Bare Minerals","type":"Eyeshadow","tags":["All Makeup","Amazon","Duel","Eye","Eyeshadow","Full Size Makeup GSK","Full Size Product","HO23Gifts50","Holiday Gifts 50","Makeup","Not Holiday","Valentine's Day","VTO"],"price":3300,"price_min":3300,"price_max":3300,"available":true,"price_varies":false,"compare_at_price":null,"compare_at_price_min":0,"compare_at_price_max":0,"compare_at_price_varies":false,"variants":[{"id":40494127087701,"title":"Default Title","option1":"Default Title","option2":null,"option3":null,"sku":"41701079101","requires_shipping":true,"taxable":true,"featured_image":null,"available":true,"name":"MINERALIST® Sunlit Eyeshadow Palette","public_title":null,"options":["Default Title"],"price":3300,"weight":0,"compare_at_price":null,"inventory_management":"shopify","barcode":"194248015145","requires_selling_plan":false,"selling_plan_allocations":[],"quantity_rule":{"min":1,"max":null,"increment":1}}],"images":["\/\/www.bareminerals.com\/cdn\/shop\/products\/41701079101_BM_Mineralist_206-Pan_20Eyeshadow_20Palette_20-_20Sunlit_Open_x6a_JG_sRGB_LORES_085e565a-e1b4-41e0-8396-491c02eb9005.jpg?v=1735215474","\/\/www.bareminerals.com\/cdn\/shop\/products\/BAR185_Mineralist_Eye_Product_Stylized_Smears_Sunlit_LORES72_sRGB_LORES_7de5b89e-ee4b-489c-b556-63a6b49f4dd1.jpg?v=1735215474","\/\/www.bareminerals.com\/cdn\/shop\/products\/41701079101_SUNLIT_PALETTE_ARMSWATCH_HIRES300_COLORPROFIL_Ulta_sRGB_LORES_60e6e5dd-9a63-49b5-9165-6d1ce40a0331.jpg?v=1736366350","\/\/www.bareminerals.com\/cdn\/shop\/products\/MineralistEyeshadowPalette_HowTo_SUNLIT_HIRES300_COLORPROFILE_sRGB_LORES_3d4b33db-56ec-4dcb-8f4a-ad1f7912f7da.jpg?v=1735215474","\/\/www.bareminerals.com\/cdn\/shop\/products\/MineralistEyeshadowPalette_CloseUp_SUNLIT_HIRES300_COLORPROFILE_sRGB_LORES_8fe443a2-a823-483f-9544-8001a00b98eb.jpg?v=1735215475","\/\/www.bareminerals.com\/cdn\/shop\/products\/SHOT_18_BAR185_Mineralist_Eye_Product_Stylized_Palette_with_smears_Sunlit_04_LORES_f3010228-8039-4b3f-acb3-7c531a8b51d3.jpg?v=1735215475"],"featured_image":"\/\/www.bareminerals.com\/cdn\/shop\/products\/41701079101_BM_Mineralist_206-Pan_20Eyeshadow_20Palette_20-_20Sunlit_Open_x6a_JG_sRGB_LORES_085e565a-e1b4-41e0-8396-491c02eb9005.jpg?v=1735215474","options":["Title"],"media":[{"alt":null,"id":22534275629141,"position":1,"preview_image":{"aspect_ratio":1.0,"height":2000,"width":2000,"src":"\/\/www.bareminerals.com\/cdn\/shop\/products\/41701079101_BM_Mineralist_206-Pan_20Eyeshadow_20Palette_20-_20Sunlit_Open_x6a_JG_sRGB_LORES_085e565a-e1b4-41e0-8396-491c02eb9005.jpg?v=1735215474"},"aspect_ratio":1.0,"height":2000,"media_type":"image","src":"\/\/www.bareminerals.com\/cdn\/shop\/products\/41701079101_BM_Mineralist_206-Pan_20Eyeshadow_20Palette_20-_20Sunlit_Open_x6a_JG_sRGB_LORES_085e565a-e1b4-41e0-8396-491c02eb9005.jpg?v=1735215474","width":2000},{"alt":null,"id":22534275891285,"position":2,"preview_image":{"aspect_ratio":1.0,"height":1080,"width":1080,"src":"\/\/www.bareminerals.com\/cdn\/shop\/products\/BAR185_Mineralist_Eye_Product_Stylized_Smears_Sunlit_LORES72_sRGB_LORES_7de5b89e-ee4b-489c-b556-63a6b49f4dd1.jpg?v=1735215474"},"aspect_ratio":1.0,"height":1080,"media_type":"image","src":"\/\/www.bareminerals.com\/cdn\/shop\/products\/BAR185_Mineralist_Eye_Product_Stylized_Smears_Sunlit_LORES72_sRGB_LORES_7de5b89e-ee4b-489c-b556-63a6b49f4dd1.jpg?v=1735215474","width":1080},{"alt":null,"id":22534275661909,"position":3,"preview_image":{"aspect_ratio":1.0,"height":2000,"width":2000,"src":"\/\/www.bareminerals.com\/cdn\/shop\/products\/41701079101_SUNLIT_PALETTE_ARMSWATCH_HIRES300_COLORPROFIL_Ulta_sRGB_LORES_60e6e5dd-9a63-49b5-9165-6d1ce40a0331.jpg?v=1736366350"},"aspect_ratio":1.0,"height":2000,"media_type":"image","src":"\/\/www.bareminerals.com\/cdn\/shop\/products\/41701079101_SUNLIT_PALETTE_ARMSWATCH_HIRES300_COLORPROFIL_Ulta_sRGB_LORES_60e6e5dd-9a63-49b5-9165-6d1ce40a0331.jpg?v=1736366350","width":2000},{"alt":null,"id":22534275924053,"position":4,"preview_image":{"aspect_ratio":1.0,"height":2000,"width":2000,"src":"\/\/www.bareminerals.com\/cdn\/shop\/products\/MineralistEyeshadowPalette_HowTo_SUNLIT_HIRES300_COLORPROFILE_sRGB_LORES_3d4b33db-56ec-4dcb-8f4a-ad1f7912f7da.jpg?v=1735215474"},"aspect_ratio":1.0,"height":2000,"media_type":"image","src":"\/\/www.bareminerals.com\/cdn\/shop\/products\/MineralistEyeshadowPalette_HowTo_SUNLIT_HIRES300_COLORPROFILE_sRGB_LORES_3d4b33db-56ec-4dcb-8f4a-ad1f7912f7da.jpg?v=1735215474","width":2000},{"alt":null,"id":22534275694677,"position":5,"preview_image":{"aspect_ratio":1.0,"height":2000,"width":2000,"src":"\/\/www.bareminerals.com\/cdn\/shop\/products\/MineralistEyeshadowPalette_CloseUp_SUNLIT_HIRES300_COLORPROFILE_sRGB_LORES_8fe443a2-a823-483f-9544-8001a00b98eb.jpg?v=1735215475"},"aspect_ratio":1.0,"height":2000,"media_type":"image","src":"\/\/www.bareminerals.com\/cdn\/shop\/products\/MineralistEyeshadowPalette_CloseUp_SUNLIT_HIRES300_COLORPROFILE_sRGB_LORES_8fe443a2-a823-483f-9544-8001a00b98eb.jpg?v=1735215475","width":2000},{"alt":null,"id":22534276350037,"position":6,"preview_image":{"aspect_ratio":1.0,"height":2000,"width":2000,"src":"\/\/www.bareminerals.com\/cdn\/shop\/products\/SHOT_18_BAR185_Mineralist_Eye_Product_Stylized_Palette_with_smears_Sunlit_04_LORES_f3010228-8039-4b3f-acb3-7c531a8b51d3.jpg?v=1735215475"},"aspect_ratio":1.0,"height":2000,"media_type":"image","src":"\/\/www.bareminerals.com\/cdn\/shop\/products\/SHOT_18_BAR185_Mineralist_Eye_Product_Stylized_Palette_with_smears_Sunlit_04_LORES_f3010228-8039-4b3f-acb3-7c531a8b51d3.jpg?v=1735215475","width":2000}],"requires_selling_plan":false,"selling_plan_groups":[],"content":"\u003ch4\u003eWhat it is:\u003c\/h4\u003e\n\u003cp\u003eSummon the sunlight with this talc-free, vegan eyeshadow palette featuring 6 richly pigmented, ultra-blendable sunwarmed bronze and copper shades in a range of finishes.\u003c\/p\u003e\n\u003ch4\u003eWhat it does:\u003c\/h4\u003e\n\u003cul\u003e\n\u003cli\u003e6 warm bronze, copper and golden tones create endless looks\u003c\/li\u003e\n\u003cli\u003e2 velvety mattes and 4 luminous satins\u003c\/li\u003e\n\u003cli\u003eDelivers all-day, crease-proof wear\u003c\/li\u003e\n\u003cli\u003eCreamy textures easily build, blend and layer\u003c\/li\u003e\n\u003cli\u003eCold-pressed botanicals help to nourish and visibly smooth skin\u003c\/li\u003e\n\u003c\/ul\u003e\n\u003ch4\u003eConsumer tested:\u003c\/h4\u003e\n\u003cul\u003e\n\u003cli\u003e94% saw smoother eyelids*\u003c\/li\u003e\n\u003c\/ul\u003e\n\u003ch4\u003eWhy you'll love it:\u003c\/h4\u003e\n\u003cul\u003e\n\u003cli\u003e95% naturally derived ingredients**\u003c\/li\u003e\n\u003cli\u003eEco-friendly, sustainable packaging: fully recyclable, plastic-free — no mirror or magnets\u003c\/li\u003e\n\u003cli\u003eDermatologist-tested\u003c\/li\u003e\n\u003cli\u003eOphthalmologist-tested\u003c\/li\u003e\n\u003cli\u003eAllergy-tested\u003c\/li\u003e\n\u003cli\u003eSuitable for sensitive eyes and contact lens wearers\u003c\/li\u003e\n\u003cli\u003eCruelty-free\u003c\/li\u003e\n\u003cli\u003eVegan\u003c\/li\u003e\n\u003cli\u003eClean — Talc-free + formulated without parabens, formaldehyde, synthetic fragrance, gluten and more\u003c\/li\u003e\n\u003cli\u003eAt bareMinerals, we have restricted over 2,500 ingredients, including the 1,400+ banned in the E.U.\u003c\/li\u003e\n\u003c\/ul\u003e\n\u003ch4\u003eAwards:\u003c\/h4\u003e\n\u003cul\u003e\n\u003cli\u003eGood Housekeeping Beauty Awards - Outstanding Cosmetics (2022)\u003c\/li\u003e\n\u003c\/ul\u003e\n\u003cbr\u003e\n\u003cp\u003e*Based on a consumer study of 33 people. \u003cbr\u003e**Averaged across all MINERALIST Eyeshadows.\u003c\/p\u003e"}
6 richly pigmented, ultra-blendable sunwarmed bronze and copper shades.
Regular price
$33.00
Unit price
/ per
Brow Gel
Filling in your brows with only brow gel will give you a softer look than using a pencil or angled brush and powder. This is great if you have a naturally fuller brows and just want to brush your brows and add a little color, or simply set them in place with a clear gel. It's a less defined look, so it's best for those looking for minimal precision with a slight boost of color. This is also great for anyone with unruly, wiry brows who are looking for a bit of hold. Try the STRENGTH & LENGTH Eyebrow Gel to shape and define brows.
{"id":6938021429333,"title":"STRENGTH \u0026 LENGTH® Eyebrow Gel","handle":"strength-length-eyebrow-gel","description":"\u003ch4\u003e\u003cstrong\u003eFree of: \u003c\/strong\u003e\u003c\/h4\u003e\n\u003cp data-mce-fragment=\"1\"\u003eCruelty Free, Vegan, Paraben Free, Gluten Free, Talc Free, Synthetic Fragrance Free, PEG Free, Tree Nut Free, SLS Free\u003c\/p\u003e\n\u003ch4\u003e\u003cstrong\u003eWhat it is: \u003c\/strong\u003e\u003c\/h4\u003e\n\u003cp class=\"ewa-rteLine\"\u003eA vegan eyebrow gel infused with a plant-based serum that tints, shapes and defines while promoting visibly fuller brows over time.\u003c\/p\u003e\n\u003ch4\u003e\u003cspan style=\"font-size: 0.875rem;\"\u003eWhat it does:\u003c\/span\u003e\u003c\/h4\u003e\n\u003cul data-mce-fragment=\"1\"\u003e\n\u003cli data-mce-fragment=\"1\"\u003e\u003cspan\u003eIntuitively angled applicator combs gel through brows for natural-looking definition and fullness\u003c\/span\u003e\u003c\/li\u003e\n\u003cli data-mce-fragment=\"1\"\u003eHoney, Chestnut and Coffee: Mineral pigments mimic your own brow color for a natural-looking, buildable tint\u003c\/li\u003e\n\u003cli data-mce-fragment=\"1\"\u003eClear: Ideal for day or overnight wear\u003c\/li\u003e\n\u003cli data-mce-fragment=\"1\"\u003eProvides flexible hold with no stiffness or flaking\u003c\/li\u003e\n\u003cli data-mce-fragment=\"1\"\u003eInfused with plant-based serum, powered by Red Clover Flower and peptides, for powerful strengthening benefits\u003c\/li\u003e\n\u003cli data-mce-fragment=\"1\"\u003eProven to strengthen and enhance for visibly fuller brows over time\u003c\/li\u003e\n\u003c\/ul\u003e\n\u003ch4\u003eConsumer tested:\u003c\/h4\u003e\n\u003cul data-mce-fragment=\"1\"\u003e\n\u003cli data-mce-fragment=\"1\"\u003eClinically shown to deliver up to 100% fuller-looking brows in 8 weeks*\u003c\/li\u003e\n\u003cli data-mce-fragment=\"1\"\u003e90% felt brows looked fuller after 8 weeks**\u003cbr\u003e*Based on an 8-week clinical study with 30 people. Results may vary.\u003cbr\u003e**Based on an 8-week consumer perception study with 30 people.\u003c\/li\u003e\n\u003c\/ul\u003e\n\u003ch4\u003eWhy you'll love it:\u003c\/h4\u003e\n\u003cul data-mce-fragment=\"1\"\u003e\n\u003cli data-mce-fragment=\"1\"\u003eTransfer-proof\u003c\/li\u003e\n\u003cli data-mce-fragment=\"1\"\u003eSmudge-proof\u003c\/li\u003e\n\u003cli data-mce-fragment=\"1\"\u003eFlake-proof\u003c\/li\u003e\n\u003cli data-mce-fragment=\"1\"\u003eClump-proof\u003c\/li\u003e\n\u003cli data-mce-fragment=\"1\"\u003eOphthalmologist-tested\u003c\/li\u003e\n\u003cli data-mce-fragment=\"1\"\u003eSafe for contact lens wearers\u003c\/li\u003e\n\u003cli data-mce-fragment=\"1\"\u003eWashes off easily with makeup remover\u003c\/li\u003e\n\u003cli data-mce-fragment=\"1\"\u003eCruelty-free\u003c\/li\u003e\n\u003cli data-mce-fragment=\"1\"\u003eVegan\u003c\/li\u003e\n\u003cli data-mce-fragment=\"1\"\u003eClean —gluten-free + formulated without synthetic fragrance, PEGs and more\u003c\/li\u003e\n\u003c\/ul\u003e","published_at":"2023-07-28T15:47:58-04:00","created_at":"2023-06-28T13:50:02-04:00","vendor":"Bare Minerals","type":"Eyebrow","tags":["All Makeup","Amazon","Brow","Duel","Eye","Full Size Makeup GSK","Full Size Product","HO23Gifts30","Holiday Gifts 30","Makeup","Not Holiday","Ordergroove","Subscription","Valentine's Day"],"price":2300,"price_min":2300,"price_max":2300,"available":true,"price_varies":false,"compare_at_price":0,"compare_at_price_min":0,"compare_at_price_max":0,"compare_at_price_varies":false,"variants":[{"id":40644065787989,"title":"Clear","option1":"Clear","option2":null,"option3":null,"sku":"41705862101","requires_shipping":true,"taxable":true,"featured_image":null,"available":true,"name":"STRENGTH \u0026 LENGTH® Eyebrow Gel - Clear","public_title":"Clear","options":["Clear"],"price":2300,"weight":0,"compare_at_price":null,"inventory_management":"shopify","barcode":"194248095338","requires_selling_plan":false,"selling_plan_allocations":[],"quantity_rule":{"min":1,"max":null,"increment":1}},{"id":40644065820757,"title":"Taupe","option1":"Taupe","option2":null,"option3":null,"sku":"41704741101","requires_shipping":true,"taxable":true,"featured_image":null,"available":true,"name":"STRENGTH \u0026 LENGTH® Eyebrow Gel - Taupe","public_title":"Taupe","options":["Taupe"],"price":2300,"weight":0,"compare_at_price":0,"inventory_management":"shopify","barcode":"194248093938","requires_selling_plan":false,"selling_plan_allocations":[],"quantity_rule":{"min":1,"max":null,"increment":1}},{"id":40644065853525,"title":"Chestnut","option1":"Chestnut","option2":null,"option3":null,"sku":"41705864101","requires_shipping":true,"taxable":true,"featured_image":null,"available":true,"name":"STRENGTH \u0026 LENGTH® Eyebrow Gel - Chestnut","public_title":"Chestnut","options":["Chestnut"],"price":2300,"weight":0,"compare_at_price":0,"inventory_management":"shopify","barcode":"194248095352","requires_selling_plan":false,"selling_plan_allocations":[],"quantity_rule":{"min":1,"max":null,"increment":1}},{"id":40644065886293,"title":"Coffee","option1":"Coffee","option2":null,"option3":null,"sku":"41705865101","requires_shipping":true,"taxable":true,"featured_image":null,"available":true,"name":"STRENGTH \u0026 LENGTH® Eyebrow Gel - Coffee","public_title":"Coffee","options":["Coffee"],"price":2300,"weight":0,"compare_at_price":0,"inventory_management":"shopify","barcode":"194248095369","requires_selling_plan":false,"selling_plan_allocations":[],"quantity_rule":{"min":1,"max":null,"increment":1}}],"images":["\/\/www.bareminerals.com\/cdn\/shop\/files\/BM_SU23_SLBG_Silo_OPEN_2000x2000_R300.jpg?v=1735216164","\/\/www.bareminerals.com\/cdn\/shop\/files\/BM_SU23_SLBG_Clear_TX_0354_2000x2000_R300.jpg?v=1735216164","\/\/www.bareminerals.com\/cdn\/shop\/files\/BM_SU23_SLBG_Taupe_TX_0354_2000x2000_R300.jpg?v=1735216164","\/\/www.bareminerals.com\/cdn\/shop\/files\/BM_SU23_SLBG_Chestnut_TX_0354_2000x2000_R300.jpg?v=1735216164","\/\/www.bareminerals.com\/cdn\/shop\/files\/BM_SU23_SLBG_Coffee_TX_0354_2000x2000_R300.jpg?v=1735216164","\/\/www.bareminerals.com\/cdn\/shop\/files\/BM_SU23_SLBG_Silo_CLOSED_2000x2000_R300.jpg?v=1735216164","\/\/www.bareminerals.com\/cdn\/shop\/files\/BM_SP23_Mineralist_Brow_Pencil_ArmSwatch_ShadeNames_2000X2000_83519cc0-65b2-4a12-a02c-aec471e03d73.jpg?v=1735216164","\/\/www.bareminerals.com\/cdn\/shop\/files\/BM_SP23_MineralistBrow_Model_2000x2000_R300.jpg?v=1735216165"],"featured_image":"\/\/www.bareminerals.com\/cdn\/shop\/files\/BM_SU23_SLBG_Silo_OPEN_2000x2000_R300.jpg?v=1735216164","options":["Color"],"media":[{"alt":"All","id":22897095082069,"position":1,"preview_image":{"aspect_ratio":1.0,"height":2000,"width":2000,"src":"\/\/www.bareminerals.com\/cdn\/shop\/files\/BM_SU23_SLBG_Silo_OPEN_2000x2000_R300.jpg?v=1735216164"},"aspect_ratio":1.0,"height":2000,"media_type":"image","src":"\/\/www.bareminerals.com\/cdn\/shop\/files\/BM_SU23_SLBG_Silo_OPEN_2000x2000_R300.jpg?v=1735216164","width":2000},{"alt":"Clear","id":22897094983765,"position":2,"preview_image":{"aspect_ratio":1.0,"height":2000,"width":2000,"src":"\/\/www.bareminerals.com\/cdn\/shop\/files\/BM_SU23_SLBG_Clear_TX_0354_2000x2000_R300.jpg?v=1735216164"},"aspect_ratio":1.0,"height":2000,"media_type":"image","src":"\/\/www.bareminerals.com\/cdn\/shop\/files\/BM_SU23_SLBG_Clear_TX_0354_2000x2000_R300.jpg?v=1735216164","width":2000},{"alt":"Taupe","id":22897094918229,"position":3,"preview_image":{"aspect_ratio":1.0,"height":2000,"width":2000,"src":"\/\/www.bareminerals.com\/cdn\/shop\/files\/BM_SU23_SLBG_Taupe_TX_0354_2000x2000_R300.jpg?v=1735216164"},"aspect_ratio":1.0,"height":2000,"media_type":"image","src":"\/\/www.bareminerals.com\/cdn\/shop\/files\/BM_SU23_SLBG_Taupe_TX_0354_2000x2000_R300.jpg?v=1735216164","width":2000},{"alt":"Chestnut","id":22897094950997,"position":4,"preview_image":{"aspect_ratio":1.0,"height":2000,"width":2000,"src":"\/\/www.bareminerals.com\/cdn\/shop\/files\/BM_SU23_SLBG_Chestnut_TX_0354_2000x2000_R300.jpg?v=1735216164"},"aspect_ratio":1.0,"height":2000,"media_type":"image","src":"\/\/www.bareminerals.com\/cdn\/shop\/files\/BM_SU23_SLBG_Chestnut_TX_0354_2000x2000_R300.jpg?v=1735216164","width":2000},{"alt":"Coffee","id":22897095016533,"position":5,"preview_image":{"aspect_ratio":1.0,"height":2000,"width":2000,"src":"\/\/www.bareminerals.com\/cdn\/shop\/files\/BM_SU23_SLBG_Coffee_TX_0354_2000x2000_R300.jpg?v=1735216164"},"aspect_ratio":1.0,"height":2000,"media_type":"image","src":"\/\/www.bareminerals.com\/cdn\/shop\/files\/BM_SU23_SLBG_Coffee_TX_0354_2000x2000_R300.jpg?v=1735216164","width":2000},{"alt":"All","id":22897095049301,"position":6,"preview_image":{"aspect_ratio":1.0,"height":2000,"width":2000,"src":"\/\/www.bareminerals.com\/cdn\/shop\/files\/BM_SU23_SLBG_Silo_CLOSED_2000x2000_R300.jpg?v=1735216164"},"aspect_ratio":1.0,"height":2000,"media_type":"image","src":"\/\/www.bareminerals.com\/cdn\/shop\/files\/BM_SU23_SLBG_Silo_CLOSED_2000x2000_R300.jpg?v=1735216164","width":2000},{"alt":"All","id":22897095770197,"position":7,"preview_image":{"aspect_ratio":1.0,"height":2000,"width":2000,"src":"\/\/www.bareminerals.com\/cdn\/shop\/files\/BM_SP23_Mineralist_Brow_Pencil_ArmSwatch_ShadeNames_2000X2000_83519cc0-65b2-4a12-a02c-aec471e03d73.jpg?v=1735216164"},"aspect_ratio":1.0,"height":2000,"media_type":"image","src":"\/\/www.bareminerals.com\/cdn\/shop\/files\/BM_SP23_Mineralist_Brow_Pencil_ArmSwatch_ShadeNames_2000X2000_83519cc0-65b2-4a12-a02c-aec471e03d73.jpg?v=1735216164","width":2000},{"alt":"All","id":22897095802965,"position":8,"preview_image":{"aspect_ratio":1.0,"height":2000,"width":2000,"src":"\/\/www.bareminerals.com\/cdn\/shop\/files\/BM_SP23_MineralistBrow_Model_2000x2000_R300.jpg?v=1735216165"},"aspect_ratio":1.0,"height":2000,"media_type":"image","src":"\/\/www.bareminerals.com\/cdn\/shop\/files\/BM_SP23_MineralistBrow_Model_2000x2000_R300.jpg?v=1735216165","width":2000},{"alt":null,"id":23329224097877,"position":9,"preview_image":{"aspect_ratio":1.0,"height":1080,"width":1080,"src":"\/\/www.bareminerals.com\/cdn\/shop\/files\/preview_images\/5510d2dcd92a45eeb5991be39d7abd88.thumbnail.0000000000.jpg?v=1702063257"},"aspect_ratio":1.0,"duration":26370,"media_type":"video","sources":[{"format":"mp4","height":480,"mime_type":"video\/mp4","url":"\/\/www.bareminerals.com\/cdn\/shop\/videos\/c\/vp\/5510d2dcd92a45eeb5991be39d7abd88\/5510d2dcd92a45eeb5991be39d7abd88.SD-480p-1.5Mbps-21729123.mp4?v=0","width":480},{"format":"mp4","height":1080,"mime_type":"video\/mp4","url":"\/\/www.bareminerals.com\/cdn\/shop\/videos\/c\/vp\/5510d2dcd92a45eeb5991be39d7abd88\/5510d2dcd92a45eeb5991be39d7abd88.HD-1080p-7.2Mbps-21729123.mp4?v=0","width":1080},{"format":"mp4","height":720,"mime_type":"video\/mp4","url":"\/\/www.bareminerals.com\/cdn\/shop\/videos\/c\/vp\/5510d2dcd92a45eeb5991be39d7abd88\/5510d2dcd92a45eeb5991be39d7abd88.HD-720p-4.5Mbps-21729123.mp4?v=0","width":720},{"format":"m3u8","height":1080,"mime_type":"application\/x-mpegURL","url":"\/\/www.bareminerals.com\/cdn\/shop\/videos\/c\/vp\/5510d2dcd92a45eeb5991be39d7abd88\/5510d2dcd92a45eeb5991be39d7abd88.m3u8?v=0","width":1080}]}],"requires_selling_plan":false,"selling_plan_groups":[],"content":"\u003ch4\u003e\u003cstrong\u003eFree of: \u003c\/strong\u003e\u003c\/h4\u003e\n\u003cp data-mce-fragment=\"1\"\u003eCruelty Free, Vegan, Paraben Free, Gluten Free, Talc Free, Synthetic Fragrance Free, PEG Free, Tree Nut Free, SLS Free\u003c\/p\u003e\n\u003ch4\u003e\u003cstrong\u003eWhat it is: \u003c\/strong\u003e\u003c\/h4\u003e\n\u003cp class=\"ewa-rteLine\"\u003eA vegan eyebrow gel infused with a plant-based serum that tints, shapes and defines while promoting visibly fuller brows over time.\u003c\/p\u003e\n\u003ch4\u003e\u003cspan style=\"font-size: 0.875rem;\"\u003eWhat it does:\u003c\/span\u003e\u003c\/h4\u003e\n\u003cul data-mce-fragment=\"1\"\u003e\n\u003cli data-mce-fragment=\"1\"\u003e\u003cspan\u003eIntuitively angled applicator combs gel through brows for natural-looking definition and fullness\u003c\/span\u003e\u003c\/li\u003e\n\u003cli data-mce-fragment=\"1\"\u003eHoney, Chestnut and Coffee: Mineral pigments mimic your own brow color for a natural-looking, buildable tint\u003c\/li\u003e\n\u003cli data-mce-fragment=\"1\"\u003eClear: Ideal for day or overnight wear\u003c\/li\u003e\n\u003cli data-mce-fragment=\"1\"\u003eProvides flexible hold with no stiffness or flaking\u003c\/li\u003e\n\u003cli data-mce-fragment=\"1\"\u003eInfused with plant-based serum, powered by Red Clover Flower and peptides, for powerful strengthening benefits\u003c\/li\u003e\n\u003cli data-mce-fragment=\"1\"\u003eProven to strengthen and enhance for visibly fuller brows over time\u003c\/li\u003e\n\u003c\/ul\u003e\n\u003ch4\u003eConsumer tested:\u003c\/h4\u003e\n\u003cul data-mce-fragment=\"1\"\u003e\n\u003cli data-mce-fragment=\"1\"\u003eClinically shown to deliver up to 100% fuller-looking brows in 8 weeks*\u003c\/li\u003e\n\u003cli data-mce-fragment=\"1\"\u003e90% felt brows looked fuller after 8 weeks**\u003cbr\u003e*Based on an 8-week clinical study with 30 people. Results may vary.\u003cbr\u003e**Based on an 8-week consumer perception study with 30 people.\u003c\/li\u003e\n\u003c\/ul\u003e\n\u003ch4\u003eWhy you'll love it:\u003c\/h4\u003e\n\u003cul data-mce-fragment=\"1\"\u003e\n\u003cli data-mce-fragment=\"1\"\u003eTransfer-proof\u003c\/li\u003e\n\u003cli data-mce-fragment=\"1\"\u003eSmudge-proof\u003c\/li\u003e\n\u003cli data-mce-fragment=\"1\"\u003eFlake-proof\u003c\/li\u003e\n\u003cli data-mce-fragment=\"1\"\u003eClump-proof\u003c\/li\u003e\n\u003cli data-mce-fragment=\"1\"\u003eOphthalmologist-tested\u003c\/li\u003e\n\u003cli data-mce-fragment=\"1\"\u003eSafe for contact lens wearers\u003c\/li\u003e\n\u003cli data-mce-fragment=\"1\"\u003eWashes off easily with makeup remover\u003c\/li\u003e\n\u003cli data-mce-fragment=\"1\"\u003eCruelty-free\u003c\/li\u003e\n\u003cli data-mce-fragment=\"1\"\u003eVegan\u003c\/li\u003e\n\u003cli data-mce-fragment=\"1\"\u003eClean —gluten-free + formulated without synthetic fragrance, PEGs and more\u003c\/li\u003e\n\u003c\/ul\u003e"}{"id":6938021429333,"title":"STRENGTH \u0026 LENGTH® Eyebrow Gel","handle":"strength-length-eyebrow-gel","description":"\u003ch4\u003e\u003cstrong\u003eFree of: \u003c\/strong\u003e\u003c\/h4\u003e\n\u003cp data-mce-fragment=\"1\"\u003eCruelty Free, Vegan, Paraben Free, Gluten Free, Talc Free, Synthetic Fragrance Free, PEG Free, Tree Nut Free, SLS Free\u003c\/p\u003e\n\u003ch4\u003e\u003cstrong\u003eWhat it is: \u003c\/strong\u003e\u003c\/h4\u003e\n\u003cp class=\"ewa-rteLine\"\u003eA vegan eyebrow gel infused with a plant-based serum that tints, shapes and defines while promoting visibly fuller brows over time.\u003c\/p\u003e\n\u003ch4\u003e\u003cspan style=\"font-size: 0.875rem;\"\u003eWhat it does:\u003c\/span\u003e\u003c\/h4\u003e\n\u003cul data-mce-fragment=\"1\"\u003e\n\u003cli data-mce-fragment=\"1\"\u003e\u003cspan\u003eIntuitively angled applicator combs gel through brows for natural-looking definition and fullness\u003c\/span\u003e\u003c\/li\u003e\n\u003cli data-mce-fragment=\"1\"\u003eHoney, Chestnut and Coffee: Mineral pigments mimic your own brow color for a natural-looking, buildable tint\u003c\/li\u003e\n\u003cli data-mce-fragment=\"1\"\u003eClear: Ideal for day or overnight wear\u003c\/li\u003e\n\u003cli data-mce-fragment=\"1\"\u003eProvides flexible hold with no stiffness or flaking\u003c\/li\u003e\n\u003cli data-mce-fragment=\"1\"\u003eInfused with plant-based serum, powered by Red Clover Flower and peptides, for powerful strengthening benefits\u003c\/li\u003e\n\u003cli data-mce-fragment=\"1\"\u003eProven to strengthen and enhance for visibly fuller brows over time\u003c\/li\u003e\n\u003c\/ul\u003e\n\u003ch4\u003eConsumer tested:\u003c\/h4\u003e\n\u003cul data-mce-fragment=\"1\"\u003e\n\u003cli data-mce-fragment=\"1\"\u003eClinically shown to deliver up to 100% fuller-looking brows in 8 weeks*\u003c\/li\u003e\n\u003cli data-mce-fragment=\"1\"\u003e90% felt brows looked fuller after 8 weeks**\u003cbr\u003e*Based on an 8-week clinical study with 30 people. Results may vary.\u003cbr\u003e**Based on an 8-week consumer perception study with 30 people.\u003c\/li\u003e\n\u003c\/ul\u003e\n\u003ch4\u003eWhy you'll love it:\u003c\/h4\u003e\n\u003cul data-mce-fragment=\"1\"\u003e\n\u003cli data-mce-fragment=\"1\"\u003eTransfer-proof\u003c\/li\u003e\n\u003cli data-mce-fragment=\"1\"\u003eSmudge-proof\u003c\/li\u003e\n\u003cli data-mce-fragment=\"1\"\u003eFlake-proof\u003c\/li\u003e\n\u003cli data-mce-fragment=\"1\"\u003eClump-proof\u003c\/li\u003e\n\u003cli data-mce-fragment=\"1\"\u003eOphthalmologist-tested\u003c\/li\u003e\n\u003cli data-mce-fragment=\"1\"\u003eSafe for contact lens wearers\u003c\/li\u003e\n\u003cli data-mce-fragment=\"1\"\u003eWashes off easily with makeup remover\u003c\/li\u003e\n\u003cli data-mce-fragment=\"1\"\u003eCruelty-free\u003c\/li\u003e\n\u003cli data-mce-fragment=\"1\"\u003eVegan\u003c\/li\u003e\n\u003cli data-mce-fragment=\"1\"\u003eClean —gluten-free + formulated without synthetic fragrance, PEGs and more\u003c\/li\u003e\n\u003c\/ul\u003e","published_at":"2023-07-28T15:47:58-04:00","created_at":"2023-06-28T13:50:02-04:00","vendor":"Bare Minerals","type":"Eyebrow","tags":["All Makeup","Amazon","Brow","Duel","Eye","Full Size Makeup GSK","Full Size Product","HO23Gifts30","Holiday Gifts 30","Makeup","Not Holiday","Ordergroove","Subscription","Valentine's Day"],"price":2300,"price_min":2300,"price_max":2300,"available":true,"price_varies":false,"compare_at_price":0,"compare_at_price_min":0,"compare_at_price_max":0,"compare_at_price_varies":false,"variants":[{"id":40644065787989,"title":"Clear","option1":"Clear","option2":null,"option3":null,"sku":"41705862101","requires_shipping":true,"taxable":true,"featured_image":null,"available":true,"name":"STRENGTH \u0026 LENGTH® Eyebrow Gel - Clear","public_title":"Clear","options":["Clear"],"price":2300,"weight":0,"compare_at_price":null,"inventory_management":"shopify","barcode":"194248095338","requires_selling_plan":false,"selling_plan_allocations":[],"quantity_rule":{"min":1,"max":null,"increment":1}},{"id":40644065820757,"title":"Taupe","option1":"Taupe","option2":null,"option3":null,"sku":"41704741101","requires_shipping":true,"taxable":true,"featured_image":null,"available":true,"name":"STRENGTH \u0026 LENGTH® Eyebrow Gel - Taupe","public_title":"Taupe","options":["Taupe"],"price":2300,"weight":0,"compare_at_price":0,"inventory_management":"shopify","barcode":"194248093938","requires_selling_plan":false,"selling_plan_allocations":[],"quantity_rule":{"min":1,"max":null,"increment":1}},{"id":40644065853525,"title":"Chestnut","option1":"Chestnut","option2":null,"option3":null,"sku":"41705864101","requires_shipping":true,"taxable":true,"featured_image":null,"available":true,"name":"STRENGTH \u0026 LENGTH® Eyebrow Gel - Chestnut","public_title":"Chestnut","options":["Chestnut"],"price":2300,"weight":0,"compare_at_price":0,"inventory_management":"shopify","barcode":"194248095352","requires_selling_plan":false,"selling_plan_allocations":[],"quantity_rule":{"min":1,"max":null,"increment":1}},{"id":40644065886293,"title":"Coffee","option1":"Coffee","option2":null,"option3":null,"sku":"41705865101","requires_shipping":true,"taxable":true,"featured_image":null,"available":true,"name":"STRENGTH \u0026 LENGTH® Eyebrow Gel - Coffee","public_title":"Coffee","options":["Coffee"],"price":2300,"weight":0,"compare_at_price":0,"inventory_management":"shopify","barcode":"194248095369","requires_selling_plan":false,"selling_plan_allocations":[],"quantity_rule":{"min":1,"max":null,"increment":1}}],"images":["\/\/www.bareminerals.com\/cdn\/shop\/files\/BM_SU23_SLBG_Silo_OPEN_2000x2000_R300.jpg?v=1735216164","\/\/www.bareminerals.com\/cdn\/shop\/files\/BM_SU23_SLBG_Clear_TX_0354_2000x2000_R300.jpg?v=1735216164","\/\/www.bareminerals.com\/cdn\/shop\/files\/BM_SU23_SLBG_Taupe_TX_0354_2000x2000_R300.jpg?v=1735216164","\/\/www.bareminerals.com\/cdn\/shop\/files\/BM_SU23_SLBG_Chestnut_TX_0354_2000x2000_R300.jpg?v=1735216164","\/\/www.bareminerals.com\/cdn\/shop\/files\/BM_SU23_SLBG_Coffee_TX_0354_2000x2000_R300.jpg?v=1735216164","\/\/www.bareminerals.com\/cdn\/shop\/files\/BM_SU23_SLBG_Silo_CLOSED_2000x2000_R300.jpg?v=1735216164","\/\/www.bareminerals.com\/cdn\/shop\/files\/BM_SP23_Mineralist_Brow_Pencil_ArmSwatch_ShadeNames_2000X2000_83519cc0-65b2-4a12-a02c-aec471e03d73.jpg?v=1735216164","\/\/www.bareminerals.com\/cdn\/shop\/files\/BM_SP23_MineralistBrow_Model_2000x2000_R300.jpg?v=1735216165"],"featured_image":"\/\/www.bareminerals.com\/cdn\/shop\/files\/BM_SU23_SLBG_Silo_OPEN_2000x2000_R300.jpg?v=1735216164","options":["Color"],"media":[{"alt":"All","id":22897095082069,"position":1,"preview_image":{"aspect_ratio":1.0,"height":2000,"width":2000,"src":"\/\/www.bareminerals.com\/cdn\/shop\/files\/BM_SU23_SLBG_Silo_OPEN_2000x2000_R300.jpg?v=1735216164"},"aspect_ratio":1.0,"height":2000,"media_type":"image","src":"\/\/www.bareminerals.com\/cdn\/shop\/files\/BM_SU23_SLBG_Silo_OPEN_2000x2000_R300.jpg?v=1735216164","width":2000},{"alt":"Clear","id":22897094983765,"position":2,"preview_image":{"aspect_ratio":1.0,"height":2000,"width":2000,"src":"\/\/www.bareminerals.com\/cdn\/shop\/files\/BM_SU23_SLBG_Clear_TX_0354_2000x2000_R300.jpg?v=1735216164"},"aspect_ratio":1.0,"height":2000,"media_type":"image","src":"\/\/www.bareminerals.com\/cdn\/shop\/files\/BM_SU23_SLBG_Clear_TX_0354_2000x2000_R300.jpg?v=1735216164","width":2000},{"alt":"Taupe","id":22897094918229,"position":3,"preview_image":{"aspect_ratio":1.0,"height":2000,"width":2000,"src":"\/\/www.bareminerals.com\/cdn\/shop\/files\/BM_SU23_SLBG_Taupe_TX_0354_2000x2000_R300.jpg?v=1735216164"},"aspect_ratio":1.0,"height":2000,"media_type":"image","src":"\/\/www.bareminerals.com\/cdn\/shop\/files\/BM_SU23_SLBG_Taupe_TX_0354_2000x2000_R300.jpg?v=1735216164","width":2000},{"alt":"Chestnut","id":22897094950997,"position":4,"preview_image":{"aspect_ratio":1.0,"height":2000,"width":2000,"src":"\/\/www.bareminerals.com\/cdn\/shop\/files\/BM_SU23_SLBG_Chestnut_TX_0354_2000x2000_R300.jpg?v=1735216164"},"aspect_ratio":1.0,"height":2000,"media_type":"image","src":"\/\/www.bareminerals.com\/cdn\/shop\/files\/BM_SU23_SLBG_Chestnut_TX_0354_2000x2000_R300.jpg?v=1735216164","width":2000},{"alt":"Coffee","id":22897095016533,"position":5,"preview_image":{"aspect_ratio":1.0,"height":2000,"width":2000,"src":"\/\/www.bareminerals.com\/cdn\/shop\/files\/BM_SU23_SLBG_Coffee_TX_0354_2000x2000_R300.jpg?v=1735216164"},"aspect_ratio":1.0,"height":2000,"media_type":"image","src":"\/\/www.bareminerals.com\/cdn\/shop\/files\/BM_SU23_SLBG_Coffee_TX_0354_2000x2000_R300.jpg?v=1735216164","width":2000},{"alt":"All","id":22897095049301,"position":6,"preview_image":{"aspect_ratio":1.0,"height":2000,"width":2000,"src":"\/\/www.bareminerals.com\/cdn\/shop\/files\/BM_SU23_SLBG_Silo_CLOSED_2000x2000_R300.jpg?v=1735216164"},"aspect_ratio":1.0,"height":2000,"media_type":"image","src":"\/\/www.bareminerals.com\/cdn\/shop\/files\/BM_SU23_SLBG_Silo_CLOSED_2000x2000_R300.jpg?v=1735216164","width":2000},{"alt":"All","id":22897095770197,"position":7,"preview_image":{"aspect_ratio":1.0,"height":2000,"width":2000,"src":"\/\/www.bareminerals.com\/cdn\/shop\/files\/BM_SP23_Mineralist_Brow_Pencil_ArmSwatch_ShadeNames_2000X2000_83519cc0-65b2-4a12-a02c-aec471e03d73.jpg?v=1735216164"},"aspect_ratio":1.0,"height":2000,"media_type":"image","src":"\/\/www.bareminerals.com\/cdn\/shop\/files\/BM_SP23_Mineralist_Brow_Pencil_ArmSwatch_ShadeNames_2000X2000_83519cc0-65b2-4a12-a02c-aec471e03d73.jpg?v=1735216164","width":2000},{"alt":"All","id":22897095802965,"position":8,"preview_image":{"aspect_ratio":1.0,"height":2000,"width":2000,"src":"\/\/www.bareminerals.com\/cdn\/shop\/files\/BM_SP23_MineralistBrow_Model_2000x2000_R300.jpg?v=1735216165"},"aspect_ratio":1.0,"height":2000,"media_type":"image","src":"\/\/www.bareminerals.com\/cdn\/shop\/files\/BM_SP23_MineralistBrow_Model_2000x2000_R300.jpg?v=1735216165","width":2000},{"alt":null,"id":23329224097877,"position":9,"preview_image":{"aspect_ratio":1.0,"height":1080,"width":1080,"src":"\/\/www.bareminerals.com\/cdn\/shop\/files\/preview_images\/5510d2dcd92a45eeb5991be39d7abd88.thumbnail.0000000000.jpg?v=1702063257"},"aspect_ratio":1.0,"duration":26370,"media_type":"video","sources":[{"format":"mp4","height":480,"mime_type":"video\/mp4","url":"\/\/www.bareminerals.com\/cdn\/shop\/videos\/c\/vp\/5510d2dcd92a45eeb5991be39d7abd88\/5510d2dcd92a45eeb5991be39d7abd88.SD-480p-1.5Mbps-21729123.mp4?v=0","width":480},{"format":"mp4","height":1080,"mime_type":"video\/mp4","url":"\/\/www.bareminerals.com\/cdn\/shop\/videos\/c\/vp\/5510d2dcd92a45eeb5991be39d7abd88\/5510d2dcd92a45eeb5991be39d7abd88.HD-1080p-7.2Mbps-21729123.mp4?v=0","width":1080},{"format":"mp4","height":720,"mime_type":"video\/mp4","url":"\/\/www.bareminerals.com\/cdn\/shop\/videos\/c\/vp\/5510d2dcd92a45eeb5991be39d7abd88\/5510d2dcd92a45eeb5991be39d7abd88.HD-720p-4.5Mbps-21729123.mp4?v=0","width":720},{"format":"m3u8","height":1080,"mime_type":"application\/x-mpegURL","url":"\/\/www.bareminerals.com\/cdn\/shop\/videos\/c\/vp\/5510d2dcd92a45eeb5991be39d7abd88\/5510d2dcd92a45eeb5991be39d7abd88.m3u8?v=0","width":1080}]}],"requires_selling_plan":false,"selling_plan_groups":[],"content":"\u003ch4\u003e\u003cstrong\u003eFree of: \u003c\/strong\u003e\u003c\/h4\u003e\n\u003cp data-mce-fragment=\"1\"\u003eCruelty Free, Vegan, Paraben Free, Gluten Free, Talc Free, Synthetic Fragrance Free, PEG Free, Tree Nut Free, SLS Free\u003c\/p\u003e\n\u003ch4\u003e\u003cstrong\u003eWhat it is: \u003c\/strong\u003e\u003c\/h4\u003e\n\u003cp class=\"ewa-rteLine\"\u003eA vegan eyebrow gel infused with a plant-based serum that tints, shapes and defines while promoting visibly fuller brows over time.\u003c\/p\u003e\n\u003ch4\u003e\u003cspan style=\"font-size: 0.875rem;\"\u003eWhat it does:\u003c\/span\u003e\u003c\/h4\u003e\n\u003cul data-mce-fragment=\"1\"\u003e\n\u003cli data-mce-fragment=\"1\"\u003e\u003cspan\u003eIntuitively angled applicator combs gel through brows for natural-looking definition and fullness\u003c\/span\u003e\u003c\/li\u003e\n\u003cli data-mce-fragment=\"1\"\u003eHoney, Chestnut and Coffee: Mineral pigments mimic your own brow color for a natural-looking, buildable tint\u003c\/li\u003e\n\u003cli data-mce-fragment=\"1\"\u003eClear: Ideal for day or overnight wear\u003c\/li\u003e\n\u003cli data-mce-fragment=\"1\"\u003eProvides flexible hold with no stiffness or flaking\u003c\/li\u003e\n\u003cli data-mce-fragment=\"1\"\u003eInfused with plant-based serum, powered by Red Clover Flower and peptides, for powerful strengthening benefits\u003c\/li\u003e\n\u003cli data-mce-fragment=\"1\"\u003eProven to strengthen and enhance for visibly fuller brows over time\u003c\/li\u003e\n\u003c\/ul\u003e\n\u003ch4\u003eConsumer tested:\u003c\/h4\u003e\n\u003cul data-mce-fragment=\"1\"\u003e\n\u003cli data-mce-fragment=\"1\"\u003eClinically shown to deliver up to 100% fuller-looking brows in 8 weeks*\u003c\/li\u003e\n\u003cli data-mce-fragment=\"1\"\u003e90% felt brows looked fuller after 8 weeks**\u003cbr\u003e*Based on an 8-week clinical study with 30 people. Results may vary.\u003cbr\u003e**Based on an 8-week consumer perception study with 30 people.\u003c\/li\u003e\n\u003c\/ul\u003e\n\u003ch4\u003eWhy you'll love it:\u003c\/h4\u003e\n\u003cul data-mce-fragment=\"1\"\u003e\n\u003cli data-mce-fragment=\"1\"\u003eTransfer-proof\u003c\/li\u003e\n\u003cli data-mce-fragment=\"1\"\u003eSmudge-proof\u003c\/li\u003e\n\u003cli data-mce-fragment=\"1\"\u003eFlake-proof\u003c\/li\u003e\n\u003cli data-mce-fragment=\"1\"\u003eClump-proof\u003c\/li\u003e\n\u003cli data-mce-fragment=\"1\"\u003eOphthalmologist-tested\u003c\/li\u003e\n\u003cli data-mce-fragment=\"1\"\u003eSafe for contact lens wearers\u003c\/li\u003e\n\u003cli data-mce-fragment=\"1\"\u003eWashes off easily with makeup remover\u003c\/li\u003e\n\u003cli data-mce-fragment=\"1\"\u003eCruelty-free\u003c\/li\u003e\n\u003cli data-mce-fragment=\"1\"\u003eVegan\u003c\/li\u003e\n\u003cli data-mce-fragment=\"1\"\u003eClean —gluten-free + formulated without synthetic fragrance, PEGs and more\u003c\/li\u003e\n\u003c\/ul\u003e"}
Brow gel that tints, shapes and defines, promoting visibly fuller brows over time.
Regular price
$23.00
Unit price
/ per
Start at the Arch
Before starting, brush your hairs upward and outward to see the natural shape of your hair growth. When filling in your brows, I recommend starting at the arch of the brow first, as the front, inside part of the brow is naturally fuller. If you begin at the inner part of your eye, there's more of a chance of overfilling your brows. Only once you've filled in from the arch to the tail should you go back and fill the inner brows, as needed.
Move in Short, Upward Strokes
Whether you're using a liner, powder or gel, apply using short, upward strokes that follow the natural pattern of hair growth. By using short strokes instead of a strong line or filling in like a marker, it will look like your hair grew on its own, creating a more natural look.
Take a Step Back
When working on your brows, you'll want to get really close to your mirror. However, if you're too close up, you're not seeing the full picture, which can lead to over-filling. It's really important to take a step back (literally) and look at both brows, to ensure the shapes of your 2 brows are complementary. I suggest moving back after filling your first brow and looking into a mirror to recognize the shape and placement, then work on the second brow so it matches. In fact, it's actually best to step back a few times as you go to ensure you're looking at both brows together as much as possible.
Highlight Under the Brow Bone
Highlighting under the eyebrow on the brow bone helps create shape, lift and helps to define the eye area, without distracting attention from your gorgeous brows. The stronger you highlight in the arch the more you will see the shape and angle. You can do this with a matte shadow, soft shimmer shadow, or even bronzer, which will add depth if your brow bone is very prominent. As a rule, you want to pick a color that will blend naturally with your skin, so it doesn't pull focus from the rest of your look. You can also add a bit of highlight to your inner corner as well to open up your eyes.
How to Get Fuller Brows
If you're looking for healthier, fuller brows over time, I recommend the STRENGTH & LENGTH Eyebrow Gel, as it's formulated with a Red Clover Peptide Serum, which provides powerful strengthening benefits. Try wearing the clear brow gel at night to let your brows reap those benefits while you sleep. You can also throw it on while at the gym or on a low-maintenance makeup day.
When to Do Brows in Your Makeup Routine
It's perfectly fine to work on your brows wherever you're most comfortable in your routine. I prefer to do complexion first, then brows, to help create a frame for the rest of my look. I will revisit the brows towards the end of my routine to make sure they look balanced. For example, you could do your pencil in the beginning of your routine, and then any additional filling at the end of your look, followed by gel at the end to set them into place.